You close the trunk and the gap sits wider on one side than the other. Maybe a corner rides high, or the whole lid pushes back toward the bumper. Learning how to align a trunk lid comes down to understanding three adjustment points and knowing which one controls the problem you actually have. Most misalignment traces back to the hinges, the latch striker, or the rubber stops, and each one moves the trunk lid in a different direction.
Before you touch a bolt, confirm the lid itself is the problem. Sometimes the panel is fine and a taillight or filler panel is what looks off. Chasing the wrong part is the fastest way to turn a small annoyance into a bigger one.
How Do You Adjust a Trunk Lid That Sits Crooked?
Start by opening the trunk and finding where the hinges bolt to the lid and to the body. These bolts run through slotted holes, and that slot is the built-in adjustment range. The whole job is loosening the right bolts, nudging the lid, and snugging them back down.
Work in this order:
- Open the trunk fully and support it so it cannot drop on you.
- Locate the hinge bolts on each side, usually two per hinge.
- Loosen the bolts on one side just enough that the lid moves with firm hand pressure. Do not remove them.
- Shift the lid the small amount you need, then hand-tighten to hold the position.
- Close the lid gently and check the gaps against the quarter panels.
- Repeat until both gaps look even, then torque the bolts down.
Move one side and one direction at a time. Loosening everything at once removes your reference point and usually makes alignment harder to dial in. A helper makes this far easier, since one person holds the panel while the other tightens.
Tip: Mark the original bolt position with a paint pen or masking tape before you loosen anything. If an adjustment goes wrong, you can return to the starting point instead of guessing.
Fixing Side-to-Side Gaps
Uneven side gaps mean the lid needs to slide left or right. There is a small amount of play where the hinges attach, and that play is what you use. Loosen the hinge bolts, push the lid toward the tight side until the gaps match, then retighten.
If the gaps look even while you hold the lid almost closed but shift the moment it latches, the hinges are not your problem. The latch is pulling the lid sideways as it seats. In that case you adjust the latch striker or receiver instead of the hinges.
Raising or Lowering the Lid Height
Height problems show up as a corner or edge that sits higher than the surrounding sheet metal or sinks below it. Two methods handle this.
For a lid that sits too high or too low across the front edge near the rear glass, loosen only the forward-most bolt on each hinge and lift or drop the front lip, then retighten. This raises the front without disturbing the front-to-back spacing you already set.
For older vehicles with generous adjustment, a thin shim between the hinge and the lid changes the angle. A shim on the rear bolt lowers the lid at the back; a shim on the front bolt raises it. Body shops have used this trick for decades to pull a stubborn corner into line with the quarters. Start with a 1/16 inch shim and adjust thickness from there, since a little goes a long way.
Warning: Do not close the lid onto a wood block to force a corner into place unless the panel is already in bodywork and due for paint. That method bends the lid and can leave it no longer flat across its surface. It is a collision-shop technique, not a driveway fix.
Why Won’t My Trunk Sit Flush After Latching?
When the panel lines up open but drops or shifts once it clicks shut, the striker is doing the work. The striker is the metal loop or plate the lid grabs onto, and it usually mounts with two bolts through slotted holes. A worn or damaged one shows its own bad trunk latch symptoms, so rule that out before you keep adjusting.
Adjust it like this:
- Mark the striker’s current position so you have a baseline.
- Loosen the two striker bolts.
- Move the striker up to pull the lid down tighter, or side to side to center the lid as it closes.
- Snug the bolts, close the trunk, and check the result.
- Fine-tune and torque once it seats correctly.
Move the striker in small increments. Push it too far in and the lid gets hard to close and pops open too easily. On many vehicles the striker controls both final height and side-to-side seating, so it is often the last piece that makes everything line up.
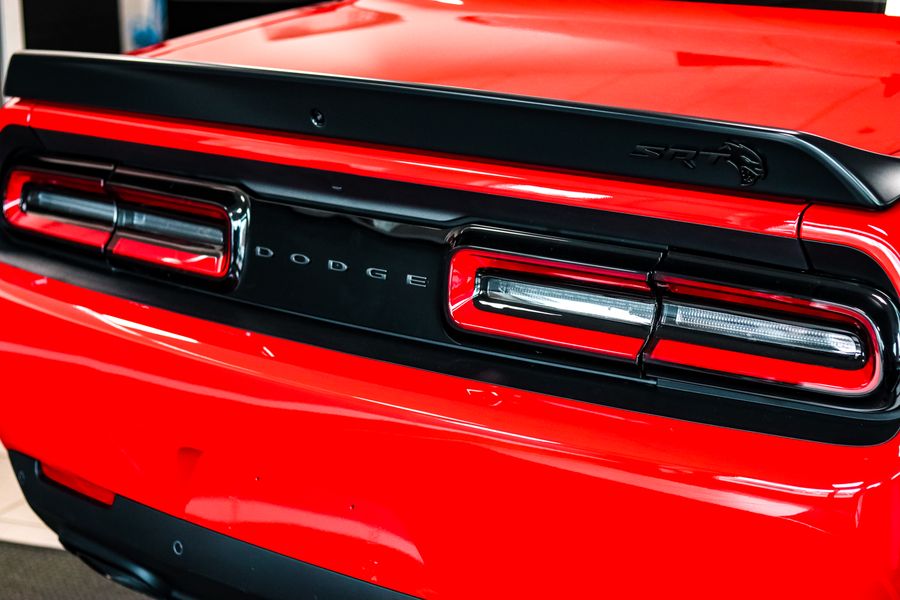
The Rubber Stops Most People Forget
Small rubber bumpers, sometimes called overslam bumpers or pucks, sit at the corners where the lid meets the body. They set how far the lid drops when closed. If one corner rides high and the hinges and striker check out, these stops are the likely cause.
Many thread in and out like a screw. Backing one out raises that corner; screwing it in lets the corner sit lower. Turn them a little at a time and close the lid to check. Adjusting the pucks and their landing zones is a quick way to level a corner that the hinges cannot reach on their own.
What to Check Before You Adjust Anything
A few checks save you from adjusting a panel that was never the issue:
- Weatherstrip condition. A too-thick aftermarket weatherstrip seal props the lid up and prevents it from sitting flush, while a flat or thin seal lets light and water through. Rule the seal in or out before chasing the panel.
- Taillight alignment. On late-model cars, the lid can be straight while a tail light sits low and makes the whole corner look wrong. Compare the lid to the body lines, not just to the light.
- Trunk struts. Worn lift supports let the lid sag and slam. It pays to replace them in pairs, since a weak one means its partner is not far behind.
- Hidden damage. If no adjustment holds, a bent hinge or prior collision repair may be the real problem. Panels that will not line up despite full adjustment often point to frame or panel damage.
Tip: Always disconnect the trunk struts before sliding the lid at the hinges. The struts fight your adjustment and can spring the lid unexpectedly, which is why this is safer as a two-person job.
When to Stop Adjusting and Buy the Part
Some situations are not adjustment problems at all.
Skip the hinge fiddling if the panel lines up open and only shifts when latched. That is a striker job, and forcing the hinges will undo good alignment you already have.
Buy carefully when shopping for a replacement lid, as some panels come out of the mold slightly off. If you are replacing a rusted or damaged lid, weigh repair against replacement and confirm the return policy before you install and paint it.
Do not shim panels that were never meant to move, like fixed quarter extensions. Forcing an adjustment point that does not exist leaves an odd gap and looks worse than the original problem.
Replace worn hardware instead of fighting it. A stretched or corroded striker, sagging lift supports, or a failing trunk lock actuator will keep the lid from seating no matter how you adjust the good parts around them.

Getting the Fitment Right
Trunk and body hardware is vehicle-specific, so fitment matters as much as the part itself. Before ordering, confirm the year, make, and model, and note whether your car uses a manual latch, a power pull-down, or an electronic release, since strikers and actuators differ across those systems. Lift supports list an extended length and force rating, and matching those to the originals keeps the lid from sagging or slamming.
When it is time to replace what adjustment cannot fix, CarParts.com carries the pieces this job depends on, from trunk lids and strikers to weatherstrip seals and tail lights. You get guaranteed fitment for your exact vehicle, low prices backed by a price-match guarantee, and fast shipping from a warehouse near you, so you can finish the alignment right the first time.
Keep Reading: Related Posts



Any information provided on this Website is for informational purposes only and is not intended to replace consultation with a professional mechanic. The accuracy and timeliness of the information may change from the time of publication.