
Having tools and equipment is essential in keeping your vehicle maintained and in tip-top shape. However, these tools also need maintenance, and neglecting their upkeep can affect their effectiveness. For example, rust can build up in metal tools, making them stiff and hard to handle.
There’s nothing more frustrating than an easy car repair job made difficult by a rusty or faulty tool. Fortunately, keeping garage tools in great condition is easy.
Ways to Clean Garage Tools
How to clean a tool typically depends on its state, size, use, and material. For example, while metal tools typically don’t need much maintenance beyond greasing their joints and wiping them clean, it’s a different story once they start getting rusty.
How to Clean Large Rusty Tools
To clean rusty tools, you’ll need the following items:
- Compressed air
- Rust remover
- Wire wheel/Cup brush
- Sanding disc
- Penetrating oil
Once you have these things on hand, follow the steps below:
- Step 1: Disassemble the tool to isolate the corroded part(s). You can take photos to make it easier to put the tool back together. Note that some bolts need to be soaked in penetrating oil for days before disassembling.
- Step 2: Clean inner parts using compressed air to remove dust and other dirt/debris.
- Step 3: Use rust remover to clean the smaller corroded parts. For the larger areas, use a wire wheel or a cup brush on a variable-speed drill.
- Step 4: Use a sanding disc with 220-grit sandpaper and penetrating oil for a smooth and rust-free finish.
- Step 5: Reassemble the parts and test if the tool you cleaned still works properly.
How to Clean Rusty Hand Tools
Because they’re smaller, hand tools are a bit trickier to clean. Their steel parts are prone to corrosion, and the wooden parts sometimes rot and fall off.
Here’s what you’ll need to restore your rusty handy tools:
- White vinegar/rust remover
- Zip-lock bag
- WD40
- Bucket
- Steel wool
- Disc sander
Follow these steps to get started:
- Step 1: Clamp the tool in a vise and remove the wooden handle (if it has one) by cutting it off and knocking off the remaining bit using a hammer.
- Step 2: Soak the tool in white vinegar for at least four hours to dissolve the rust. You can also use rust removers for better results.
- Step 3: If the tool is stuck together (like pliers or wire cutters), put it inside a zip-lock bag filled with WD40. Check every day to see if the tool works, and spray more lubricant if necessary.
- Step 4: Use steel wool to buff the tool and finish removing the rust. Buffing it would also leave it shiny and smooth.
- Step 5: Rinse the tool in clean water to remove the white vinegar or the rust remover.
- Step 6: Use a disc sander with a 100-grit sander to smoothen the tool.
- Step 7: If you’re working on a tool with joints, soak it in WD40 for proper lubrication.
- Step 8: Install the new handle if you removed the old one.
- Step 9: Spray the tool with WD40 again to prevent rust in the future. Make it a habit to prolong your tool’s lifespan.
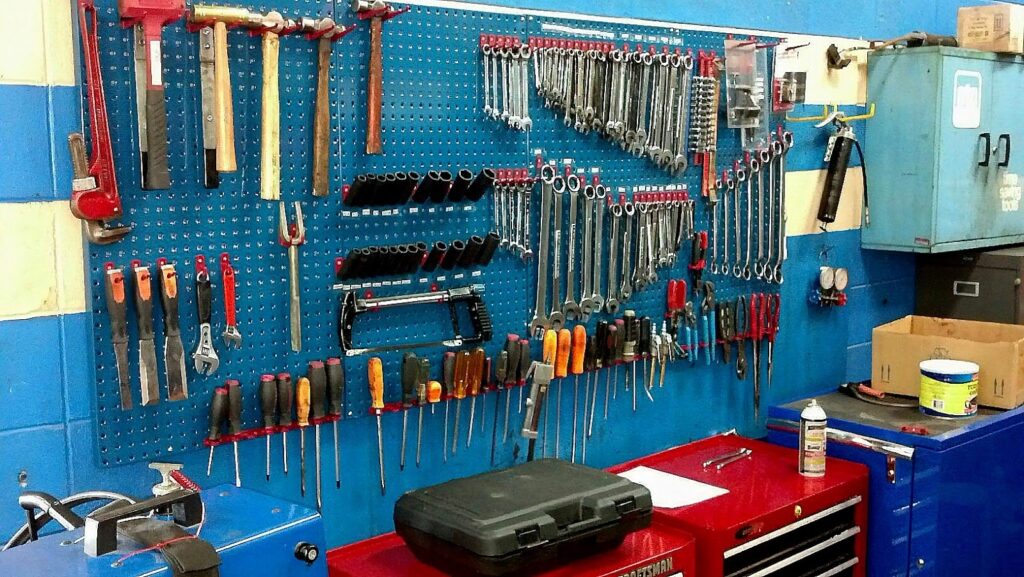
How to Organize Your Garage Tools

Start by cleaning your garage and taking inventory of everything. Then, consider installing a workbench, taking advantage of vertical spaces, and using other tools to properly put away your garage items.
Clean Your Garage
Cleaning your garage ensures a neat workspace with no clutter to distract you from work. Sweep the floor, dust the workbench, and disinfect the entire area. Finally, vacuum and mop the floor.
It’s also a good idea to keep cleaning tools around to make it easier to clean up any mess in your workstation.
Take Inventory of Everything
Taking inventory of everything means keeping tabs on every tool you own. Make a list or take pictures of your tools. Having an up-to-date inventory guide will make it easier to plan how and where you want everything stored.
It also ensures you don’t misplace or forget a tool or two after you use them. Keep a written sheet of all the tools you own and where you placed them to keep an organized inventory of garage items.
Install a Workbench
A workbench supports an application that uses large tools. Without it, you’ll find yourself working on different areas in the garage for mundane tasks. This could result in messes everywhere, leaving the garage in disarray.
The workbench itself is not an organizational tool. Rather, it helps you become more organized by giving you a place to work on your craft. To maximize its use, ensure the workbench is neat and decluttered after every use.
Take Advantage of Vertical Spaces
Take advantage of the walls and the ceiling to make more room for items. If your car doesn’t need much overhead clearance, consider adding screw hooks to the ceiling joists. They’ll give you a place to hang some tools.
The same principle applies to the walls. Use racks to hang tools or install cabinets and drawers to organize other items.
Use Racks
As mentioned, you need to take advantage of the garage wall and vertical space. Installing racks lets you hang bicycles, tools, garden equipment, and other items that take up space but can’t fit in storage boxes.
Racks also mean you can decorate your garage a bit, no matter how minuscule the design is. It gives the space a sense of identity while keeping clutters to a minimum.
Use Magnets
Another clever way to maximize vertical spaces is to use magnets to hang screwdrivers, pliers, and other metal items. Of course, ensure the magnets aren’t placed near your vehicle to avoid potentially damaging your car.
Use a Rolling Tool Box
Tool boxes have compartments and drawers that let you place multiple tools without worrying about clutters. The downside is that they can get heavy, making it hard to carry them around your workspace. To solve that hassle, consider getting a tool box with wheels.
Use Bins
Consider getting a bin if you want more places to store tools and equipment. Bins let you store items that are too big for tool boxes but are too small for racks. You can also label bins to make it easier to organize certain items.
Get These Storage Must-Haves for Your Tools
Remember: cleaning your tools is just the first step. You also have to store them properly to keep them in good condition. With a tool box and other storage essentials, you can keep your tools safe from dust and other debris. You’re also less likely to lose your expensive tools if you have a proper place to store them. Don’t hesitate to buy a tool box and a storage cabinet shelf from CarParts.com.
Browse through a wide selection of tool boxes, storage cabinet shelves, and other organizers at CarParts.com. You can use our filters to set your preferences, including your budget, brand of choice, and even special offers. If you need any help with your order, our customer support staff are ready to answer your call. They’re available round-the-clock for all your shopping needs.
Don’t wait until you accidentally lose a tool before storing them properly. Check out our catalog of storage cabinet shelves, tool boxes, and other organization essentials at CarParts.com and order today!
Keep Reading: Related Posts


Any information provided on this Website is for informational purposes only and is not intended to replace consultation with a professional mechanic. The accuracy and timeliness of the information may change from the time of publication.


