
Getting scratches out of your car bumper can be costly if you get it done at an auto body shop. But if the scratches aren’t too bad, you can opt to fix this issue on your own. Keep in mind, however, that you’ll need to follow the right process to get good results.
Light scratches can usually be treated with car scratch remover kits. However, deep scratches and scuffs that go past the clear coat are better addressed with a more extensive procedure that will restore not only the color, but also the contour.
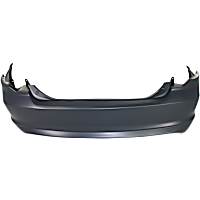
Bumper Scratch Removal
This guide will focus mainly on how to fix scratches on painted plastic bumpers, as that is the most common material used nowadays.
The exact fix will depend on the severity of the scratches, so assess the level of damage you have before you proceed.

How to Remove Faint Scratches
Faint scratches usually occur from something as minor as an object accidentally grazing the surface of your bumper. You can tell that it’s a faint scratch if it’s still smooth enough to glide your nail across without getting caught in the grooves.
Pro Tips are nuggets of information direct from ASE-certified automobile technicians working with CarParts.com, which may include unique, personal insights based on their years of experience working in the automotive industry. These can help you make more informed decisions about your car.
Pro Tip: Some people will use waterproof 3,000 grit sandpaper with water trickling across the area as they sand it and then follow up with some polishing compound, but be gentle and don’t over-sand. If your scratch isn’t handled using the gentle first-shot method, you can up your game by using the one of the methods below, depending on how deep the scratch turns out to be. But sand across the scratch and not with it for the proper effect.
Materials:
- Portable or dual action drill
- Polishing/buffing pads
- 3000-grit sandpaper
- Microfiber cloth
- Polishing compound
- Rubbing compound
1. Buff out the scratch with sandpaper
Wet your 3,000-grit sandpaper and gently sand the scratch out. Do this until the scratch is no longer visible.
Alternatively, you can use toothpaste to buff out this type of scratch. It works just like a 3,000-grit sandpaper, but polishes the affected surface as well.
2. Wipe the surface with a microfiber cloth
Buff the area with a microfiber cloth to remove any residue or debris.
3. Apply the polishing compound
Apply compound using the polishing pad and smear it all over the affected area.
4. Polish
With the polisher head of the drill at 1,200 rpm, polish the surface until slightly hazy. Finish off with polishing compound.
How to Remove Minor Scratches
Car scratches of this degree are deep enough to have damaged the base coat but can still be fixed through DIY methods. For best results, make sure to wash your car before trying to remove the scratch.
Materials:
- Polishing compound
- Microfiber cloth
- Rubbing compound
1. Apply the rubbing compound
Buff out the scratch with the rubbing compound. The latter is specially formulated to be able to level scratches the same way sandpaper does. It comes in varying grits of 1000 to 5000, so choose one that will best suit the depth of the scratch you’re trying to get rid of.
Apply in small amounts for faster drying time.
2. Remove residue
Clean the surface with a microfiber cloth to get rid of any residue. Make sure that it’s completely clean before proceeding.
3. Repeat the first two steps
Apply more product (about 2-3 times more) until the scratch is no longer visible.
4. Apply polish
Once you’ve achieved your desired finish, apply polish and buff until you’ve reached your desired shine.
How to Remove Major Scratches
Deeper scratches require a more tedious repair process. These are typically the kind of scratches that are deep enough to reach the metal panel, so attempting to buff them out won’t work.
You’ll have to fill in the scratches before painting them over and polishing them to your desired finish.
Materials:
- Body filler putty
- Bumper repair kit
- Prep solvent
- Car clear coat and spray primer
- Color-matched car paint
- Sandpaper in varying grits
- Surface cleaner
- Scuff pad
- Towel
- Wax remover
1. Determine which type of plastic your bumper is made of
Plastic bumpers are typically made of one of the following materials:
- polyphenylene oxide (PPO)
- thermoplastic elastomer (TPE)
- polypropylene (PP)
- thermoplastic polyurethane elastomer (TPUR)
- polyurethane plastic rigid (PUR)
Keep in mind that the first three can smear when sanded, while the last two can powder. Be guided accordingly when grinding or sanding.
2. Remove the bumper cover
Remove the bumper cover to get better access to all of the surfaces. You’ll usually find a collection of fasteners holding the bumper in place. If you’re uncertain about how to remove the bumper cover on your car, consult the factory repair manual.
Once you’ve successfully removed the cover, find a spot to start working on. Make sure this location is dry and is room temperature to make it conducive to what you are about to do.
3. Prep the bumper
If the area has been torn or punctured, scrub the damaged area gently but thoroughly. Do this prior to wiping it with surface cleaner.
4. Wash and dry the bumper
Rinse with water and make sure to dry the bumper completely.
5. Apply prep solvent
Remember to apply the prep solvent in one direction to avoid contaminating the surface area. While waiting for it to dry, combine equal parts of hardener and repair adhesive in a container.
6. Sand the surface
Take your 80-grit sandpaper and vigorously sand the surface.
7. Create V-shaped grooves
There are two ways to approach this. If your bumper is the type that powders when sanded, cut the grooves using a 24-grit disc attachment on a sander. Or, use a cordless drill and a rotary file if your plastic bumper is the type that smears. Run the tool along the front and the back side of the fascia forming a “V” groove on each side. This will make aligning the edges easier while also providing more area for the filler material to stick to.
8. Apply body filler putty
Apply an even coating of body filler putty over the damaged portion.
9. Fix the tears from the rear end of the fascia
Do this using adhesive fiberglass-repair tape. If the damaged area is too large, use masking tape to hold the ends of the tear together before repair.
10. Apply adhesive
Use a body filler squeegee to spread adhesive over the tape. Do another layer of tape and adhesive.
Allow the combination to dry until it hardens.
11. Remove any tape that is visible from the front fascia
Sand the area using 80-grit sandpaper to get rid of any overruns. Fill any visible damage in front of the car bumper with the materials from the repair kit.
Squeegee to set everything in place.
12. Coat and sand
Finish off by skim-coating the surface of the affected area with the coating included in the repair kit.
Let dry and do another coat.
Smooth out the surface with a wet 400-grit sandpaper to bring everything together.
13. Paint
Painting your car bumper is trickier than it seems. First, you’ll need to do a wet coat of flexible part sealer and allow it to dry for 30 minutes. After this, apply primer and paint over the part sealer.
Usually, two coats of two-part primer surfaces should work. Dry sand the restored surface with 400-grit paper once hardened.
Spray with base coat after buffing the area with a wet tack cloth to keep the surface clear and smooth, then spray on some paint that matches the color of your bumper.
Mix the car clear coat with a hardener. Apply the mixture twice, letting the first layer dry completely before applying the second layer.
What to Remember After Fixing the Scratches on Your Bumper

Now that you’ve removed those unsightly scratches from your bumper, it’s essential that you take the appropriate aftercare measures. This will help extend the lifespan of the paint job on your newly repaired bumper.
- Cleaning and polishing your vehicle on a regular basis helps as long as you’re using the right method and chemicals.
- Do not wash the newly repaired paint job with water for four to six weeks following the time of repair. For best and lasting results, use only a soft chamois cloth when wiping the surface.
- Extensive and aggressive cleaning methods such as high-pressure washes should be avoided to let the repair components dry properly.
After 4 to 6 weeks, regular maintenance should be observed. While waxes and polishes allow you to maintain the integrity of your car’s finish, doing so incorrectly can have terrible results. Correctly washing, polishing, and waxing your car regularly will help defend its finish against the elements.
What Happens If You Leave Scratches on Your Car Bumper?
Most car bumpers are made of plastic, so leaving scratches on may lead to cracking, chipping, or peeling. Other parts of your vehicle, on the other hand, are susceptible to corrosion and rust, as the scratches are a way for water, dirt, and debris to reach the metal.
Scratches also lower the value of your vehicle, making it hard to trade or sell.
How Much Does It Cost to Remove Bumper Scratches?
The price of removing bumper scratches ranges from $50 to $200 or more. The bill will depend on the severity of the damage, the bumper material, and your vehicle model. Labor fees and taxes also vary among shops in different locations.
Closing Thoughts
Knowing how to cover up and remove scratches on car bumpers preserves your vehicle’s good looks and helps protect its resale value. This is something you can do at home, granted you have the proper equipment and know-how.
And if you’re unequipped with the necessary tools, seeking professional help is inexpensive and saves you time and energy.
Getting Your Hands on a Rubbing Compound for Your Bumper
Scratches on your bumper are never a good look for your ride. Fortunately, you can get rid of them without any hassle when you have high-quality rubbing compounds from CarParts.com.
We only offer rubbing compounds that pass the highest quality control standards. That means you’re sure to get one that’s effective when you shop from us.
Also, here at CarParts.com, you’ll never go over budget while shopping for your maintenance needs. All our products come with a low-price guarantee to help you get the best value for your money.
Place your order using our website, or you can also dial our toll-free hotline for further assistance. If you have any questions, you can reach our round-the-clock customer service through the same number.
Don’t let your bumper sustain more scratches and nicks than it needs to. Shop for rubbing and polishing compounds today and enjoy fast shipping on your order.
Products Mentioned in this Guide
 Bumper
 Bumper Cover
Keep Reading: Related Posts


Any information provided on this Website is for informational purposes only and is not intended to replace consultation with a professional mechanic. The accuracy and timeliness of the information may change from the time of publication.


