A license plate bracket replacement looks like the easiest part purchase on the planet. It’s not a gasket, not a sensor, not something buried in the drivetrain. It holds your plate. How complicated can it be? Complicated enough that shoppers regularly receive a bracket that doesn’t match their bumper’s mounting points, order a front bracket when they need the rear, or grab a bare bracket when the job also needed mounting hardware.
The fix itself takes ten minutes. Returning the wrong part takes a week. The question to start with isn’t ‘what’s cheapest?’ It’s ‘what exactly needs to go in the cart for this job to close out cleanly?’
The Job in One Sentence
Replacing a license plate bracket restores proper plate mounting and keeps the vehicle compliant with display requirements in your state. That sounds obvious, but the order is about more than the bracket itself.
Depending on the vehicle and condition of the bumper, the job may also involve new mounting hardware, a front and rear pair, or a full bracket-and-frame kit. Some brackets come with screws included. Others don’t. Some bolt directly to factory mounting points. Others need the bumper to have specific pre-drilled holes or receiver clips.
License plate brackets are sold individually, in sets of two, and as kits that include mounting hardware. What the listing includes versus what the job needs are not always the same thing.
Choose Your Cart Size
Most license plate bracket jobs fit neatly into one of three cart sizes. The right one depends on what failed, what condition the surrounding area is in, and how thorough you want to be.
Minimum Viable Repair
Choose it if:
- Only one bracket is cracked, missing, or damaged
- The bumper mounting points are intact
- Hardware from the old bracket is reusable
Typical cart:
- One direct-fit replacement bracket (front or rear, matching position)
Smart Same-Access Refresh
Choose it if:
- Mounting screws are stripped, corroded, or missing
- Both front and rear brackets are worn or mismatched
- The old bracket was removed for a bumper repair and hardware was lost
Typical cart:
- Replacement bracket(s) for the affected position(s)
- Mounting screw set or hardware kit
Complete Refresh / Appearance Upgrade
Choose it if:
- The vehicle is older and both brackets look faded or damaged
- Upgrading the exterior appearance is part of the goal
- A bumper replacement is happening at the same time
Typical cart:
- Front and rear bracket set
- Mounting hardware
- License plate frame or accessory, depending on preference
Not every job needs all three items. A single cracked front bracket on a late-model vehicle with good mounting points is a one-item order.
What Is Commonly Ordered Together on This Job
Hardware and Fasteners
Mounting screws and clips are the most commonly forgotten item. Many replacement brackets do not include hardware. If the existing screws are stripped, rusted, or were lost during a bumper job, they need to be in the cart. Check whether the replacement listing specifies ‘includes hardware’ before assuming.
Front and Rear Pairs
If both brackets are damaged or cosmetically mismatched, ordering them together saves a second shipment. Front and rear brackets are typically sold separately and are not interchangeable. Verify position before ordering.
License Plate Frames
Not a functional requirement, but commonly purchased at the same time since the plate is already off the vehicle. If a frame is on the list, add it now rather than later.
What People Forget Until the Vehicle Is Already Apart
These are the details that cause mid-job problems or parts returns.
- Whether the listing includes mounting screws or sells them separately
- Front vs. rear position (these are different parts for most vehicles)
- Whether the bumper has pre-drilled holes or requires drilling
- The material and finish match (black plastic vs. chrome vs. primed)
- Whether the vehicle needs a direct-fit bracket or can accept a universal-mount unit
- Sedan vs. body style variants that affect the mounting geometry
- Whether a trim-specific version exists (base model vs. luxury or sport trim may differ)
- The condition of the bumper’s mounting tabs or threaded inserts
When Replacing Only the License Plate Bracket Is False Economy
For most vehicles, replacing just the bracket is completely reasonable. It’s a low-cost, low-access part. If only one is broken and the hardware is intact, a single bracket is the right call. Where it becomes shortsighted: if the screws are stripped or missing, skipping a hardware kit means the new bracket won’t mount properly or will rattle loose quickly. A small hardware pack costs almost nothing and solves that problem permanently.
If a bumper cover replacement is happening at the same time, order the bracket alongside the bumper. Having to come back for the bracket after the bumper is painted and installed is the kind of repeat labor that makes the ‘save money now’ logic backfire.
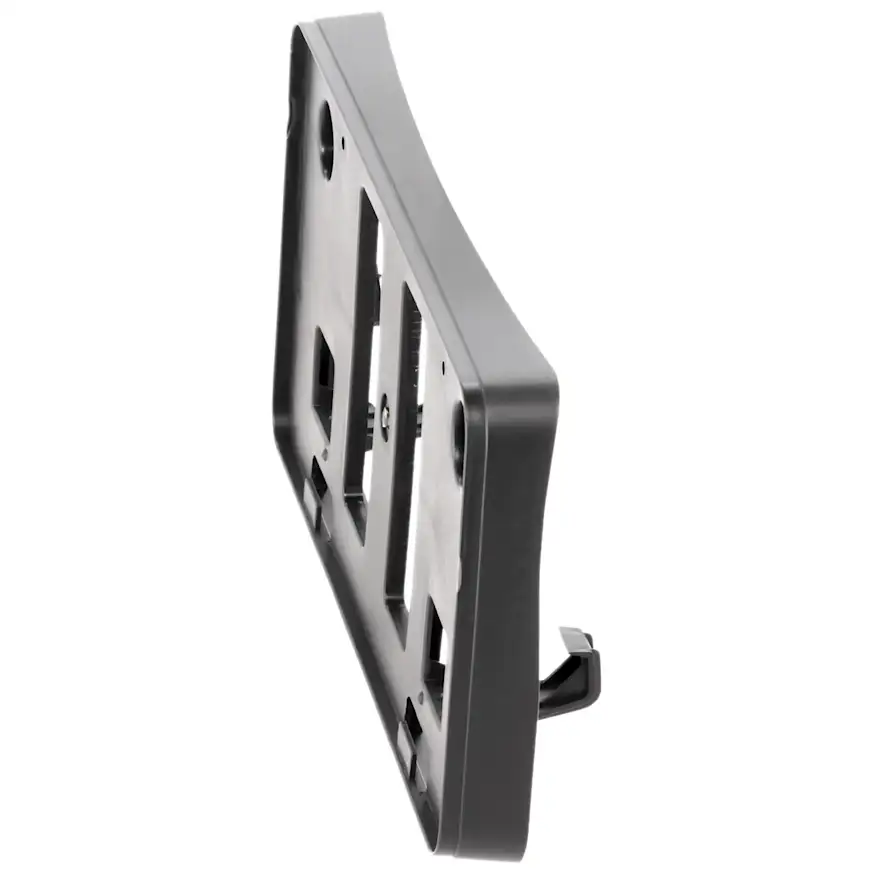
The Fitment Splits That Break License Plate Bracket Orders
Front vs. Rear Position
This is the split that causes the most returns. Front and rear brackets have different shapes, mounting point patterns, and sometimes different profiles entirely. Always confirm which position you need before ordering.
Trim and Submodel
Some vehicles use different front fascias across trim levels, which means the bracket mounting geometry changes. A base model bracket may not seat correctly on a sport or luxury trim. Check trim-specific listings if they exist for your vehicle.
Body Style
Sedan, coupe, and truck applications sometimes require different bracket profiles depending on the bumper shape. A listing labeled ‘sedan’ or ‘without tow package’ carries that restriction for a real reason.
Direct Fit vs. Universal
Direct-fit brackets are designed for a specific vehicle. Universal brackets require drilling or use adjustable hardware. Most shoppers replacing an OE bracket want a direct-fit unit. Confirm product fit type before purchasing.
Engine or Package Variants
On some trucks and SUVs, engine packages or off-road configurations ship without a front license plate bracket entirely, or with a different bumper that changes the bracket spec. If the vehicle came from the factory without a bracket mounting point, a drill or adapter kit may be needed.
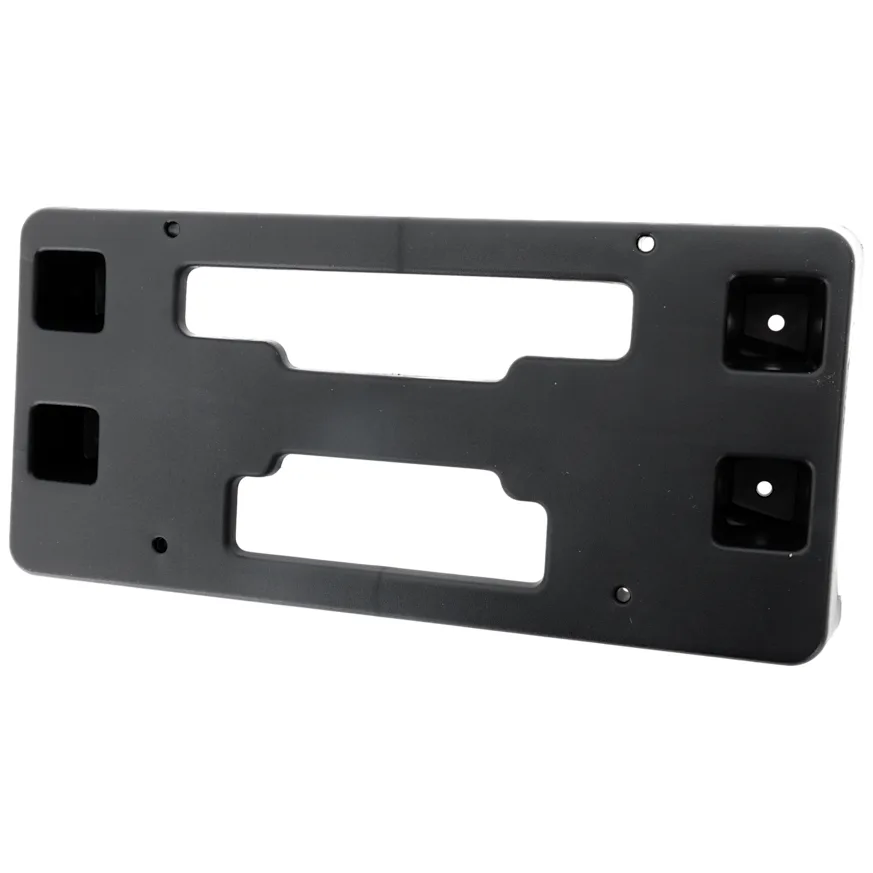
Delivery-Day Inspection Checklist
Before pulling the old bracket off, compare the new part against the old one.
- Bolt hole pattern matches the bumper’s mounting points
- Overall shape and profile match the original bracket
- Mounting clip or tab design is compatible
- Finish and color match expectations (black, chrome, primed)
- Hardware is included if needed, or confirmed to be ordered separately
- No cracks, warping, or shipping damage
- For kits, confirm all pieces are present before starting
Your One-Job Order Sheet for a License Plate Bracket
1. Confirm the vehicle using year, make, model, and trim. Many listings are trim-specific.
2. Confirm the position needed: front, rear, or both. Do not assume front and rear are interchangeable.
3. Check what the listing includes. Hardware is not always bundled. Read the product details.
4. Assess the bumper mounting condition. Stripped threads or missing clips may need separate hardware.
5. Add hardware if needed. A mounting screw set is inexpensive and eliminates a common failure point.
6. Consider both positions. If the rear bracket is also worn, order both now and close the job completely.
The Smart Way to Shop License Plate Brackets
A license plate bracket is one of the least expensive parts on any vehicle. The risk isn’t paying too much. The risk is ordering the wrong position, missing the trim split, or skipping the hardware and ending up with a bracket that doesn’t sit right or won’t stay put.
Shop by vehicle and position first. Confirm what’s included in the listing. If hardware isn’t listed, add it. For older vehicles or cosmetic refreshes, ordering front and rear together saves a second trip to the cart. The correct order here is genuinely simple, as long as the fitment and position details get confirmed upfront. That’s the only thing that separates a closed job from a parts return.
Keep Reading: Related Posts


Any information provided on this Website is for informational purposes only and is not intended to replace consultation with a professional mechanic. The accuracy and timeliness of the information may change from the time of publication.