Your car’s header panel is the front-end mounting piece that keeps your grille and headlights lined up and locked down tight. When it bends, cracks, or loses its grip, you’ll deal with wonky gaps, loose hardware, and parts that refuse to sit straight, no matter how many times you reinstall them.
Key Takeaways
- The header panel creates a stable foundation for your grille, headlights, and front trim so everything stays aligned and secure
- Damage shows up as uneven gaps, loose mounting points, rattles, and headlights that won’t aim correctly
- Replacing a bent or cracked panel saves you time and frustration by giving your front-end parts a solid base to mount to
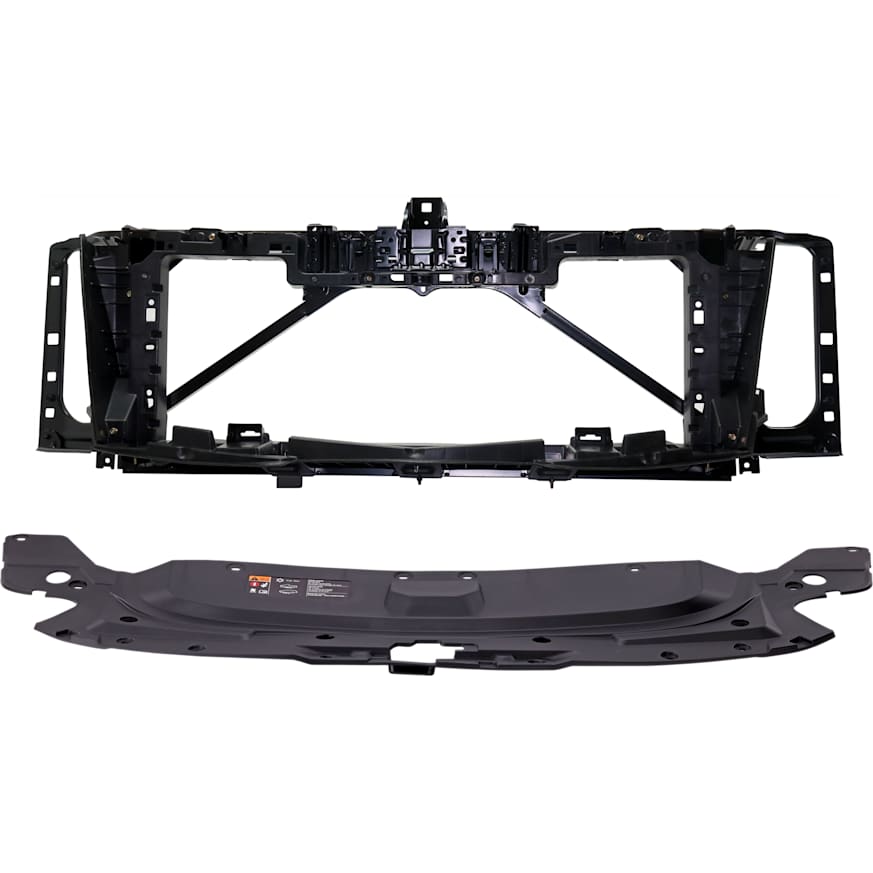
What Is a Header Panel on a Car
The header panel gives your front-end parts a stable platform so they sit exactly where the engineers intended. You might see it stretched across the nose near your grille, or it might hide behind the bumper cover as a skeleton that holds everything together. Either way, it keeps critical parts precisely positioned.
This matters because the components that bolt to it need exact alignment and rock-solid attachment points.
It Holds Your Grille and Trim in Place
Your header panel gives the grille and surrounding trim something solid to clip or bolt into. When the panel flexes or shifts out of position, your grille starts rattling around, sits crooked, or develops gaps that look terrible. The frustrating part? Your grille might be perfectly fine, but it looks like a cheap aftermarket piece because its foundation moved.
It Keeps Your Headlights Mounted and Aimed Right
Many header panels carry the mounting points that position your headlight assemblies. When that mounting surface shifts, a headlight can push too far in or stick out too far. You might also end up with a light that feels tight but aims slightly wrong. That throws off your nighttime visibility and blinds oncoming drivers.
It Sets Your Front-End Alignment and Panel Gaps
The header panel helps establish your front-end geometry, so damage ripples across multiple parts. You can swap the bumper cover, grille, or headlights and still see weird gaps because the foundation underneath shifted.
Why Fixing It the Right Way Pays Off
A properly aligned, structurally sound front end delivers real benefits you’ll notice every time you drive.
Safety: A solid header panel keeps your headlights positioned correctly, which means your beam pattern stays where it should after repairs.
Time Savings: A straight panel cuts down the hours you waste wrestling with clips, elongating mounting holes, or redoing installations to fight misalignment.
Longevity: Secure mounting reduces vibration that cracks plastic tabs, loosens fasteners, and kills lights and trim before their time.
Resale Protection: Even panel gaps and correctly seated headlights tell buyers your car stayed well-maintained. That reduces concerns about hidden front-end damage lurking underneath.
Comfort: A stable front end cuts down on rattles and can reduce wind noise caused by gaps around your grille and bumper that shifted out of place.
Header Panel Location and What It Connects To
Most vehicles position the header panel right at the front, running left to right across the grille and headlight area. It sits ahead of your engine bay structure and behind the styling pieces on many models.
It connects to several key parts around it.
Hood and Hood Latch Area
Some designs place the header panel close to where your hood latch mounts. If that area shifts, your hood closes poorly, sits a little high, or latches inconsistently.
Bumper Cover and Upper Mounting Points
Your bumper cover attaches to brackets and mounting points that depend on consistent structure underneath. When the header panel shifts, you see bumper-to-fender or bumper-to-grille gaps that stay uneven no matter how carefully you install everything.
Radiator Support and Front Framework
Many front-end designs tie mounting points into the nearby support structure that also positions your cooling parts. A harder hit can shift multiple mounting surfaces at once, which explains why swapping a cosmetic part sometimes fails to restore clean alignment.
How to Spot a Damaged Header Panel
Header panel damage usually announces itself through fitment and mounting problems before you ever see an obvious crack.
You Notice Uneven Gaps Around Your Headlights and Grille
A shifted or bent header panel changes how your grille and headlights sit. One side looks tight while the other side opens up. Your grille might tilt or sit off-center, too.
You Find Loose, Broken, or Missing Attachment Points
Impacts, age, and repeated removals snap tabs and wear out clip pockets. When those points fail, your grille or headlight moves around even after you tighten everything down. That movement creates visible shake and constant noise.
You Hear Rattles After a Front-End Repair
A damaged header panel lets vibration travel straight into your grille, bumper cover, and headlight housings. You can install brand-new exterior parts and still hear buzzing or tapping because the mounts no longer hold tension.
Tip: Grab your grille and gently wiggle it. If the grille moves while the fasteners stay tight, check the header panel mounts behind it.
You See Corrosion or Weakness Near Edges and Seams
Stone chips and exposed metal start rust around seams and bolt holes. Rust eats away strength and shifts mounting points over time. On plastic or composite panels, stress marks and cracking signal fatigue.
Note: If you see rust-through or cracks near multiple mounting points, replace the header panel instead of patching individual tabs. Replacement restores alignment and prevents repeat failures.
Repair vs. Replacement: How to Make the Call
Material type, damage severity, and surrounding alignment determine your best move.
Replace When Mounting Integrity Fails
If tabs, clip pockets, or mounting flanges keep breaking or no longer hold tension, replacement usually beats patching. Weak mounts cause repeated rattles and part failures down the road.
Repair When You Can Restore the Mounting Plane
If a metal section shows minor bending without kinks and you can restore a flat mounting surface, repair can work. You should still confirm alignment after you straighten it.
Treat Post-Impact Misalignment as a System Issue
If multiple parts sit wrong at once, inspect how the header panel aligns with adjacent brackets and support structure. Replacing only the visible piece might not solve the real alignment problem.
Tip: If the same hit broke headlight mounts and grille mounts, inspect the full span of the header panel because damage often spreads across the mounting framework.
What to Look for When Buying a Replacement
Choose a part that fits correctly, supports the right mounting points, and avoids creating new alignment headaches.
Confirm Fitment Details
Confirm the part matches your year, make, model, and trim. Front-end structures can change within a generation, and small differences move mounting holes around.
Match Material and Construction
Match the original material when possible so mounting strength and flexibility behave as designed. A different material changes how clips seat and how the panel responds to vibration.
Verify Mounting Features
Confirm the replacement supports the mounts you rely on, especially for headlamps, grille hardware, and any latch-related mounting points.
Plan for Finish and Corrosion Prevention
If the panel arrives primed, plan proper paint prep and full coverage. If bare metal edges stay exposed, corrosion starts early.
Installation Overview and Alignment Checks That Matter
Most installations require removing front-end exterior parts to access mounting points and then aligning the new panel before you tighten anything down for good.
- Disconnect your battery if you plan to unplug lighting harnesses.
- Remove your bumper cover and grille components to expose the working area.
- Unplug and remove headlight assemblies so you don’t stress wiring and mounts.
- Remove fasteners in a controlled order while you support the panel to prevent cracking tabs during removal.
- Test-fit the new panel and start all bolts and clips loosely before you tighten anything.
- Align gaps from the center outward, then confirm headlight and grille seating before final torque.
- Reinstall lights and grille, then recheck gaps after everything seats fully.
- Verify headlight aim after reassembly, especially after impact damage or mounting changes.
Note: Don’t force alignment with longer bolts or stacked washers. That approach cracks plastic panels, distorts headlamp position, and creates vibration problems.
Keep Reading: Related Posts


Any information provided on this Website is for informational purposes only and is not intended to replace consultation with a professional mechanic. The accuracy and timeliness of the information may change from the time of publication.


