Brake lines can leak, corrode, and crack over time, which can reduce your vehicle’s braking performance and reliability. You’ll need to replace the brake lines to restore your brake’s performance.
Replacing brake lines typically involves cutting, flaring, and bending the lines so that the lines are securely fitted and there won’t be any leaks. We’ll discuss them in this article.
How to Cut Brake Lines
While cutting brake lines is a straightforward task, it’s still best to keep the following tips in mind to ensure you do it right the first time.
Measure Twice, Cut Once
To replace faulty brake lines, you’ll need to get a new one and cut the brake line to its proper size. That’s best done with a brake-cutting tool and a metal file.
When cutting brake lines, measure the length of the brake line that you need. Do it twice before you cut it. If you cut a brake line too short, it’ll be useless. It’s better to cut a line and leave some extra length because you can just trim smaller lengths later on.
Use a tape measure to compare the brake line with the old brake line. Trace the brake line using the measuring tool, and be sure to include every bend and curve in the measurement.
Leave Length for Flares and Bends
It’s a good idea to cut the brake line longer than your measured requirement, especially if you need to flare or bend it.
If you’re going to flare the brake line, add around an extra quarter inch of the brake line to account for the flare. If you’re connecting two brake lines with a brass union fitting, subtract the length of the fitting from the line.
Bending the line might also change the overall length of the brake line, potentially making it slightly shorter.
Use a Tube Cutter or Brake Cut-Off Tool
When cutting a brake line, you need to ensure that the metal pipe remains round. This ensures you can slip on fittings, and nuts, and use the flaring tool.
A tube-cutting tool works similarly to a can opener. It clamps onto the tube and its sharp roller is wedged into the brake line when tightened. Once it’s in place, turn the tool once or twice. Then, tighten the wedge and turn the tool once or twice again. Repeat this process until the roller has cut the line in two.
Remove Sharp Edges From the Line
The brake line might have some sharp edges after cutting it. Use a metal file or a deburring tool to remove the sharp metal flanges and ensure you won’t run into issues when flaring the line.
How to Flare Brake Lines
Flaring a brake line means bending the brake line’s edge in such a way that it expands like a small funnel. The flare is meant to create a leak-proof connection with other brake system components, particularly with the brake line nut. The tight connection between the flare and the nut prevents brake fluid leaks. Here are some tips to flare brake lines like a pro.
Invest in a High-Quality Tool
Investing in a high-quality tool is going to make the task much easier and decrease the likelihood of a poor-quality brake line flare. Get a flaring tool that can create the two most reliable flares, which are bubble and double flares.
Using Your Flare Tool
Before creating a flare at the end of your brake line, place the nut along the line. Once you’ve created the flare, you won’t be able to put the nut, which is meant to push the flare toward the component that the line attaches to.
Many flaring tools use a clamp that holds the brake line in place. The flaring tool pushes a metal block called an adapter stem into the brake line using a screw. The adapter is specially shaped to create the flare for a specific brake line size when the adapter is forced into the brake line, so using the right flare adaptor is crucial.
Depending on the flare design you’re using, you might need to cramp the brake line twice.
How to Bend Brake Lines
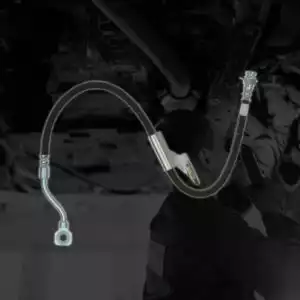
Bending brake lines lets you route the brake lines around your vehicle’s chassis, axles, and suspension components. The task can be challenging, as brake lines are made of steel and are too stiff to bend by hand, so you’ll need a special tool for the job.
Brake bending tools also help keep the line from cracking or kinking, which will affect brake fluid flow. Here are some tips when bending brake lines.
Find Where to Bend
Brake bending tools look like pliers and they’re made to bend a specific brake line size. Before placing the brake line on the bending tool, identify where you’re going to bend the line. You can place the brake line where it’s going to be installed in your vehicle to figure out where to bend.
It might also be better to bend the brake line first before you cut it. Cutting the brake line before bending it might result in a line that’s too short. Bending the brake line and routing it between components will allow you to figure out what length you need before cutting it.
Using the Brake Bending Tool
The brake bending tool has a channel where you’ll place the brake line. Once the line is in place, squeeze the brake bender’s handles. Ensure a smooth and controlled motion so that the line doesn’t kink or crease.
Think twice before bending. Remember that if you bend the line too much, bending the line back without damaging it is going to be difficult.
Remember that these lines are the core of your vehicle’s braking system. So be careful when you cut, flare, and bend brake lines. Otherwise, you might encounter issues like system leaks down the line. If you’re unsure whether you could do this job, you can always defer this task to a qualified mechanic.
Keep Reading: Related Posts


Any information provided on this Website is for informational purposes only and is not intended to replace consultation with a professional mechanic. The accuracy and timeliness of the information may change from the time of publication.