You install bed rail caps by cleaning the bed rails, confirming the fit, warming the surface to between 60 and 110 degrees F, then bonding each cap with its adhesive tape and, on clip-style caps, locking it down with clips and screws. Most trucks take about an hour of hands-on work, and the tape reaches full strength after 24 hours. The prep matters more than the mounting itself, because a clean, dry, correctly warmed surface is what keeps the caps from lifting later.
Key Takeaways
- Bed rail caps mount two ways: adhesive tape only, or tape plus clips and screws.
- Keep the vehicle, the caps, and the tape between 60 and 110 degrees F so the adhesive bonds.
- Clean the rails with rubbing alcohol and dry them completely before you peel any tape.
- Apply firm pressure, roughly 30 lbs per square inch or several passes with a J-roller, then wait 24 hours before washing.
What Bed Rail Caps Do and Why Fit Matters
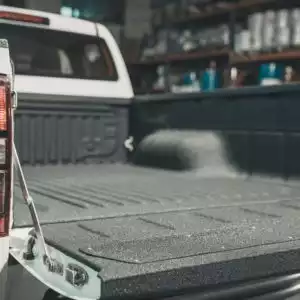
Bed rail caps are molded covers that shield the top edge of your truck bed from scratches, dents, and UV fading. They also clean up the look of a rail that’s already chipped, and many include openings that line up with the factory stake pockets.
Fit drives everything else. Hold each cap against the rail before you peel tape or paint anything, and confirm it’s the correct type for your truck. You can make small adjustments by trimming, filing, sanding, or scraping excess plastic, but a cap that’s clearly the wrong shape won’t seat correctly no matter how you press it.
Tools and Materials You’ll Need
Keep the job simple with a short list. You’ll want a clean cloth, rubbing alcohol or a 100 percent alcohol solution, and a J-roller for adhesive-only caps. Clip-style caps also need a #2 Phillips screwdriver for the supplied screws and star washers. If the surface sits under 60 degrees F, have a heat gun or hair dryer ready to warm it. Painter’s tape is worth grabbing too, so you can protect the tail light lenses during cleanup.
Before You Start
Good preparation is the difference between a cap that stays put for years and one that peels in a month.
Check the Temperature
The vehicle, the caps, and the tape all need to sit between 60 and 110 degrees F for the adhesive to grab. If the surface is cold, warm it with a heat gun or hair dryer first. The warmer the metal (within this range), the stronger the initial bond.
Clean and Dry the Surface
Wipe the rails with a cloth and rubbing alcohol to strip off wax, road film, and dirt. Then dry the surface completely with a clean, dry, cloth, because any leftover moisture or solvent weakens the bond. Alcohol can damage some plastics, so cover the tail light lenses, and if any alcohol touches a lens, rinse it with water right away.

Step-by-Step Installation
Bed rail caps come in two mounting styles. Match the steps here to the hardware in your kit.
Adhesive-Only Caps
These caps hold with pre-applied tape and a firm roll-down.
- Leave the tape backer on until you’re positioned. Peel it from the driver-side cap first.
- Hold the cap slightly above the rail, then set the back end down so that it goes to the rear of the rail. Push forward and lower the front while using the inboard side of the rail as your guide.
- Pull the cap outboard so it sits flush against the inside of the rail with no gap.
- Start at the rear, press a J-roller down onto the cap, and roll forward the full length, then back to the rear.
- Repeat for the passenger-side cap.
These caps often have few reference marks, so dry-fit and lightly mark your position before you commit the tape.
Caps With Clips and Screws
Bushwacker-style caps combine tape with mechanical clips for a stronger hold, and they can be painted.
- Paint the caps first if you want a color match, always before installation, using a quality lacquer, enamel, or polyurethane. Don’t use lacquer thinner or enamel reducer as a degreaser.
- Peel the red vinyl backing from the tape and set the cap snugly at the tail end of the rail, aligning any stake pocket holes with the truck’s stake pockets.
- Apply about 30 lbs per square inch to the taped areas.
- Wait an hour with the surface above 60 degrees F, then apply that pressure again.
- Slide the supplied clips onto the rail wherever the cap has a bump on its inside edge, then fasten the cap to the clips with the screws and star washers.
For a matching tailgate cap, center it on the tailgate and follow the same press, wait, and re-press routine.
Replacing Ram Bed Rail Caps
On 2011 to 2018 Ram 2500 trucks, the factory caps clip over the Ram bed rails and hold with fasteners rather than tape alone, so replacement is mostly a matter of unclipping the old cap and locking in the new one. Remove the existing fasteners, lift the worn cap off, clean the rail, then set the replacement and refasten. Exact fastener count and clip locations vary by cab and trim, so compare your vehicle’s old cap to the new one before you start, and reuse or replace hardware as needed.
Curing and Aftercare
Once the caps are on, leave them alone. Don’t wash the truck or expose it to a wet environment for 24 hours, since that’s how long the tape needs to reach maximum bond. After a day, the caps are ready for normal use, weather, and cargo.
Safety and Common Mistakes
Bed rail caps aren’t structural, but a loose one can catch wind and lift at highway speed, so confirm every clip and screw is tight and every taped edge is fully pressed. Don’t cover or block any drain holes in the rail, and watch for sharp trimmed edges after you cut plastic. If a cap won’t stay seated or a corner keeps popping up, stop and inspect the fit and surface prep rather than forcing it, because a cap that won’t bond usually points to a temperature, cleanliness, or fitment issue.
FAQ
The adhesive tape reaches maximum strength about 24 hours after contact. Keep the truck dry and out of the weather during that window.
Use adhesive-style caps that rely on pre-applied tape instead of clips. Clean and warm the rail, roll the caps down firmly, and skip the drilling entirely.
Yes, and painting before installation is the recommended order. Clean the caps with a good degreaser, avoid lacquer thinner and enamel reducer, and use a quality automotive lacquer, enamel, or polyurethane.
No, they’re designed to protect the rail, not harm it. Removing an adhesive cap later may leave tape residue, which lifts off with an adhesive remover.
Aim for the warm end of the 60 to 110 degrees F range. A warmer surface helps the tape grab faster and hold better.
Cap It Off the Right Way
Bed rail caps are one of the easiest upgrades for protecting your truck and sharpening its look. Take your time on prep, mind the temperature, and let the adhesive cure, and your caps will stay put for the long haul. Find the right caps, clips, and prep supplies for your truck here at CarParts.com.
Keep Reading: Related Posts



Any information provided on this Website is for informational purposes only and is not intended to replace consultation with a professional mechanic. The accuracy and timeliness of the information may change from the time of publication.