
A rear bumper reflector does one job: it returns light back toward the driver who’s approaching from behind. This matters most in situations where tail lamps do less work than you’d like, such as due to heavy spray, glare from wet pavement, or uneven lighting in a parking lot. Because the reflector sits low and near the corners, it also takes frequent abuse from curb taps, parking stops, and minor bumps that never reach the tail lamp.
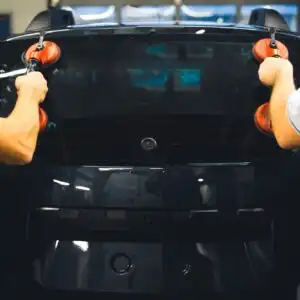
Successful reflector replacement depends on access and restraint. The part often comes out after you release a few tabs or remove one or two fasteners, but the bumper cover and retainers can crack if you pry in the wrong place. A careful approach reduces broken clips, paint scuffs, and the annoying rattle that follows a rushed reassembly.
Tips on How To Install a Rear Bumper Reflector
Confirm Fitment Details
Rear bumper reflectors commonly differ by side, trim, and bumper style. Before removal, compare the replacement to what’s on your vehicle. Check tab locations, screw points, and the lens profile. If you install the wrong side, it may sit proud or bind, and that’s when tabs snap.
Plan Access Before Pulling Panels
Some vehicles give you a straight shot from behind the bumper through a small opening. Others hide the fasteners behind a wheel-liner section or an underbody panel. Take two minutes to look for access points with a flashlight. That quick preview keeps you from yanking on a reflector that still has a hidden screw or clip holding it.
Use the Right Tools for Painted Edges
If you need to pry, use plastic trim tools. Metal blades leave crescent-shaped marks on soft bumper paint, and the damage stays visible even after a touch-up. When you pull, pull squarely from the mounting face. Side-loaded force bends tabs and turns a simple swap into a broken-retainer problem.
Treat Old Clips Like They’re Already Cracked
Heat cycles and road grit age plastic fast. If a clip looks chalky, stress-whitened, or warped, replace it while you’re there. Otherwise, you may get a clean install that loosens over the next few weeks. If you loosen the bumper cover, seat it back into guides and brackets in the same order you removed it. Misalignment near the corner often shows up later as an uneven panel gap.
If You’re Changing to a Lit Reflector, Solve Wiring First
A reflector-only lens needs no wiring. A reflector-lamp upgrade does, and it changes the job. If you’re moving to a rear bumper LED setup, decide how you’ll power it and how you’ll protect the connections from water and road salt. Route the wire away from heat and moving parts. Check polarity and function before the bumper goes back on so you don’t reopen panels to fix a loose connector.
Part and Labor Cost
Parts often range from $10–$50 for a single reflector, to around $490 for sets and reflector lamp assemblies. Labor cost depends on access. Straight swaps often take about 0.5–1.5 hours at a shop. LED reflector conversions can stretch to 3–4 hours if wiring runs long or access stays tight. Shops also base labor on local rates, which average in the mid-$100s.

What Is a Rear Bumper Reflector?
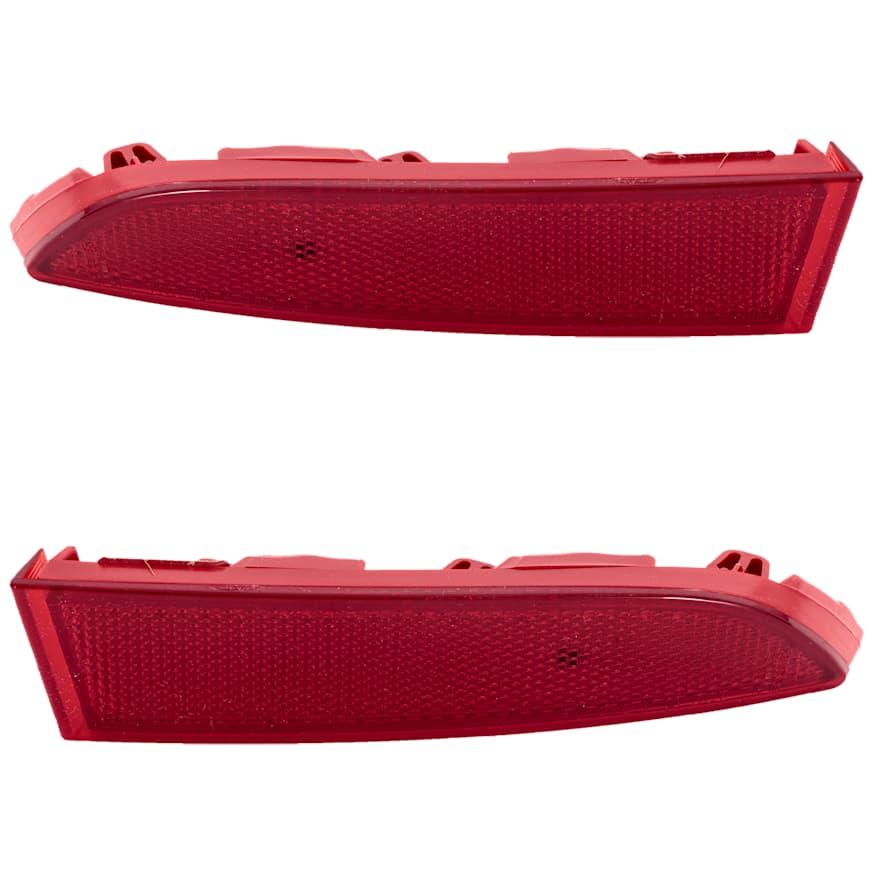
A rear bumper reflector is a passive reflective lens mounted on the back of your vehicle, usually in the bumper cover near the corners. The lens uses molded optics that return light toward its source rather than scattering it across angles. Most rear reflectors use red plastic because rear-facing reflectors must show red. Some vehicles integrate a reflector into a lamp assembly, but the purpose stays the same: a clear rear marker when headlights hit the back of your vehicle.
How a Rear Bumper Reflector Works
A rear bumper reflector works through retroreflection rather than illumination. The lens contains small prismatic cells that bounce incoming light back toward the source. That’s why it looks bright from the driver’s seat of the vehicle shining the headlights, even though it produces no light of its own.
From there, the mounting position does the rest of the work. The reflector needs to sit flat and face rearward so the returning beam travels back toward the approaching driver’s eyes. If the lens cracks, clouds, or tilts from a broken tab, the light return drops. Road film can cause the same effect by blocking light from reaching the prismatic surface, which is why reflector issues first show up at night and in wet weather.
Rear Bumper Reflector Parts
A rear bumper reflector looks simple from the outside, but several small elements control how well it reflects light and how securely it stays in the bumper.
Reflector Lens
The lens is the visible red face. It carries the prismatic pattern that returns light toward its source. Scratches and haze dull the surface and cut brightness. Cracks disrupt the internal pattern and often spread from the first impact mark.
Reflective Optics (Prismatic Cells)
Behind the outer face, the reflector uses molded geometric cells that create retroreflection. These shapes do the real work. Heat damage can warp them. Aggressive sanding can round off the edges that redirect light, so the reflector may look fine in daylight but read weak at night.
Housing or Backing Plate
Many reflectors include a rear housing that stiffens the assembly and shields the optics from dirt entering from the back side. On reflector-lamp styles, the housing also forms a sealed cavity. That cavity helps keep moisture off the contacts and internal surfaces.
Mounting Tabs and Locator Pins
Tabs lock the reflector into the bumper opening. Locator pins guide placement so that the lens sits flush and square. These pieces fail often because they take concentrated stress during removal. They also take the hit when a low-speed bump flexes the bumper cover.
Fasteners (Screws or Clips)
Some designs use screws that you reach from behind the bumper. Others use spring clips or snap-in retainers. Fasteners set how tightly the reflector clamps to the bumper cover. If a clip goes missing, the reflector can vibrate. Over time, that movement can enlarge mounting holes and loosen the fit further. If the issue is related to nearby bumper hardware, a bumper retainer guide can help you understand how those clips and tracks hold the cover in position.
Gasket or Foam Tape
Some reflectors use a thin gasket or foam strip around the edge. It cushions the lens against the bumper cover and blocks dirt and water. When foam tears or compresses permanently, the reflector may sit unevenly. It can also start to rattle.
Wiring and Connector (Reflector-Lamp Styles Only)
If the unit also functions as a lamp, it includes LEDs or a bulb socket, plus a wiring pigtail and connector. This section turns the reflector into an illuminated marker. Because it sits low on the vehicle, it’s vulnerable to road spray, vibration, and winter salt. A solid seal and strain relief matter as much as brightness for long-term operation.
Common Signs of a Failing Rear Bumper Reflector
Cracked Lens or Broken Corners
Parking stops, curb taps, and small impacts frequently crack the lens. The reflector may still function, but the light return drops and the part can start loosening as the lens flexes.
Loose Fit, Popped-Out Edge, or Uneven Seating
If the reflector sits proud on one side, a tab may have snapped or a retainer may have pulled out of the bumper cover. Sometimes the fastener still holds but the mounting ear warps, which makes the lens look angled.
Dull Appearance or Uneven Brightness at Night
Hazing and surface abrasion reduce reflectivity. If one side looks noticeably dimmer when you shine a flashlight at it from a low angle, replace it instead of polishing aggressively. Treat it like any reflector light car component: once the optics get dull, the part stops returning light the way it should.
Water in the Lens (Reflector-Lamp Styles)
Condensation inside a reflector lamp points to a seal problem. Water intrusion can corrode contacts and shorten LED life. If you see fogging that returns after drying, the housing likely needs replacement rather than resealing. Similar moisture and access issues can also come up when working around nearby rear lighting parts, so it helps to review basic tail light replacement steps before removing panels.
Missing Reflector After a Minor Bump
Some reflectors eject cleanly when tabs break, especially in cold weather. If the lens is gone, inspect the bumper cover opening for damage before installing the new piece. A distorted opening can prevent proper clip engagement and lead to repeat failures.
A rear bumper reflector install stays simple when you treat access as the real job and the reflector as the final step. Work slowly around clips, confirm the replacement matches the mounting points, and re-seat panels in the order they came apart. Once the reflector sits flush and secure, you’ll restore nighttime visibility where low-mounted rear hardware often gets overlooked.
Keep Reading: Related Posts


Any information provided on this Website is for informational purposes only and is not intended to replace consultation with a professional mechanic. The accuracy and timeliness of the information may change from the time of publication.


