A dash warning says a parking assist sensor has failed, so you start shopping for a replacement. Parking assist sensors are available to shoppers as singles, matched sets, and kits with sensors installed. Before you pick a listing, decide how much of the repair you want this order to cover.
A warning doesn’t exactly identify the failed position, and on many vehicles, a bad sensor disables the system. If you order the wrong inner or outer sensor or skip the retainer ring, you’ll end up having to repeat the repair. The better approach starts with scope: which parts does this repair actually touch? Answer that first, and the right cart follows.
More Than One Round Sensor Face
A parking assist sensor order should restore reliable distance readings at every bumper position.
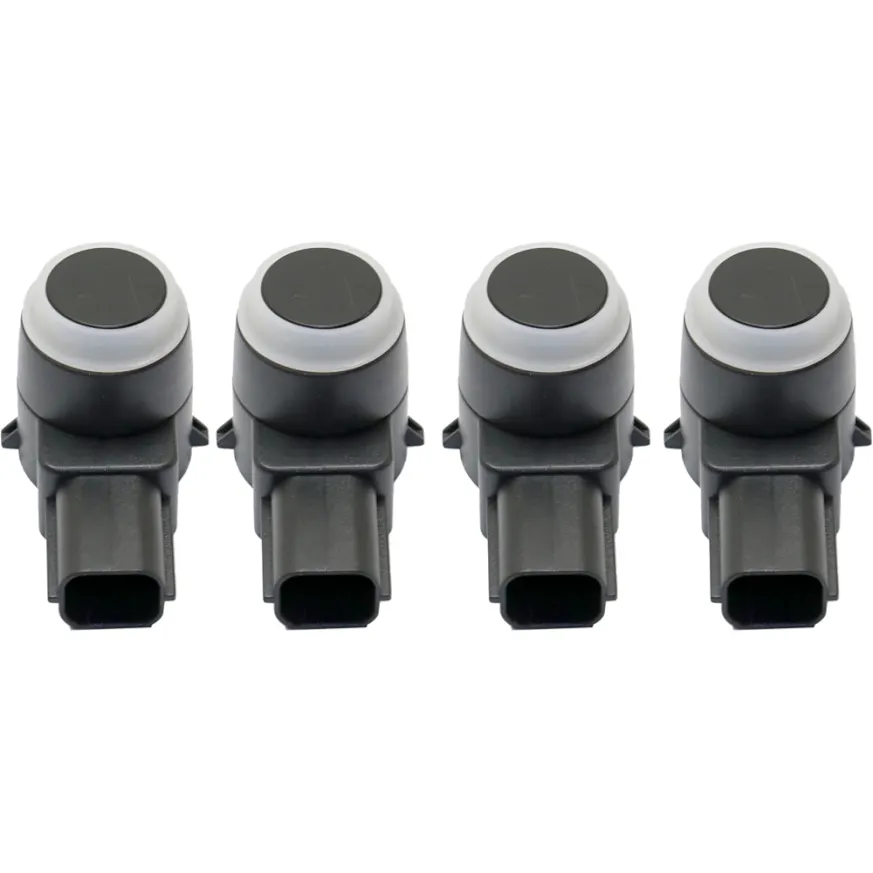
Parking assist sensors are ultrasonic transducers set into the bumper cover. They feed a parking module that alerts you through beeps, a display, or a back up camera screen. Most systems detect farther at the rear than at the front, so position matters. Catalogs also list the part as a parking aid sensor, backup sensor, or ultrasonic sensor.
Aftermarket parking assist sensors designed as direct replacements match the original fit and function for the vehicles they list. Listings range from one sensor to a matched set, or a cover kit that may add a control unit. Add-on kits, including strip-style electromagnetic versions, suit cars without sensors, as do other parking assistance devices. This guide covers direct replacement for factory systems.
Pick Your Cart Size: Three Sensible Options
Three cart sizes cover most jobs, and each one is a fair choice.
The Quick Swap
This is the smallest sensible order. Choose it if one position is damaged or dead and the harness and neighbors look good. Typical cart: the matching sensor for that position, plus a retainer ring if the listing doesn’t include it.
Cover’s Off, So Do the Set
When the bumper cover is already off, extra sensors share the same labor. Choose it if the sensor isn’t the only failed one or the originals have aged together. Your cart should include every sensor for that bumper, fresh retainer rings, and a few cover clips.
The Keep It for Years Order
This size fits a vehicle you’ll keep for years or drive through road salt. Choose it if: mileage is high, the front and rear sensors are original, or a collision damaged the cover. Choose front and rear sensor sets, retainer rings, and a cover kit if the damage calls for it. If one corner took the hit, the first size covers it.
The Parts Often Ordered Together
A few inexpensive items decide whether the job wraps up in one sitting.
Retainer Rings, Bezels, and Brackets
The sensor face snaps into a retainer ring or bracket, and impact or removal can crack it. Retainer bezels often sell separately, and some sensor listings leave out mounting pieces. Many buyers assume the ring comes in the box, so check the listing first.
Connectors and Harness Pieces
Each sensor plugs into a bumper harness that leads to the parking module. Many sensor listings don’t include wiring. If the old connector looks brittle or corroded, add a pigtail or harness section where your application offers one.
Paint and Cover Clips
Sensors often arrive black or primed. If your bumper wears body color, plan thin coats of matching paint. Heavy coats can interfere with the signal. Add a few cover clips too, since old plastic clips often break during removal.

Things to Note Once the Cover Is Off
Run through these questions before checkout, since each missed detail can mean a second box.
• Which position failed: front or rear, center or corner, left or right?
• Does the listing include the retainer ring or bracket?
• Is the sensor body straight or right-angled, and does the terminal count match?
• Is the sensor black, primed, or painted?
• Does your system need calibration, a scan tool, or a parking assist sensor reset after the swap?
• Does your vehicle use side or corner sensors that take different parts?
Is Replacing One Parking Assist Sensor Enough?
Often, yes. If one sensor failed, replacing that unit alone is a sound call. If the other sensors read well and the connectors look clean, keep the order small.
The answer changes when the cover is already off, and the neighboring sensors are original or aging. Removing the cover takes most of the labor. An extra sensor costs far less than reopening the job later. Worn connectors and retainer rings fit that same logic, much like buying parts in pairs.
Four Fitment Checks That Decide the Match
Position, connector, finish, and trim decide whether a sensor works on your bumper. Check each one against the old sensor.
Position
Applications split sensors into front or rear, center or corner, inner or outer, and left or right. Part numbers often change by position. Some listings cover several positions, so confirm yours.
Connector and Body Shape
Terminal count, terminal shape, and connector gender must match your harness. Sensor bodies come straight or right-angle, and the angle decides whether the wire clears the cover.
Face Size, Ring, and Finish
Sensor face diameter and ring style vary by application. Finishes include black, primed, and a contrasting ring. The sensor should seat in your bracket or arrive with its own.
Trim, Package, and Production Date
Park assist packages differ by trim, and side or corner sensors take different parts than standard bumper sensors. A bumper redesign midway through a model run can change cutouts. Counts range from a few sensors to a dozen across vehicles, so match your quantity to your positions.
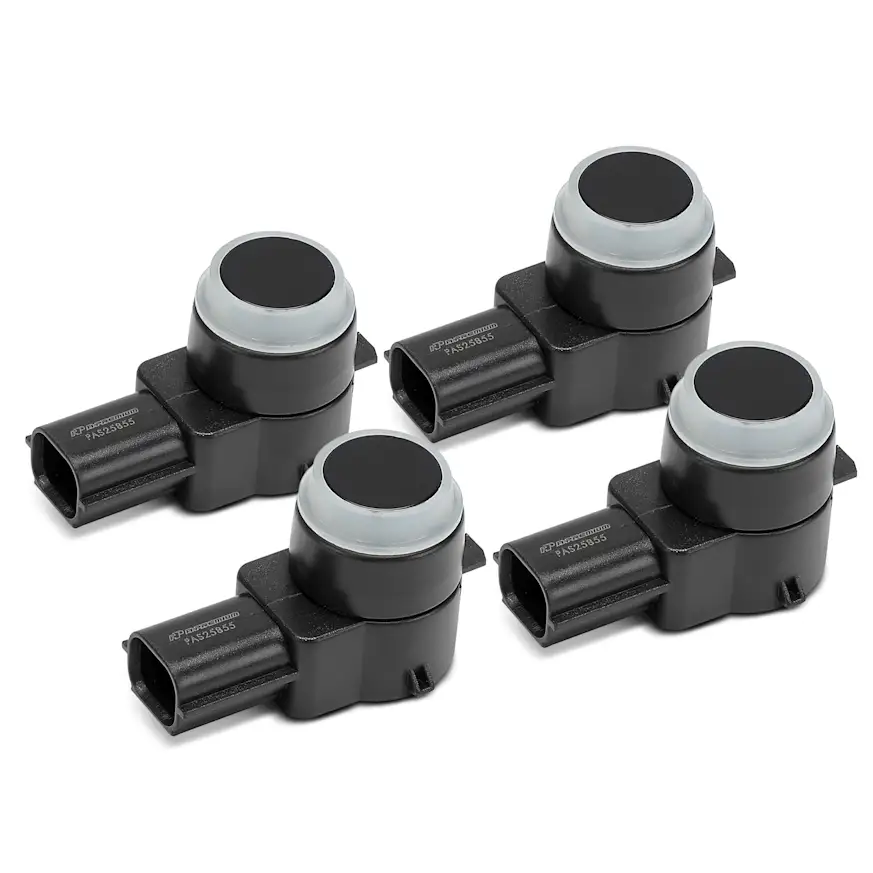
Open the Box Before You Open the Bumper
Compare the new sensors with the old ones in good light before any teardown.
• Count the sensors against your bumper positions.
• Compare terminal count, terminal shape, and connector gender.
• Match the body angle: straight or right angle.
• Check sensor face diameter and ring or bracket fit.
• Confirm the retainer rings, brackets, or bezels you need are included.
• Look for cracked faces, bent terminals, and crushed packaging.
Your One-Job Order Sheet in Six Steps
These six steps condense everything you need into one checklist.
1. Confirm the Vehicle
Select your exact vehicle, trim included, and read any park assist package or production date notes.
2. Confirm the Repair Scope
Decide between one position, one bumper, or both, and identify the failed position.
3. Confirm What the Listing Includes
Check quantity, retainer rings, brackets, and wiring.
4. Add the Small Items
Add cover clips, a pigtail where offered, and body color paint if needed.
5. Compare Against the Old Sensor
Study the old sensor’s connector, body angle, and face size when you can reach it.
6. Choose the Ownership Logic
Pick the smallest cart that matches how long you’ll keep the vehicle.
One Order For a Quick Fix
A low price on one parking assist sensor can result in a second purchase for retainer rings or clips. The right order costs a little more upfront and saves you time and effort. Fitment varies by vehicle, so confirm your application, then size the cart to the repair.
Keep Reading: Related Posts





Any information provided on this Website is for informational purposes only and is not intended to replace consultation with a professional mechanic. The accuracy and timeliness of the information may change from the time of publication.