Your car’s serpentine belt lives a tough life, constantly transmitting torque from the crankshaft to the accessories inside of the hot engine bay. Unsurprisingly, serpentine belts commonly require replacement due to wear and tear, but they’ll usually last anywhere from 60,000 to 100,000 miles unless they’re contaminated by engine oil. Part of the replacement process involves ensuring the belt is properly routed around the engine’s pulleys.
What is a Serpentine Belt?
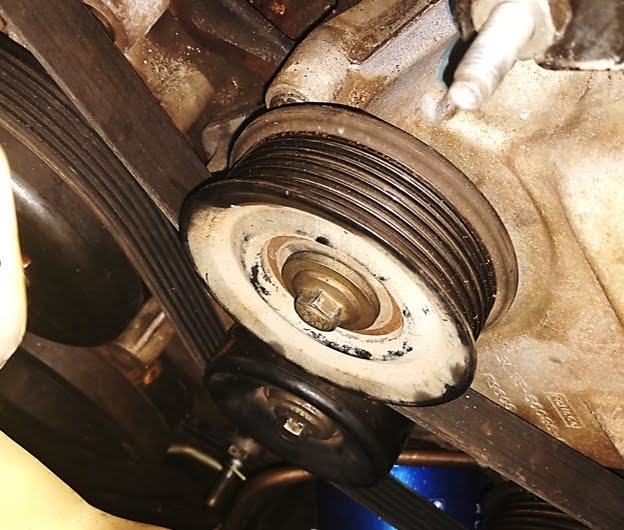
In the past, automobile engines had multiple V-belts (also known as fan belts). But now, nearly all modern vehicles have a single serpentine belt at the front of the engine. The serpentine belt wraps around several engine-driven accessories fitted with pulleys, as well as the engine’s crankshaft pulley, which provides the turning torque that is transmitted to the rest of the pulleys, some of which simply carry the belt and others drive components like the A/C, alternator, etc.

Serpentine belts are made from either neoprene rubber or ethylene propylene diene monomer (EPDM) synthetic rubber. Although EPDM is more robust than neoprene rubber, either material can eventually wear out and suffer from issues, such as cracks and fraying.
When you notice the serpentine belt shows signs of damage or wear, you’ll want to replace it right away to avoid a breakdown.
Can I Replace a Serpentine Belt Myself?
Generally, serpentine belt replacement is a fairly straightforward task, but in many cases it’s not as easy as it might seem. It’s worth a try, but if you’re easily frustrated and haven’t replaced a belt, you might want to find a YouTube video of somebody replacing a belt on an engine like yours.
But you can usually tackle the job yourself if you have the tools and the know-how.
Before you get started, you’ll want to have a belt routing diagram ready so you can refer to it. Don’t try to remember how the belt was routed. That’s foolhardy and will get you in trouble. If you can’t find a diagram, take some good photos of the belt routing with your phone before you start.
Where Can I Find the Serpentine Belt Routing Diagram for My Car?
Often, the toughest part of replacing a serpentine belt is ensuring the new belt is properly routed around the engine’s pulleys. Vehicle manufacturers produce serpentine belt diagrams that are designed to aid with this task.
Some vehicles have the serpentine belt diagram located on a decal somewhere in the engine compartment. But if your car does not have a decal, you can easily look up the diagram in a repair manual or repair database.
Often, the serpentine belt diagram you need might be behind paywalls. If you’re just a DIY enthusiast and not a mechanic, this might not be worth it. Luckily, many online resources like forums and YouTube videos can illustrate the serpentine belt’s routing without a diagram. Enter your vehicle’s year, make model, and “serpentine belt diagram into Google. For example, try searching “2013 chevy equinox serpentine belt diagram.”
You can also take photos of the belt before you start and some will even take a piece of paper and draw the belt routing using pen and paper so they won’t get lost in the process
How to Change a Serpentine Belt
If your serpentine belt or drive belt is showing signs of damage or wear, you might want to try replacing the belt yourself. Usually, the job is a fairly straightforward affair that only requires basic hand tools.
Check out our complete step-by-step guide on how to replace a serpentine belt yourself here.
Serpentine Belt Q&A
Below, you’ll find a couple more answers to common questions regarding serpentine belts.
How Long Does a Serpentine Belt Last?
Most serpentine belts are expected to last anywhere between 60,000 to 100,000 miles. Mileage can vary depending on the vehicle’s make and model. Serpentine belts can wear out ahead of their expected mileage and create squeaking noises. When this happens they’ll need to be replaced.
Are Serpentine Belts Directional?
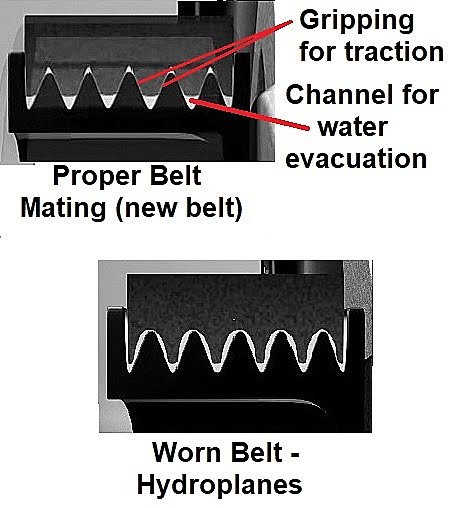
Because nearly all serpentine belts are symmetrical, a new belt’s direction of rotation usually doesn’t matter. What does matter, though, is that the new belt is routed correctly around the pulleys. It’s also important that the grooved side of the belt faces toward the pulley grooves.
And what about a used serpentine belt? According to the Gates Corporation, a leading manufacturer of drive belts, direction can make a difference when you’re reinstalling a used serpentine belt.
The company recommends drawing an arrow on your old serpentine belt so that you can reinstall the belt in the same direction. Doing so will ensure that the ribs on the drive belt are realigned with the pulley grooves they have adapted to.
Can You Put a Serpentine Belt on Backwards?
Although most serpentine belts are non-directional, it is possible to install some serpentine belts backwards. The grooved portions of the belt should be touching the grooved pulleys, and smooth areas of the belt should be touching the smooth pulleys.
You can ensure the belt is routed directly by consulting a belt routing diagram. Another option is to take a photo of the old belt before you remove it. That way, you can reference the photo when installing the new belt.
Check out these tutorial videos on how to replace your serpentine belt:
Get a Replacement Serpentine Belt that Fits Your Car
It’s a good idea to stop driving your vehicle if its serpentine belt develops an issue or fails. The cost of engine repair jobs can set you back by a considerable sum, so you want to avoid worsening existing issues or adding problems. Get your vehicle back on the road with a new serpentine belt from CarParts.com.
Get back on the road in no time with CarParts.com. We make searching for and ordering a compatible serpentine belt easier and faster with the help of our vehicle selector. Enter your vehicle’s year, make, and model to find parts that best fit your car or truck. Our strategically located warehouses allow us to ship your new serpentine belt quickly. You are assured of getting the new part within several business days, especially if you live in the continental U.S. and place your order before noon ET.
Make sure you get the new serpentine belt you need. Check out our selection of serpentine belts at CarParts.com and order today.
Keep Reading: Related Posts


Any information provided on this Website is for informational purposes only and is not intended to replace consultation with a professional mechanic. The accuracy and timeliness of the information may change from the time of publication.