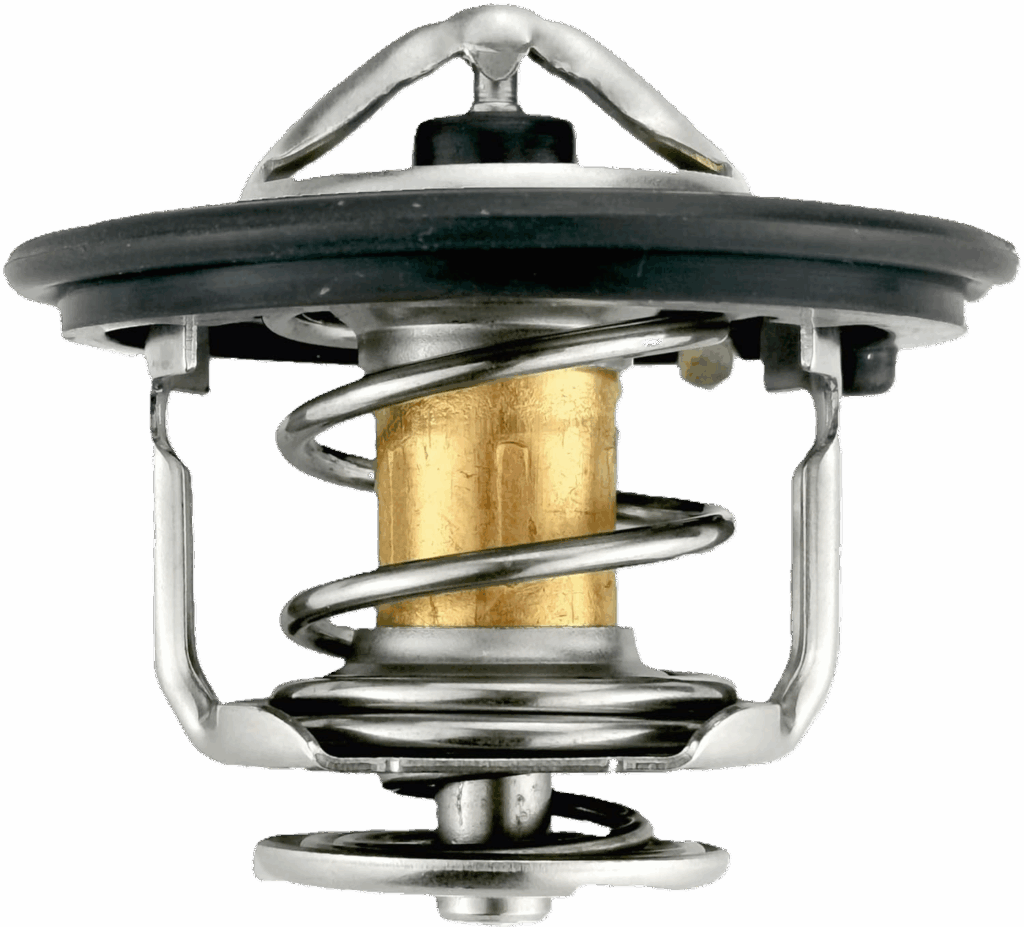
A thermostat is a small valve with a big job. It meters coolant so the engine warms quickly, runs in its sweet spot, and keeps emissions under control. If it sticks shut, heat builds fast and can warp heads or fry gaskets. If it sticks open, the engine runs cool, fuel use climbs, the check engine light comes on with a code P0128 or P0125, and the catalytic converter wakes up late. Either way, the bill that follows can dwarf the price of the part.
Today’s cars add twists. Many use a molded plastic housing with sensors, and some include an electrically heated, “map-controlled” unit that lets the ECU change the opening point under load. You get finer temperature control, but parts cost rises and access can be fussier—two big reasons estimates swing so much by model and engine layout.
How Much Does Thermostat Replacement Cost?
Expect a wide spread. On late-model cars, national estimate tools often show complete jobs landing in the mid-hundreds, with common ranges around $560–$750.
That variation comes from labor time, the part style (simple wax valve versus an integrated assembly), and how buried the unit is on transverse or V-configuration engines. Your local number generally follows flat-rate hours times the posted hourly rate—often $50 to $220—plus parts and coolant.
If your car uses a separate, easy-to-reach thermostat, the total can drop a lot, especially on older layouts. At the other end, electronic or integrated setups can push the parts line far higher than a basic valve. That’s why quotes for a base compact and a turbo luxury model can sit worlds apart. Always compare estimates that list parts, labor hours, and coolant so you know what you’re paying for.
Parts vs. labor: A plain thermostat might run $15–$60; an integrated or electronically assisted assembly can run a few hundred. Labor often falls between ~0.8 and 2.5 hours, but hidden fasteners, seized hardware, or extra trim removal add time. On many newer platforms, those variables guide the total more than the part itself.
Price Drivers
- Integrated housings with sensors or quick-connects
- Locations tucked under intake manifolds or behind accessory drives
- Required coolant drain/flush and careful bleeding
- Bundling with other cooling work (water pump, radiator, hoses)
Symptoms That Point to a Failing Thermostat
- Rapid overheating or a hot upper hose with a cold radiator: likely stuck shut. (Note: This is very uncommon on modern platforms; it happens most on pre-1990 engines.)
- Long warm-up, low gauge reading, weak cabin heat: likely stuck open or opening too soon.
- Gauge swings or sudden spikes: intermittent sticking, air pockets, or sensor hiccups.
- Check Engine Light with temperature plausibility codes: common as warm-up strategy goes sideways.
- Coolant crust at the housing: warped flange or a tired seal.
Why move quickly? Running cold burns more fuel and raises emissions; running hot risks head-gasket trouble and a damaged catalytic converter.

Can you Replace Your Car’s Thermostat at Home?
If you’re comfortable draining coolant, pulling hoses, and tightening bolts with a torque wrench, many cars are DIY-friendly.
Clear access and simple bleeding make it a weekend job. If the unit is buried—or it’s an electronically heated type—having a shop handle it can save knuckles and time.
Use the cost ranges above to decide whether tools and hours pencil out for you.
Tools and Materials
- Vehicle-specific thermostat and fresh seal/gasket (or complete housing)
- Correct coolant type and amount (check the owner’s manual)
- Socket set and torque wrench
- Hose-clamp pliers and a pick for old gasket material
- Drain pan and funnel; a spill-free/bleeder funnel is a big help
- Shop towels, safety glasses, gloves
How to Replace a Car Thermostat (Step by Step)
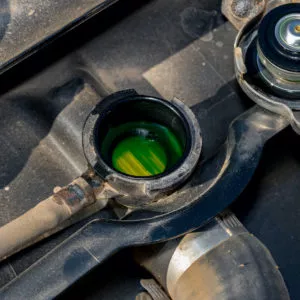
- Cool and depressurize: Park on level ground. Let the engine go cold. Feel the upper radiator hose for pressure; if there’s pressure, wait longer. Crack the cap slowly.
- Drain below the housing: Catch coolant in a pan. Save it if it’s still within service life and clean.
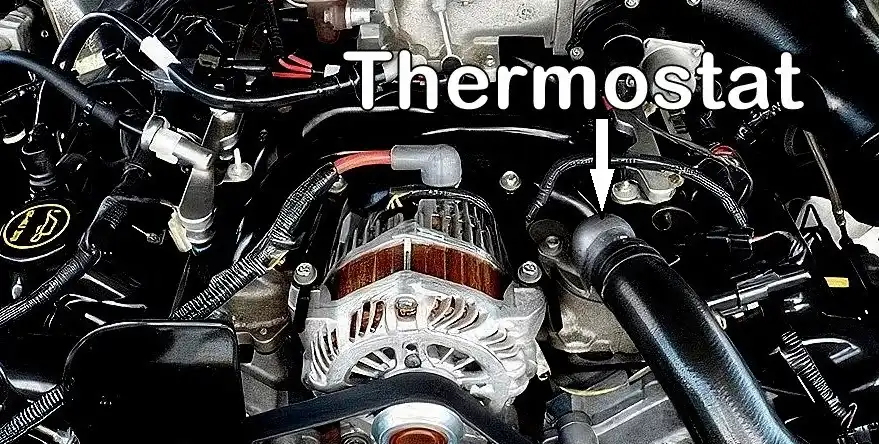
- Find the housing: Trace the upper radiator hose to the housing but realize that on some engines (like the 2.2L Camry) the thermostat is where the lower radiator hose connects to the block. Pull intake ducting or brackets if they block access.
- Remove housing and old thermostat: Note orientation. Some units have a jiggle pin or bleed notch that must face a certain way.
- Prep the surfaces: Clean the mating faces without scratching aluminum. Replace O-rings/gaskets—don’t reuse a crushed seal.
- Install the new unit: Match orientation and seating depth. Tighten bolts evenly to spec.
- Refill and bleed: Add the correct mix. Run the engine with the heater on. Use a spill-free funnel or the factory bleed ports until the thermostat opens and bubbles stop. Top off the reservoir.
Verify: Look for a steady gauge, hot air from the vents, and dry joints. With the A/C off, the engine cooling fan should turn off and on at least 2 times. If it comes on and stays on (A/C off), you may have low coolant or some other overheating issue. Take a short drive and recheck the level once cold.


Note: Brands that use map-controlled thermostats heat the wax pellet to shift the opening point based on load. No programming is usually needed after replacement, but a thorough bleed matters for sensor readings and fan logic.
Ways to Keep Replacement Costs Down
- Ask for line-items: flat-rate hours × hourly rate, part brand/PN, coolant type and quantity. Easy to compare, easy to question.
- Bundle wisely: If a pump, radiator, or hoses are due, knock them out together to avoid paying labor twice.
- Pick the part format that fits your car and your plans: If both a separate valve and an integrated housing exist, balance upfront price against leak resistance and future service time.
- Split the job: If your engine bay is roomy, you can handle the swap and have a shop vacuum-fill and bleed if your platform is picky.
More Tips for Thermostat Replacement
- Coolant chemistry matters. Mixing IAT/OAT/HOAT at random can make gel and sludge that clogs passages and ruins seals. If you’re not certain what’s in there, drain and refill with the spec from the owner’s manual rather than topping with a mystery jug.
- Bleeding isn’t optional. Air pockets cause hot spots, jumpy gauges, and heater complaints. Use the bleed points or keep a liquid head with a spill-free funnel until the system settles.
- Warm-up strategy affects emissions and drivability. A cool-running thermostat delays catalyst light-off and can set fuel-trim and thermostat-performance codes.
Map-controlled units exist. A small heater in the pellet lets the ECU run cooler under heavy load (for knock resistance) and warmer at cruise (for economy). Great for performance, pricier to replace.
Keep Reading: Related Posts


Any information provided on this Website is for informational purposes only and is not intended to replace consultation with a professional mechanic. The accuracy and timeliness of the information may change from the time of publication.