A transfer case motor looks like a simple bolt-on. The thumbnails on any parts site reinforce that: small black electric motor, a couple of gears, done. That impression is where most wrong orders start. Shoppers pick by photo resemblance, skip the fitment verification, and end up with a motor that either will not mount, will not mate to the shift shaft, or does not talk to the truck’s control module.
Before shopping by price or image, the smarter move is to ask what actually needs to end up in the cart for this repair to finish in one shot. The transfer case motor sits at the intersection of mechanical fitment, electrical connector design, and sometimes module relearn logic, and any one of those can send the part back in a return box.
The Job in One Sentence
The job is restoring electronic range selection so the vehicle reliably shifts between 2WD, 4WD High, 4WD Low, and (on some systems) neutral, without throwing a service 4WD light.
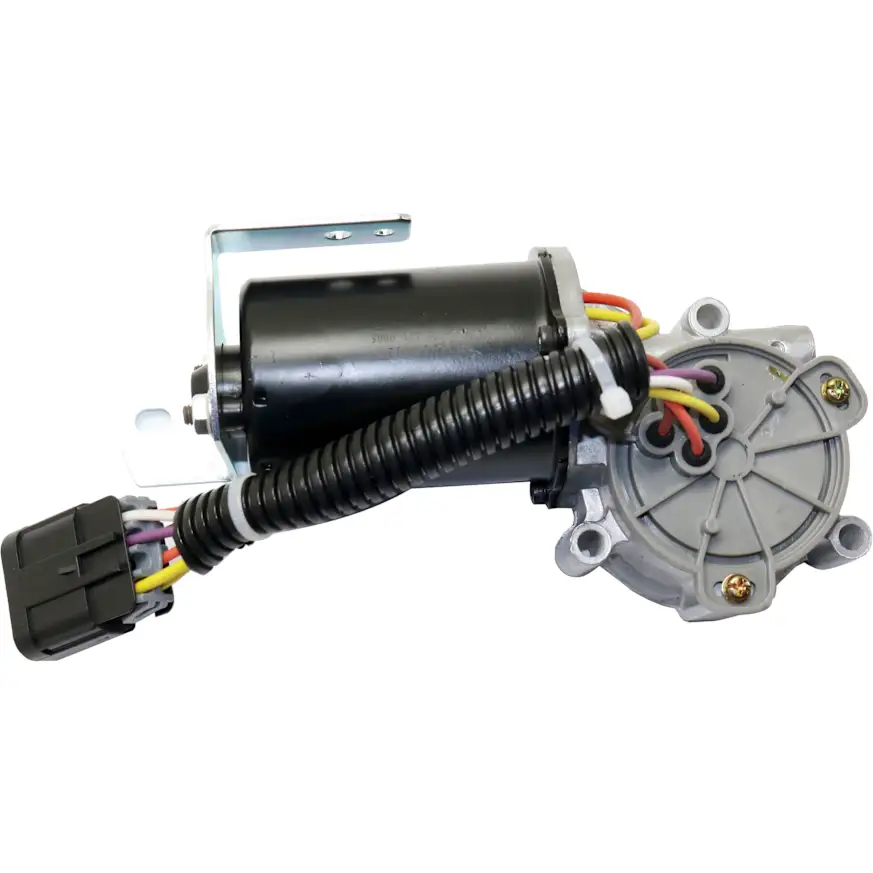
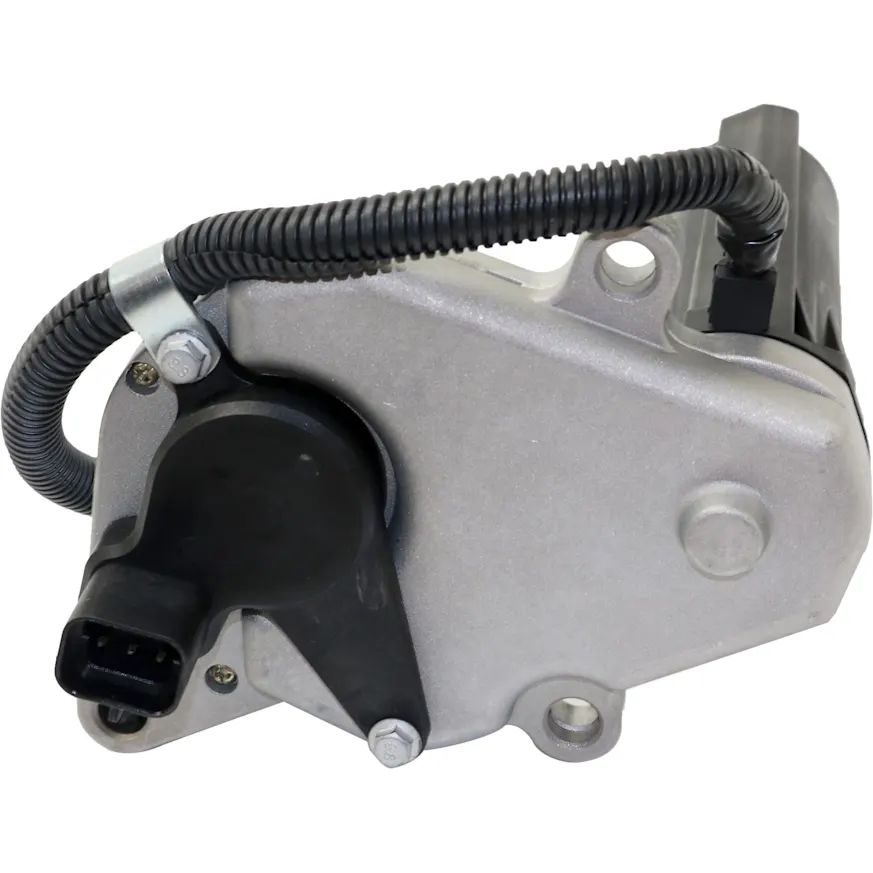
The transfer case motor, sometimes called a transfer case shift motor or encoder motor, bolts to the rear or side of the transfer case and rotates the internal shift shaft on command from the shift control module. On many trucks and SUVs it carries an integrated encoder or position sensor that reports shaft position back to the module. That means the order is rarely just “a motor.” It is a motor that matches the case, the connector, the encoder style, and the control strategy the vehicle uses.
Choose Your Cart Size
Three realistic cart sizes cover most transfer case motor jobs.
1. Minimum Viable Repair
Replace the motor only. Reuse the old gasket or O-ring if it is clean and intact.
Choose it if:
- The motor has been diagnosed as the failed component
- The transfer case itself shifts freely when turned by hand
- The vehicle is lower mileage and the surrounding area is dry
- The encoder or position sensor is integrated in the new motor
Typical cart:
- Transfer case shift motor
- A small tube of the correct gear lube or transfer case fluid to top off any loss during R&R
2. Smart Same-Access Refresh
Replace the motor plus the sealing and wear items exposed during removal.
Choose it if:
- There is visible fluid weepage around the motor mounting face
- The connector or pigtail looks heat-damaged or corroded
- The vehicle has moderate mileage and the owner wants the job to stay sealed for the long haul
Typical cart:
- Transfer case shift motor
- Motor mounting gasket or O-ring
- Transfer case fluid (correct spec for the case)
- Connector pigtail or repair harness if the terminals look tired
- Mounting bolts if the originals are corroded
3. High-Mileage Do-It-Once Reset
Replace the motor, refresh sealing and fluid, and address the electrical and mechanical items that commonly fail alongside it.
Choose it if:
- The truck has high mileage or lives in a heavy snow and salt environment
- There is a history of intermittent transfer case faults before the motor finally quit
- The owner plans to keep the vehicle several more years
Typical cart:
- Transfer case shift motor with integrated encoder if applicable
- Mounting gasket or O-ring
- Transfer case fluid, full drain-and-fill quantity
- Drain and fill plug seals
- Shift motor connector pigtail
- Relevant selector switch if the dash button is also flaky
What Is Commonly Ordered Together on This Job
Sealing items
The motor mounts against a machined face on the transfer case. Most applications use a gasket, an O-ring, or a formed seal behind the motor. Shoppers often assume the new motor includes this seal. It sometimes does, and it sometimes does not. Verify the listing and add the seal separately when in doubt.
Fluids
Pulling the motor can release a small amount of transfer case fluid, and a do-it-once job is a fair time to drain and refill. Transfer cases are particular about fluid spec. Using generic ATF or gear oil where the manufacturer calls for a specific synthetic transfer case fluid is a common cause of chatter and shift complaints afterward.
Hardware and fasteners
Motor mounting bolts on an older vehicle can seize or shear. Having fresh bolts on hand prevents a stalled repair on the bench.
Electrical items
The connector on the end of the factory harness dries out and cracks. A pigtail repair kit is cheap insurance and often lives one click away from the motor listing.
Full assembly vs. bare component
Some applications use a motor with a separate encoder or shift position sensor. Others integrate both into one unit. A bare-looking motor with no sensor housing will not work on a vehicle that expects an encoder feedback signal. This is one of the most common wrong-part returns in the category.
What People Forget Until the Vehicle Is Already Apart
Read these before the old motor is off the truck.
- Does the new motor include the gasket or O-ring, or is it bare?
- Does the listing match the connector style (round versus rectangular, pin count, shroud shape)?
- Is the encoder or position sensor integrated, or is it a separate piece being reused?
- Will the existing transfer case control module need a relearn or recalibration after installation?
- Are the mounting bolt holes the same pattern (three-bolt vs four-bolt, depending on application)?
- Is the internal drive feature a matching shape and spline, or tooth count, to engage the transfer case shift shaft?
- Has the transfer case fluid been checked, and is the correct spec on hand for top-off or a full service?
- Is the battery going to be disconnected long enough to cause a radio or module fault code?
When Replacing Only the Transfer Case Motor Is False Economy
Swapping the motor alone is reasonable when the vehicle is lower mileage, the motor face is dry, and the connector looks healthy. In that case, the minimum viable cart finishes the job and sends the truck back down the road.
It becomes false economy when the surrounding signs are already talking. A weeping motor face means the seal or gasket is compromised, and leaving it means coming back to the same spot later. A brittle or green-corroded connector means the new motor is about to inherit a bad signal path. A truck that has been throwing intermittent 4WD service lights for a year has probably also cooked the encoder and stressed the selector switch.
The labor to reach the transfer case motor is usually modest, but it still involves getting under the vehicle, managing fluid, and disconnecting electrical. Doing it twice because a two-dollar O-ring was skipped is the expensive outcome. The honest answer is that a mid-size cart, motor plus seal plus fluid plus connector, is the right call on most higher-mileage trucks.
The Fitment Splits That Break Transfer Case Motor Orders
Transfer case family
The same truck model year can ship with different transfer case units depending on trim and drivetrain. A motor that fits one case will not fit another. Match to the transfer case, not just the vehicle.
Connector and pin count
Listings often call out pin type versus blade type, or a specific pin count such as two-pin, four-pin, or multi-pin with an encoder feedback bundle. Getting this wrong guarantees a return.
Encoder integration
Some motors are a plain electric motor. Others include an integrated encoder or shift position sensor that reports back to the control module. These are not interchangeable.
Mounting pattern
Three-bolt and four-bolt patterns exist across the category, and the bolt circle and orientation vary. Photo resemblance is not enough.
Drive engagement
The feature that engages the shift shaft differs by case, whether a specific tooth count, spline, or flat-drive shape. A motor that bolts up but does not engage cleanly will not shift the case.
New vs. remanufactured
Both are legitimate, but warranty terms and core charges differ. Verify before checkout.
Production date or mid-year split
Some platforms changed transfer cases or connectors mid-production. When an application shows two similar options, the VIN often decides which is correct.
Delivery-Day Inspection Checklist
Compare the new motor to the old one before the truck is apart.
- Mounting bolt pattern and bolt circle
- Overall motor body length and orientation
- Drive feature shape, spline, or tooth count
- Connector shape, pin count, and pin style
- Presence of an integrated encoder or position sensor
- Included gasket, O-ring, or sealing surface
- Shaft depth and engagement geometry
- Packaging and shipping condition, with no cracked housings or bent terminals
Your One-Job Order Sheet for a Transfer Case Motor
- Confirm the vehicle. Year, make, model, engine, drivetrain, and where relevant the VIN or transfer case tag.
- Confirm the repair scope. Motor only, motor plus seal and fluid, or full high-mileage reset.
- Confirm what the listing includes. Gasket or O-ring, encoder integration, mounting hardware.
- Add the consumables and adjacent items. Correct-spec transfer case fluid, mounting bolts, connector pigtail.
- Bench-check the old part logic. Compare connectors, bolt patterns, and drive features before teardown.
- Choose the right ownership logic. Match the cart to how long the vehicle will be kept and how hard it works.
The Smart Way to Shop Transfer Case Motors
Shopping a transfer case motor by price and thumbnail is how returns happen. Shopping by repair scope, transfer case family, and connector match is how the 4WD light goes off and stays off.
The correct order is the one that finishes the job once. That means the motor, the sealing item that belongs behind it, the fluid it displaces, and the fitment details that prove the part actually matches the case on the vehicle. Cart size depends on the truck, the miles, and how the owner plans to use it. Get those three right, and the difference between a cheap-looking order and a correct order is measured in one trip under the vehicle instead of two.
Keep Reading: Related Posts


Any information provided on this Website is for informational purposes only and is not intended to replace consultation with a professional mechanic. The accuracy and timeliness of the information may change from the time of publication.