Picture a hot August trail, mud packed into your radiator, and the temperature needle creeping toward the red. That’s exactly where fresh coolant earns its keep. A coolant flush for ATV, UTV, and dirt bike owners is easy to put off. Skip it too long, though, and you risk the two things that kill an engine fastest.
Those two things are summer overheating and winter freeze damage. The good news is that this job stays within reach for most riders. You don’t need a lift or a wall of tools, just some time and the right fluid. This guide covers the full process plus the details other articles skip.
Why a Coolant Flush Matters for Your Machine
Coolant pulls triple duty in your engine. It carries heat to the radiator, keeps the water in the mix from freezing, and fights corrosion all year. Over time the rust fighting additives wear out and the fluid turns acidic. That acid then eats away at cylinder liners, the water pump, and the radiator.
Powersports engines hit this wall faster than cars do. They run hot, sit through long off seasons, and take a beating in mud and dust. Neglected coolant can crystallize, clog hoses, and block the radiator core. Staying ahead of that is cheap insurance against a costly teardown.
Coolant Change vs. Coolant Flush
Riders mix up these two terms all the time, so let’s draw a clean line. A coolant change just drains the old fluid and refills with new. A flush goes further and runs distilled water or cleaner through the system first. That extra step strips out rust, sludge, and leftover old coolant.
Reach for a full flush when the fluid looks rusty, when you switch brands, or when service has slipped. A straight change works fine for routine upkeep on a clean system.
Tools and Supplies You Will Need
Grab everything before you start so you’re not hunting for parts with coolant dripping. You probably own most of this short list already.
- Fresh coolant for your machine, plus distilled water if you mix your own
- An 8mm or 10mm socket or wrench, since most machines use one
- A drain pan and a sealed container for the old fluid
- A funnel with a long spout for clean pouring
- A torque wrench and a fresh sealing washer for the drain bolt
- Shop towels, protective gloves, and eye protection
Choosing the Right Coolant Before You Flush
This step trips up more riders than the flush itself. Powersports engines use aluminum parts, so they want a silicate free formula built for aluminum. It’s best to skip standard automotive antifreeze unless your manual specifically calls for it.
You’ll also run into two additive families. Older green fluid uses inorganic additive technology, while many newer machines want longer life organic additive technology. Green ethylene glycol is toxic, so plenty of aftermarket coolants use lower toxicity propylene glycol in blue or pink. Match whatever your manual specifies.
One rule beats all the others. Don’t mix coolants with different characteristics, since blending types can form sludge or fine grit inside the system. When in doubt, flush it fully and start fresh.
Find the right fluid for a quad in the ATV coolant catalog. Grab a side by side bottle in the UTV coolant selection. Find a two wheeler option in the dirt bike coolant lineup. Universal fit powersports coolants shine here, since a premixed formula nails the ratio across many machines.
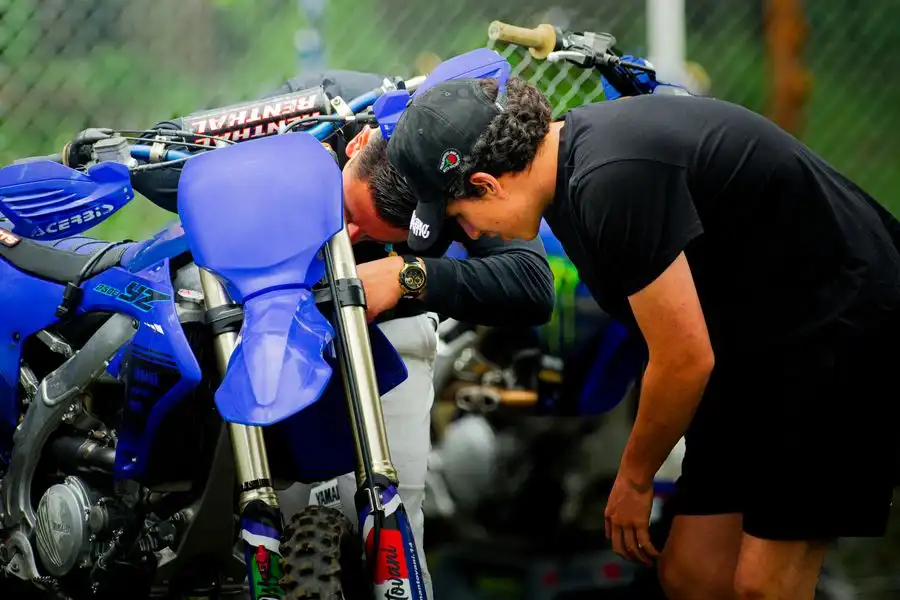
How to Do a Coolant Flush Step by Step
The process looks similar across machines, though bolt locations vary. Check your manual first, then follow this sequence. It works for a coolant flush on an ATV, UTV, or dirt bike.
1. Cool the Machine and Prep the Area
Park on flat ground and let the engine cool fully, ideally 30 to 60 minutes. A hot system can spray pressurized coolant and burn you. Set the parking brake and chock the wheels if needed.
2. Access the Radiator and Drain Bolt
On many ATVs and UTVs, you’ll pull plastics or a skid plate to reach the radiator and water pump. Keep that hardware in a labeled cup. On a dirt bike, the drain bolt usually sits on the water pump cover near the clutch. Watch for the copper sealing washer, since it’s easy to lose.
3. Drain the Old Coolant
Set the drain pan under the water pump, then pull the bolt or loosen the hose. Crack the radiator cap to speed the flow. Tilt the machine gently side to side to empty it fully. Drain and clean the reservoir tank too, if it has one.
4. Flush the System
If the fluid looks rusty or gritty, this is where the real flush happens. Fill the radiator with distilled water, run the engine briefly, cool it, then drain. Repeat until the water runs clear. Stick with distilled water, since tap water leaves mineral deposits.
5. Reinstall the Drain Bolt Correctly
Clean the bolt threads and check the sealing washer or O ring, swapping it if it’s worn. Torque the bolt to spec instead of muscling it, since aluminum cases strip easily. If you reconnected a hose, make sure the clamp sits snug and square.
6. Refill With Fresh Coolant
Pour new coolant slowly through a funnel to the bottom of the fill neck, letting air escape. If your machine takes concentrate, use a 50/50 blend with distilled water unless the manual says otherwise. Top the reservoir to the full line as well.
7. Bleed the Air and Test
Trapped air causes overheating, so bleeding isn’t optional. Start the engine with the cap off and add coolant as the level drops. Many dirt bikes lack a bleed screw, so stand the bike up and squeeze the hoses. Once the bubbles stop, cap it, ride briefly, then recheck.

Model Specific Tips Most Guides Skip
Every machine has quirks, and knowing them ahead of time saves real frustration. A few details make a big difference on powersports cooling systems.
Many small dirt bikes hold about a liter of coolant and ship without an overflow bottle. A little fluid may vent if you overfill. On four wheelers and side by sides, mud in the radiator fins is a top overheating cause.
Wash and straighten bent fins after muddy rides. Check the dirt bike radiator shrouds if yours are cracked, since they protect that vulnerable core.
While the system is open, look over the parts nearby. Wiggle the water pump impeller, since play points to worn bearings and seals. A water pump repair kit handles that fix. A fresh water pump seal keeps coolant out of your oil.
Also eye the cooling fan assembly, a worn cooling system thermostat, and tired radiator hose clamps before closing up. A basic coolant drain pan keeps the job clean. Grab a full replacement powersports radiator is worth pricing if the core is damaged.
Test Your Coolant Like a Pro
A few quick checks tell you a lot about coolant health. Test strips read the pH, and anything below 7 means the fluid has gone acidic. A refractometer reads freeze protection against a common target near minus 37 degrees Celsius. That confirms your mix is strong enough for winter.
Here’s a check almost no powersports guide mentions. Touch a voltmeter negative lead to the battery negative terminal, then dip the positive lead in the coolant. A reading above 0.3 volts points to electrolysis, a stray current that eats metal. Fresh fluid usually clears it right up.
How Often to Change Your Coolant
Your owner manual sets the baseline coolant change interval, usually two to five years. Treat that number as a starting point, not a hard ceiling. How and where you ride changes everything.
If you race, ride hard in summer, or crawl through mud, check the fluid each season. Refresh it more often when conditions get rough. Rusty color, floating debris, a sweet smell, or odd temps all say the same thing. Preventing UTV overheating and engine damage starts with catching these signs early.
Handle and Dispose of Coolant Safely
Used coolant is toxic and tastes sweet, which draws in pets and wildlife. Never leave an open container within reach, and wipe up spills right away. Keep it off your skin and out of the soil.
Don’t pour old coolant down a drain, a toilet, or onto the ground. Disposal rules vary by state. Take it to a recycling center or an auto parts store. A local shop can point you the right way if you’re unsure.
Keep Every Machine in Your Garage Running Cool
A coolant flush is a small job that protects a big investment. It applies to a quad, a side by side, or a two wheeler. It works best inside a bigger routine.
Learn the right ATV and UTV oil change cadence, plus how often a dirt bike needs maintenance. The car side matters too. This guide on how to flush automotive coolant covers the truck that tows your rig.
Your thirst for adventure doesn’t have an off season, and neither does caring for your ride. The JC Whitney Performance Hub at CarParts.com is built for the total garage, for everything you drive and ride. It backs its parts with a century of heritage and automotive grade fitment data. Browse the coolant, cooling parts, and gear you need today.
Keep Reading: Related Posts




Any information provided on this Website is for informational purposes only and is not intended to replace consultation with a professional mechanic. The accuracy and timeliness of the information may change from the time of publication.