Corrosion is one of the biggest issues car owners face. It not only diminishes a vehicle’s clean look but also affects its performance.
At its worst, rust could leave a structural weakness in crucial components, such as the frame, chassis, or floorboards. Luckily, there are ways to prevent or deal with corrosion like using dielectric grease.
What Is Dielectric Grease?
Dielectric grease is a waterproof substance made of oil and silica filler. It doesn’t conduct electricity. Instead, the grease seals out moisture and prevents corrosion. This is because silica filler is very hydrophobic, making it an excellent additive to limit moisture.
What Is Dielectric Grease Used for in Cars?
Dielectric grease prevents moisture from corroding different car components, such as spark plug boots, battery terminals, electrical connectors, headlight and lamp sockets, and fuse boxes.
Spark Plug Boots
Dielectric grease is also referred to as “tune-up grease” because of how it helps improve ignition systems, specifically by unsticking spark plug boots from the spark plug.
Some signs that the boots are stuck include engine hesitation, rough idling, reduced power, surging, and cracks in the plug wires, among others.
Applying dielectric grease limits the odds of the spark plugs and their boots fusing, as it makes it easier to pull them apart. This is crucial as forcibly removing the stuck boot from the spark plug could damage the latter’s wires.
Note that it’s not always a bad thing for them to stick together. It means the boots are sealed to the spark plug ceramic and the spark is not leaking out.
Battery Terminals
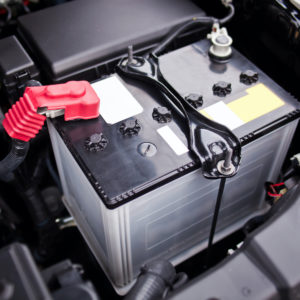
Battery terminals are prone to corrosion because the battery acid tends to cause a chemical reaction with the metal terminals. Look for flaky and rusty-looking spots on the terminal to determine if the battery is corroding.

A symptom you should also keep an eye out for is undercharging, which usually occurs when rust forms on the negative battery terminal. This could lead to hardware damage inside the threads.
Applying a small amount of dielectric grease on the terminals helps repel dirt and inhibit corrosion.
Electrical Connectors
Similar to spark plug boots, electrical connectors tend to stick to the socket. This issue usually occurs due to rusting, especially if you haven’t disconnected the connectors for a while.
Of course, you can combat this by applying a dab of dielectric grease to the connector body each time you disconnect it from the socket. The grease acts as a lubricant and as a moisture repellant.
Headlight and Lamp Sockets
A corroding light bulb can be hard to remove because of the added friction due to built-up rust. It might also result in a dimmer bulb light because it could limit the flow of electricity between the socket and the bulb.
To prevent these problems, you can apply a thin layer of dielectric grease to the sockets. The lubricant will limit corrosion, making it easier to remove the bulb. It also prevents the gasket from sticking to the back of the housing.
Fuse Boxes
You can use dielectric grease to keep dirt and moisture out of your fuse boxes. It’s especially useful when you’re off-roading, as there’s an increased chance of dirt and debris reaching the fuse boxes.
How to Apply Dielectric Grease
While you can use dielectric grease for different components, the way to apply it usually follows the same steps.
- Step 1: Make sure the car is parked and cooled down to make it easier to remove the component you need to grease up.
- Step 2: Locate the component you want to use dielectric grease on.
- Step 3: Remove the component and clean it first if possible to make it easier to apply the grease.
- Step 4: Squeeze a small amount of grease onto a clean piece of cloth. Adding too much could prevent a good electrical connection, depending on the part you’re working on.
- Step 5: Use a cotton swab to smear the grease onto the corroding area.
- Step 6: Put the component back in place if you removed it.
If you’re unsure of how to or how much grease to use, you can consult a professional mechanic. The amount of grease you should use would differ depending on the corrosion’s severity.
Where to Buy Dielectric Grease for Your Vehicle
If you want to keep driving your vehicle for a long time, you should always be on the lookout for any signs of corrosion. Even the tiniest spot of rust can eat away at the metal of your engine, and it can cause even more damage if ignored. However, you can prevent all of this by applying dielectric grease to your vehicle. Luckily, getting dielectric grease is fast and easy with CarParts.com.
CarParts.com offers a wide selection of dielectric grease, sourced from only the most trusted manufacturers in the industry. You can easily browse through our catalog with the help of our vehicle selector and search filters. Just be sure to input your car’s correct details. CarParts.com also guarantees fast shipping, thanks to our strategically located warehouses around the US. Order by 12 p.m. ET, and you can expect your package to arrive in as fast as two business days.
Don’t wait until rust eats away at your spark plugs, batteries, and electrical connectors before applying dielectric grease. Check out our catalog of high-quality dielectric greases at CarParts.com today!
Any information provided on this Website is for informational purposes only and is not intended to replace consultation with a professional mechanic. The accuracy and timeliness of the information may change from the time of publication.


