
Fuel pump replacement cost in the US usually falls between about $400 and $1,500+, with many modern vehicles landing around $1,000 to $1,300 for parts and labor. The final number depends on pump access, whether the shop replaces a full in-tank assembly, and whether your engine uses direct injection with an additional high-pressure pump.
How much does fuel pump replacement cost?
Most drivers see four-figure quotes because modern pumps are often tank-mounted and labor can involve lowering the fuel tank. If you’re pricing the price to swap a fuel pump, expect the estimate to swing widely based on what your vehicle needs and how the shop approaches the job.
Here are common published ranges you’ll see, and what they usually represent:
| Published price range | What it commonly covers | What can push it higher |
| $75 to $250 (parts only) | DIY parts cost for some vehicles | Full assembly vs pump-only, brand tier, included sender/strainer |
| $390 to $900 (parts + labor ballpark) | Lower-end “fair repair range” style estimates | Hard-to-reach pump, rusted hardware, higher labor rates |
| $1,000 to $1,300 (typical modern job) | A common modern total with labor and parts | Difficult access, higher parts prices, vehicle age/region |
| $1,226 to $1,479 (average estimate) | Aggregated estimates with higher average parts pricing | Full assembly replacement, higher-end applications |
What the bill is made of:
- Parts: The pump itself may be sold alone or bundled in a larger assembly. Many late-model applications skew higher than older “pump-only” pricing.
- Labor: The labor charge for the pump job can climb when the tank must be lowered, the exhaust needs loosening, or straps and fasteners are heavily corroded.
- Add-ons: A shop may quote seals, a strainer, a filter, or electrical repairs if testing shows low voltage or overheated terminals.
Tip: Ask the shop if the estimate includes a new tank seal/O-ring. A reused seal is a common reason for fuel odors and comebacks. But typically a new fuel pump will come with a replacement seal or gasket.
Why can the same repair be $500 on one car and $1,500 on another?
The overall bill for fuel pump service changes mainly because access and system design change. Some vehicles have a service access panel above the tank, while others require draining and lowering the tank to reach the pump.
These examples show why quotes can look nothing alike across common vehicles:
| Example vehicle | Why the quote can change | What to verify before you order parts |
| 1997 Subaru Outback wagon with the 2.5-liter engine | Age can add time because hoses and fasteners may be brittle or rusted | VIN-based fitment, connector style, seal type |
| BMW | Parts pricing and system complexity can be higher, especially on newer designs | Engine type (port vs direct injection), pressure rating, sensor connectors |
| Ford F-150 | Larger tanks and underbody packaging can increase labor time | Cab/bed configuration notes, harness routing, lock ring type |
| Ford Ranger | Similar job types can vary by year and tank layout | Build date split, connector pin count, returnless vs return system |
| Chevrolet Equinox | Packaging and access differ by generation | Trim/engine code, tank access, emissions package |
| Silverado 1500 | Trucks can have heavier tanks and rust-prone strap hardware | Strap condition, line quick-connect size, correct seal |
| Dodge Charger | Layout differences across model years change access time | Engine code, module style, EVAP line routing |
| Chevrolet Cruze | Small cars can still vary by year and fuel system design | Pump assembly variation, fuel line fittings, sensor style |
| Tahoe SUV | Larger SUV tanks and skid plates can add labor steps | 4WD hardware clearance, tank shield presence, vent line condition |
| Dodge Durango | Similar SUVs can differ by tank shape and heat shielding | Heat shield placement, connector location, seal/lock ring style |
Note: The same nameplate can change designs mid-generation. Always match Year/Make/Model/Engine and confirm the part number against your build details.
What are you replacing: pump only, a module, or a high-pressure pump?
Many vehicles replace more than the electric motor alone because the pump lives inside an assembly that also supports filtration and level measurement. In modern tank-mounted setups, the pump sits in the fuel tank for cooling and safety, and it supplies pressure to the engine’s fuel delivery system.
A few common configurations matter for pricing and parts selection:
- In-tank electric pump systems: The pump is usually located inside the fuel tank.
- Direct-injection gasoline systems: These use a low-pressure pump feeding an engine-mounted high-pressure pump, with low-side supply around 6 bar and high-side pressure commonly up to 200 bar (and some systems designed up to 350 bar).
- What you buy: Many applications are sold as a complete pump module assembly, which can include the housing, strainer, and the fuel-level sender sensor that drives the gauge.
The parts price for a direct-injection high-pressure pump is often higher because the part is built for extreme pressure and tight tolerances, and replacement can involve additional procedures and verification.
Pro Tips are nuggets of information direct from ASE-certified automobile technicians working with CarParts.com, which may include unique, personal insights based on their years of experience working in the automotive industry. These can help you make more informed decisions about your car.
Pro Tip: But labor for replacing a GDI high‑pressure pump is usually much lower than labor for replacing an in‑tank pump. The high pressure fuel pump is usually mounted on the engine and takes about 1–2 hours, while an in‑tank pump often requires 2–4+ hours because unless there is an access point in the body without removing the tank, the fuel tank must be drained of fuel, then lowered or removed. This difference is reflected in national averages: in‑tank pump labor commonly ranges from $180–$1,080, while HPFP labor is typically $90–$360 depending on the vehicle.
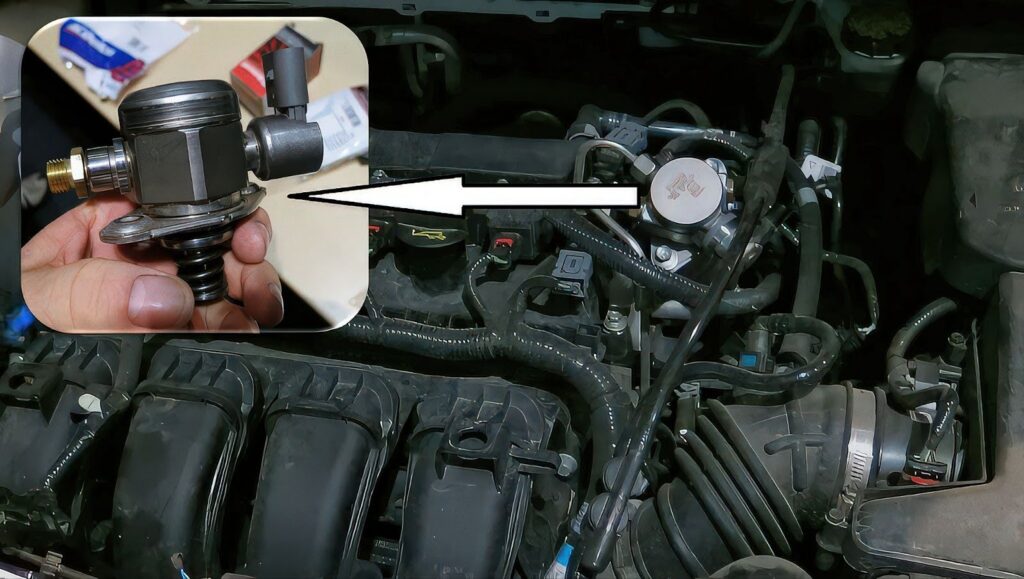
Warning: Gasoline direct injection hardware operates at very high pressure. Do not loosen high-pressure fittings or lines unless the OEM procedure specifically calls for it and you have the correct tools and safety steps.
What symptoms point to a failing fuel pump, and is it safe to drive?
A failing pump often shows up as hard starts, whining from the tank area, loss of power under load, sputtering, stalling, or a no-start. A weak pump can still run the engine at idle but fall on its face when demand rises.
Driving can be risky when symptoms include random stalling or sudden loss of power in traffic. That risk is bigger than the inconvenience because the vehicle can become a road hazard.
Common symptom patterns:
- Whine that gets louder over time from the tank area
- Long crank before starting, especially after sitting
- Hesitation or power loss during acceleration or climbing
- No-start with no audible prime sound
- Intermittent overheat-like behavior where the vehicle runs, then quits, then restarts after cooling (a pattern described in published warning-sign lists)
Tip: Many systems prime for about 2 to 5 seconds when you first switch the key to ON. A missing prime sound does not prove the pump is dead, but it’s a strong clue to keep testing.
How can you confirm the pump is the problem?
A correct diagnosis prevents expensive parts swapping. Low pressure and flow can be caused by wiring, voltage drop, poor grounds, or contamination, so testing needs to check both fuel delivery and electrical supply.
Tools that help narrow it down:
- Fuel pressure gauge (or an OE-compatible scan tool PID if the system supports it)
- Digital multimeter
- Test light or relay tester
- Basic hand tools for access panels and connectors
- Safety glasses and gloves
Fast checks that often save money:
- Turn the key to ON and listen for the prime run at the tank (many pumps run briefly until RPM is detected). Many newer GDI vehicles will turn on the in-tank pump when the driver’s door is opened.
- Check fuses and the pump relay (swap with a same-type relay only if the circuit design allows it).
- Verify battery voltage and charging health before chasing fuel delivery problems.
- Run a pressure test and compare the result to the OEM spec. Low pressure can be pump wear, a restricted filter/strainer, or low voltage.
- Perform a voltage drop test on power and ground while the pump is commanded on; one published method targets less than 0.2 V on each side, while another diagnostic reference stresses 0.1 V or less as a practical goal. Always defer to the vehicle’s service information.
Warning: Do not shove multimeter leads into sealed terminals. Terminal spread increases resistance and can create heat at the connector. Use proper back-probing tools.
Symptom-based shortcut table
| Symptom | Likely cause | What to check next |
| Long crank, then it starts | Pressure bleed-down, weak pump, or check valve issue | Pressure hold test and leak-down rate |
| No prime sound | Electrical supply issue or seized pump | Fuse, relay function, voltage at connector during prime |
| Power loss under load | Low pressure/flow or restricted filter/strainer | Pressure under load, filter history, tank contamination |
| Fuel gauge reads wrong | Sender issue inside the tank assembly | Scan gauge PID vs cluster, connector condition |
| Repeat pump failures | Overheated terminals, poor ground, or contamination | Inspect connector melting, bucket/strainer debris |
Anecdotal insight: In one long-running community thread, owners repeatedly chased a no-start with parts swaps before focusing on relay control and wiring integrity. Treat that as a reminder to test voltage and grounds before replacing major parts.
What does fuel pump replacement involve at a shop or at home?
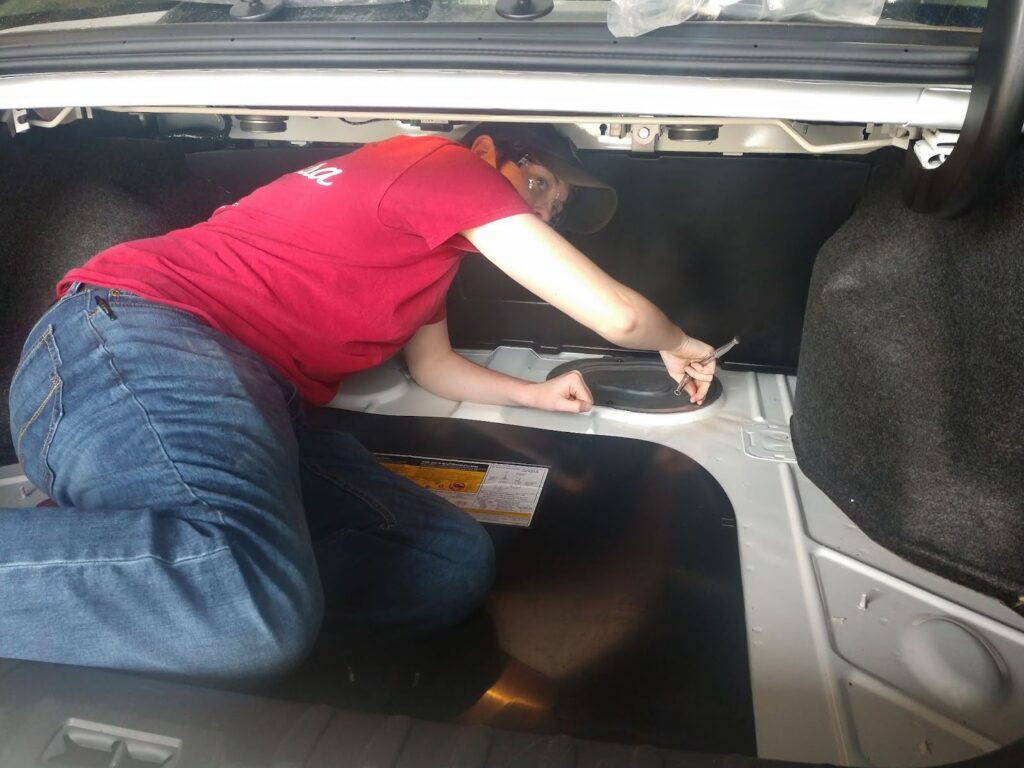
Most replacements follow the same safety pattern: depressurize, disconnect power, access the pump, replace seals, then leak-check. Many vehicles are serviced through an access panel, but others require draining and lowering the tank to reach the pump.
A typical high-level replacement sequence looks like this:
- Disconnect the battery.
- Relieve fuel system pressure using the OEM procedure.
- Access the pump through an interior access cover or support and lower the fuel tank if needed.
- Disconnect electrical connectors and fuel lines with the correct quick-disconnect tools.
- Remove the lock ring or fasteners and lift out the assembly carefully.
- Install the new seal/O-ring, install the new pump or assembly, and torque/lock the retainer correctly.
- Reconnect lines and connectors, then prime the system and check for leaks and fuel odor before road testing.
Warning: If you smell raw fuel after the job, do not start the engine and do not park the vehicle in an attached garage. Tow it for inspection if needed.
Parts and supplies that commonly come up:
- Fuel pump (or assembly)
- Tank seal/O-ring
- Strainer (if not included)
- Fuel filter (where serviceable)
- Optional: new wiring pigtail if terminals show heat damage
- Optional: replacement relay if testing shows intermittent control issues
How do you pick the right replacement fuel pump?
Correct fitment matters as much as quality because a wrong connector or pressure spec can create a no-start, drivability issues, or repeat failure. Match Year/Make/Model/Engine, verify part numbers, and compare connector shapes before you click buy.
Fitment checks that reduce returns:
- Engine type: Port injection vs direct injection changes pressure requirements and parts count.
- Connector details: Pin count, keying, and harness routing
- Tank design: Lock ring style, depth, and sock/strainer position
- Level sender compatibility: Gauge and sender designs vary by year/trim
- Emission package and build date: Mid-year splits are common on fuel delivery parts
- Included hardware: Seal/O-ring, strainer, and lock ring are not always included
Tip: If the old connector shows discoloration or melting, replace the connector or pigtail along with the pump. A new pump cannot fix high resistance in the harness.
When does DIY make sense, and when should you pay a pro?
DIY can make sense when the vehicle has a straightforward access panel, you have a safe workspace, and you can run pressure and electrical tests first. Professional repair makes sense when access requires tank removal, corrosion is heavy, or the vehicle uses a high-pressure direct-injection system that needs more specialized procedures and verification.
DIY is a better fit when:
- You can confirm voltage, ground, and pressure with basic tools first
- The tank is near empty and easy to support safely
- You can perform a careful leak check afterward
A shop is usually safer when:
- The tank must be lowered and you don’t have lifting equipment
- Fuel lines and fittings are heavily rusted
- The diagnosis suggests a wiring issue that needs harness repair
- You’re dealing with direct injection components and high-pressure safety
What causes repeat fuel pump failures after replacement?
Repeat failures usually come from fixing the symptom instead of the cause. The most common root causes are electrical resistance and heat at terminals, contamination in the tank, and fuel starvation/overheating from consistently running low fuel.
Mistakes that lead to comebacks:
- Ignoring melted or loose terminals at the pump connector (high resistance makes heat)
- Skipping voltage-drop checks and blaming the pump for low pressure
- Reinstalling without cleaning contamination found on the strainer or inside the assembly bucket
- Driving habitually at very low fuel levels, which can make the pump run hotter because it relies on fuel for cooling
- Forgetting new seals and then chasing leaks or odor later
Note: A clogged fuel filter can force the pump to work harder. If your vehicle has a serviceable filter, replace it on schedule and treat it as pump protection.
Keep Reading: Related Posts


Any information provided on this Website is for informational purposes only and is not intended to replace consultation with a professional mechanic. The accuracy and timeliness of the information may change from the time of publication.


