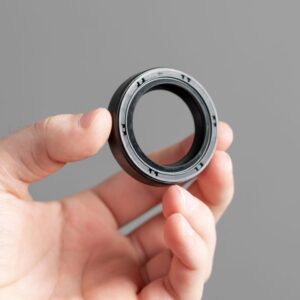
In order for the engine to function correctly, each of its parts must be in top condition. This includes even the smallest components that some might overlook, such as the camshaft cap. If the camshaft cap is damaged or mounted incorrectly, the camshaft can break down, causing the entire engine to malfunction. Because of this, it’s important to know how to replace a camshaft cap properly.
Why You May Need to Replace Camshaft Caps
Camshaft caps need to be replaced in sets rather than just replacing one cap.
Camshaft caps, unlike rod bearing and main bearing caps, almost never have bearings. The cap itself is the bearing, and may wear because of the constant upward pressure of the valve springs on the camshaft. The head typically only wears where the cam spins if the engine is starved for oil, and that requires replacing the cylinder head.
But cam caps, as they wear, can allow the camshaft journal clearance to increase to the point of losing oil pressure when the engine is hot. Thus, replacing cam caps might slightly help with an oil pressure concern if the pump and other bearings have been replaced and the oil pressure is a bit lower than desired. This is particularly important on engines that use oil pressure timing chain tensioners.
Camshaft caps need to be replaced in sets rather than just replacing one cap.
– Richard McCuistian, ASE Certified Master Automobile Technician
Camshaft Cap Replacement Tips
Replacing a camshaft cap isn’t easy, but that doesn’t mean you can’t give it a try. If you’re up for the task, here are some tips on how to replace a camshaft cap by yourself:

Prepare the Necessary Tools
It’s best to prepare everything you need before you start working on your camshaft cap. You’ll save a lot of time this way, and it’s also a great way of making sure you have all the necessary tools on hand. You’ll need a torque wrench, shop towels, and lubricant (some grease will do). Don’t forget to get replacement cam caps that fit your engine.
Remove the Rocker Arm (Valve) Cover
Before you can access the camshafts in an overhead cam engine, the valve cover needs to be removed. Sometimes removing the valve covers can be quite demanding, particularly on V6 and V8 engines and even on some 4 cylinder platforms. You need to do whatever you can to clean the top of the engine with compressed air to remove any debris that will have settled around the valve covers, then do whatever your manual tells you to do to remove the covers.
Carefully Remove the Camshaft Cap Bolts On the Cap
First, always remove and replace each cap without loosening or removing other caps if you’re just replacing the cap. The valve spring pressure will unseat the camshaft if you loosen them all, and you don’t want that. So again, focus on just one cap and change that one, then move on to the next one after carefully torquing the bolts to specs on the cap you’ve replaced.
Lubricate the Camshaft Cap
Apply clean engine oil or a bit of grease, then apply a light coat on the camshaft journal and camshaft bearing cap. This provides lubrication as soon as the camshaft begins to spin. Note that this step is very important.
Install and Tighten the Camshaft Cap Properly
Make sure you install the cam cap the right way. It will only fit one way and if you install it backwards you may crack the cap when torquing the bolts. Make sure it’s configured the same way as the caps you haven’t yet replaced. Refer to the instruction manual of your cam cap for the correct torque specs.
How Much Does a Camshaft Cap Replacement Cost?
The exact price can vary depending on your vehicle’s year, make, and model, but you can expect to spend anywhere between $10 and $100 on a brand-new camshaft cap.
How to Get a Replacement Camshaft Cap
Don’t hold off on camshaft cap replacements. Despite its size, this component plays an important role in keeping the camshaft operative.
With the help of CarParts.com, you won’t have to worry about finding auto parts compatible with your vehicle. The best part? You don’t even have to take one step outside your home to get your hands on a new camshaft cap.
We source our parts from some of the most reliable names in the industry. Each item in our catalog is carefully selected by a team of professionals to guarantee both quality and longevity. This means you won’t have to worry about your replacement parts failing you any time soon.
To get started, simply use your mobile device or computer to download our mobile app or visit our website. Use our vehicle selector and input your vehicle’s details. Make sure to select the exact year, make, and model. This way, you can easily find auto parts designed for your vehicle.
Any information provided on this Website is for informational purposes only and is not intended to replace consultation with a professional mechanic. The accuracy and timeliness of the information may change from the time of publication.


