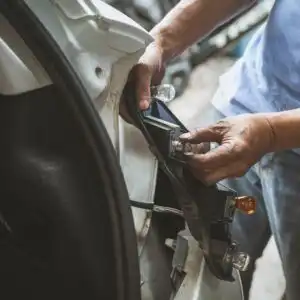
Swapping the board takes 30 to 60 minutes per side and only needs basic hand tools. Disconnect the battery, open the lamp housing from inside the trunk or cargo area, unplug the harness connectors, release the old board, seat the new one, then test every lighting function before you close everything up. A tail light circuit board is the plastic backing plate that holds the bulb sockets and carries power to them, which is why a failure usually kills one function while the rest keep working.
Key Takeaways
- A dead light with a good bulb usually points to the board, its sockets, or the connector.
- Plan on 30 to 60 minutes per side, and pull the negative battery cable before you touch anything.
- Snug the mounting fasteners lightly, roughly 1 to 3 foot-pounds, so the plastic doesn’t crack.
- Water intrusion and corrosion cause most failures, so fix the leak or the new board will also fail.
- Test running lights, brake lights, turn signals, and reverse lights before final reassembly.
Signs the Board Has Failed
The classic symptom is a bulb that looks perfect and still won’t light. Other giveaways include a brake light that works while the running light doesn’t, flickering that changes when you thump the lens, two or three functions dead on one side while the other side is fine, and a bulb-out warning on the dash that keeps returning after a fresh bulb.
Corrosion is the common thread. The board’s copper traces and socket contacts sit right behind the lens, and once moisture gets in, the contacts turn green or chalky white and stop passing current cleanly.
Bulb vs. Board: How To Tell Them Apart
Swap a good bulb into the dead socket first, since that’s a two-minute test. If it still doesn’t light, move to a multimeter. Backprobe the socket with the circuit switched on and look for battery voltage on the feed pin and a clean ground on the return. Voltage at the harness connector but nothing at the socket means the trace or contact on the board has failed. No voltage at the harness connector points upstream to a fuse, a switch, or the body control module instead.
Tools and Parts To Gather
- Hand tools. Socket set and ratchet, Phillips and flathead screwdrivers, and a plastic trim tool for pry-off panels.
- Test gear. A multimeter and a flashlight or work light so you can see inside the housing.
- Torque wrench. Useful for the housing bolts and the small board fasteners, since these threads strip easily.
- Parts. The replacement board assembly for your exact vehicle’s year, cab, and trim, plus a housing gasket or foam seal if the original is flattened or torn.
- Consumables. Dielectric grease for the connectors, and new fasteners if any came out rusted or rounded.
Verify the part number against the board in your hand, not just the vehicle year. Trucks and SUVs often use different boards for base and upgraded lighting packages, and a listing that looks correct can still have the sockets in the wrong spots.
Step-by-Step: Replacing the Board
- Disconnect the battery. Loosen the negative terminal, pull the cable clear, and keep it from springing back onto the post.
- Open the housing. Most assemblies release from inside the trunk or cargo area. Pull back the trim panel or access cover, remove the two or three bolts or wing nuts, then ease the lamp straight back so the alignment pins clear the body.
- Free the board. Squeeze the plastic retaining tabs or back out the small screws holding the board to the housing. Put every fastener in a cup so none get lost.
- Unplug the connectors. Press the release tab and pull on the connector body, never the wires. If one feels stuck, rock it gently side to side rather than yanking. Photograph the orientation before it separates.
- Inspect the housing. Check for cracks, condensation, a lens seal that’s lifted, and corrosion on the mounting surface. Fix the water path now or you’ll be doing this job twice.
- Seat the replacement. Align the board with its mounting holes and clip locations, with the connector sockets facing the harness. Press until the tabs click, then tighten fasteners to roughly 1 to 3 foot-pounds. Overtightening cracks the board.
- Reconnect the harness. Look inside each connector for bent, green, or missing pins, add a thin film of dielectric grease, and push until you hear the latch click.
- Test before you close it. Reconnect the battery and run through running lights, brake lights, turn signals, hazards, and reverse. Have someone press the brake pedal while you watch. If a function is dead, disconnect the battery again before you go back in.
- Reassemble. Seat the gasket, confirm no wires are pinched behind the housing, snug the bolts evenly, and refit the trim.

Safety note: Rear lighting is what keeps following traffic from hitting you, so don’t drive with a broken brake light or turn signal. If a function stays dead after the swap, have a shop check the harness and grounds before you keep driving at night.
Why These Boards Fail
Moisture is the number one cause. A cracked lens, a hardened gasket, or a car wash aimed straight at the seam lets water sit against the contacts, and corrosion does the rest over a few seasons.
Mounting hardware is the second cause, and it’s a real issue for trucks in salt states. The tabs and brackets that hold the lamp to the body rust through, the assembly starts to shift, and the connector gets stressed every time you close the tailgate. This can be a constant problem for owners of older Silverados and Sierras. If the bracket tabs are gone, replace or repair the bracket at the same time, since a new board bolted to a loose housing won’t stay sealed.
Most tail light circuit board replacement work goes sideways for one of two reasons: skipping the leak that caused the failure, or forcing a stuck connector and breaking the latch. Both are avoidable with 10 extra minutes.
When To Call a Professional
Hand it off if you see burnt or melted wiring, multiple corroded pins in the harness connector, rodent damage, structural rust where the lamp mounts, or a board that fails again shortly after installation. Repeat failures usually mean a wiring or grounding fault upstream, and repairing this safely calls for a wiring diagram and a scan tool.
Frequently Asked Questions
Only far enough to get it fixed. A missing brake light or turn signal is a real crash risk and a ticketable equipment violation in most states.
Not always, but it’s worth doing while the housing is open. Old bulbs that ran through a corroded socket often have pitted contacts of their own.
It isn’t required, but it’s cheap insurance. A thin film seals moisture out of the connector without blocking the metal-to-metal contact.
Usually because water is still getting in, or a ground point is corroded. Reseal the lens, check the housing drain, and clean the chassis ground before buying another board.
It can, though used boards from the same climate often carry the same corrosion you’re trying to escape. Inspect the sockets closely before you buy.
Keep Your Rear Lighting Sharp
Don’t worry, it’s easy to buy parts to fix a failed board. CarParts.com stocks tail light boards, complete lamp assemblies, gaskets, and bulbs for most makes and models, with fitment filtered to your exact vehicle. Enter your ride’s year, make, and model, order the right part, and get your lights working again soon.
Keep Reading: Related Posts


Any information provided on this Website is for informational purposes only and is not intended to replace consultation with a professional mechanic. The accuracy and timeliness of the information may change from the time of publication.