
A fuel sending unit isn’t something most drivers think about until their fuel gauge suddenly lies. It’s the small, hidden part inside your gas tank that tells the gauge how much fuel you have left. Without it, you’d have no clue whether you could make it home or if you’re about to stall on the highway. The sending unit doesn’t move fuel or affect how your vehicle runs, but it’s the reason your gauge knows the truth.
The fuel sending unit works hard in a rough environment, constantly soaked in fuel, rattled by road vibrations, and exposed to electrical wear. Over time, it can start sending false signals or none at all. Once that happens, your fuel gauge turns from a helpful companion into a guessing game. Knowing how this part works and what to watch for can save you frustration and maybe even a tow.
How Does a Fuel Sender Work?
Think of the fuel sending unit as the translator between your gas tank and your dashboard. Inside the tank sits a float attached to a thin metal arm. As the fuel level rises and falls, the float moves with it, pivoting the arm across a small resistor. The resistor changes how much electrical current passes through, and that change gets sent to the gauge, which moves its needle accordingly.
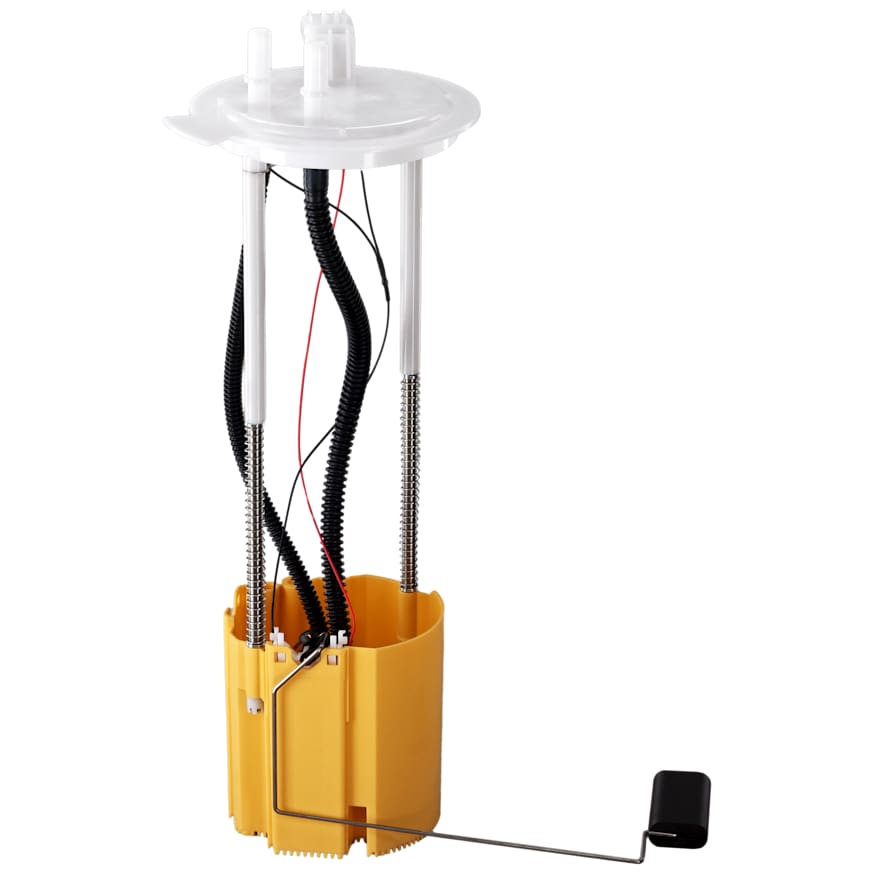
In newer cars, the sending unit often lives as part of the fuel pump assembly. Some newer systems skip the float and arm setup entirely and use sensors that read changes in capacitance or magnetism to figure out fuel level. But whether old-school or modern, the idea stays the same: the unit converts the movement of the fuel into an electrical signal that tells you how full or empty the tank is.


Fuel Sending Unit vs. Fuel Pump
People often confuse these two, but they do completely different jobs. The fuel pump physically moves gasoline from the tank to the engine so the car can run. The fuel sending unit only reads the fuel level and sends that data to your dashboard.
Pro Tips are nuggets of information direct from ASE-certified automobile technicians working with CarParts.com, which may include unique, personal insights based on their years of experience working in the automotive industry. These can help you make more informed decisions about your car.
Pro Tip: In most cases, the fuel pump comes in a housing that includes the gauge sending unit.
If your pump dies, your engine stops. If your sending unit fails, your car still runs, but your gauge turns unreliable. Because the sending unit spends its life submerged in fuel and constantly moving, it tends to wear out first. In some cars, both parts come in one module, which can make repairs pricier but installation easier.
Fuel Sending Unit Parts
A fuel sending unit looks simple, but every piece has a specific purpose.

- Float: This lightweight piece rides on top of the fuel. It’s usually made of a sealed brass capsule, foam, or a tough plastic designed not to absorb fuel.
- Arm or Rod: The float connects to a metal arm, which moves up and down with the fuel. That motion adjusts the resistor, which tells the gauge how much fuel is left.
- Variable Resistor: Inside, a wiper slides over a resistive track made from carbon, a conductive polymer, or metal. As the wiper moves, resistance changes, which changes the gauge reading. This is the part that wears out most often.
- Housing and Seal: Everything mounts to the top of the tank, sealed by a gasket or O-ring to keep vapors and fuel inside. These pieces are typically made of stainless steel or reinforced plastic to fight corrosion.
- Wiring and Connectors: These carry the signal from the resistor to the gauge. Brass or coated connectors are common since they handle fuel exposure better than bare metal.
Manufacturers choose materials that can handle constant contact with gasoline, heat, and vibration. Stainless steel resists rust, brass keeps solid electrical contact, and certain polymers prevent swelling or cracking inside the tank.
Common Signs of a Failing Fuel Sending Unit
A bad sending unit doesn’t usually leave you stranded, but it can make you second-guess every trip. Here’s how it usually acts up:
- Fuel gauge stuck on full or empty: Your gauge might sit at “F” all the time, even when you’re low, or stubbornly stay at “E” right after you’ve filled up.
- Gauge bouncing around: The needle may jump back and forth while you drive, often due to worn electrical contacts inside the resistor.
- False readings: The gauge says you’ve got half a tank left, but you’re sputtering out. That’s a sign the resistor or float isn’t doing its job.
- Warning lights or error codes: Some cars pick up on voltage problems in the circuit and flash a check-engine light. Codes like P0460–P0464 usually point to a level-sensor issue.
- Sudden drops in reading: If your gauge drops to empty out of nowhere and then creeps back up later, you’re probably dealing with an intermittent resistor or loose wiring.
Quick Way to Test the Fuel Sending Unit
Typically, if you disconnect the sending unit/fuel pump and switch on the key, the gauge needle will go past full. If the gauge wire is shorted to ground (don’t do this unless you know which wire it is), the gauge needle will go to empty.
That’s the quickest way to test the gauge for proper operation. Magnetic gauges have a “slosh” function either as a separate module or built into the gauge or sending unit to prevent the needle from moving around as the fuel sloshes in the tank.
Pro Tips are nuggets of information direct from ASE-certified automobile technicians working with CarParts.com, which may include unique, personal insights based on their years of experience working in the automotive industry. These can help you make more informed decisions about your car.
Pro Tip: Cars in the ‘70s didn’t have this and you’d see the needle move a lot when cornering or accelerating.
Before replacing the unit, check for corroded connectors, a faulty ground, or even a bad gauge cluster. Sometimes, it’s the wiring, not the sender itself, that’s lying to you.
Tips for Replacing a Failing Fuel Sending Unit
Swapping out a fuel sending unit isn’t the hardest job, but it’s messy, and mistakes can cost you. Here are a few things worth knowing before diving in:
- Confirm the part fits. Every vehicle uses a sender with a specific resistance range and connector style. Mixing them up can make your new gauge just as wrong as your old one.
- Work safely. Gasoline fumes ignite easily. Disconnect the battery, open the garage doors, and keep sparks or flames far away.
- Know your access point. Some cars let you reach the unit through a hatch under the back seat or trunk. Others force you to lower the entire fuel tank. Check a repair guide first.
- Use fresh seals. Always replace the O-ring or gasket when installing a new unit. Old ones can leak or let in vapors.
- Inspect wiring while you’re there. Clean off corrosion, check grounds, and tighten connectors. It’s a cheap fix that often solves erratic readings.
- Watch for leaks. After reassembly, turn the key to prime the fuel system and inspect for drips before driving.
As for cost, expect to pay anywhere from $25 to $250 for the part alone, depending on your car and whether the unit comes with a fuel pump. Labor can add another $100 to $400, especially if the tank has to come out. So, you might spend $300 to $600 total, more for complicated setups.
If you’re comfortable with basic tools and safety steps, it’s a doable DIY. Otherwise, a shop can handle it quickly with the right equipment.A fuel sending unit is small, but it keeps your gauge honest. Once it starts acting up, every trip becomes a guess. Were you thinking about the fuel sending unit and what does it do? We hope this article was able to answer your questions. Now that you know all about this part, you can spot trouble early and fix it before you’re left running on fumes.


Any information provided on this Website is for informational purposes only and is not intended to replace consultation with a professional mechanic. The accuracy and timeliness of the information may change from the time of publication.


