An intake manifold isn’t a part most people order on impulse.
Most engines never need a replacement intake manifold at all, but with today’s plastic ones, it’s a bit more common to need a replacement unit. That doesn’t mean the aluminum ones can’t fail.

Pro Tips are nuggets of information direct from ASE-certified automobile technicians working with CarParts.com, which may include unique, personal insights based on their years of experience working in the automotive industry. These can help you make more informed decisions about your car.
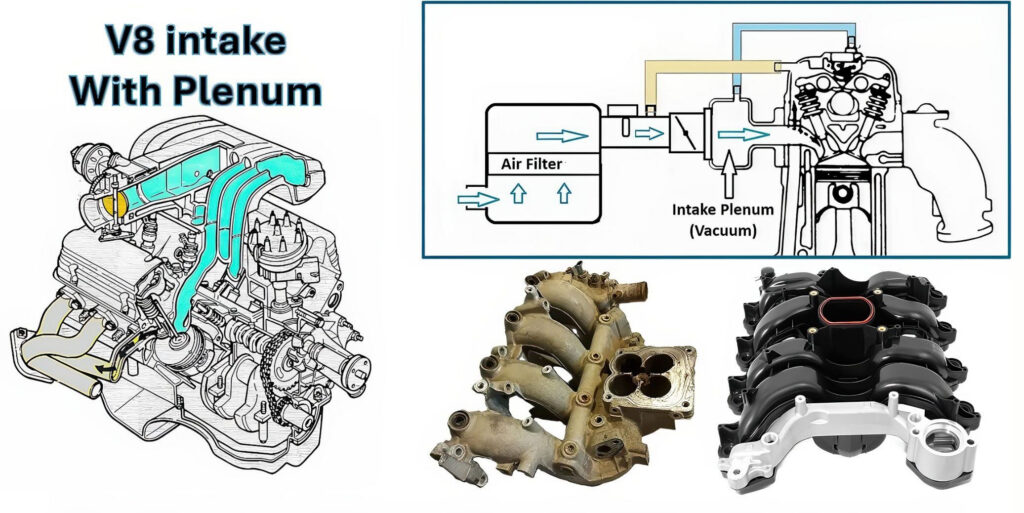
Pro Tip: Also remember that on some vehicles, the plenum and the intake manifold are separate parts. On others, the plenum is part of the intake manifold.
It is also one that frequently lands in the wrong cart because the shopper matched a thumbnail instead of the application. Between engine family splits, runner configurations, sensor provisions, and the surprisingly long list of gaskets and hardware that may or may not be included, an intake manifold order can go sideways before the box even ships.
The better starting point isn’t “What’s cheapest?” It’s “What exactly needs to go in the cart for this job?” That means identifying the repair scope, confirming every fitment variable, and deciding which adjacent items belong in the same order so you aren’t placing a second one after your vehicle’s already taken apart.
This article walks through how to build the correct intake manifold order the first time, whether you’re replacing a cracked plastic housing, chasing a vacuum leak, or doing a full top-end refresh on a high-mileage engine.
The Job in One Sentence
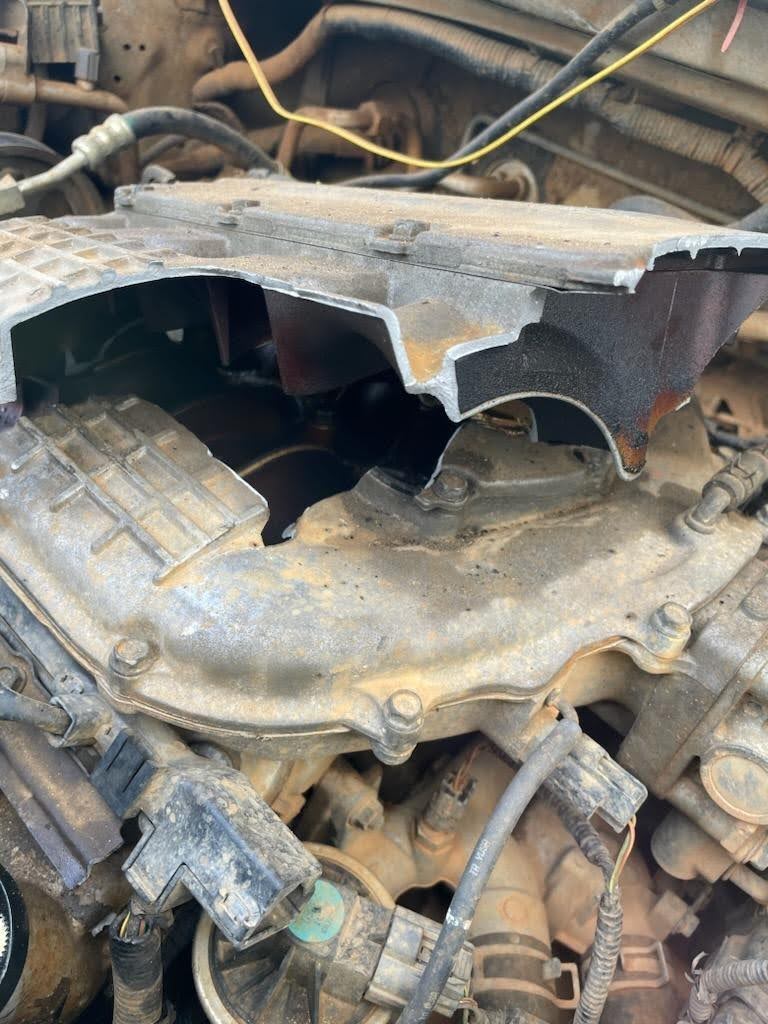
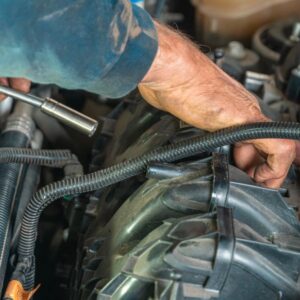
You’re restoring sealed, correctly routed airflow between the throttle body and the cylinder head ports. That’s the whole job. The intake manifold distributes metered air (and in port-injection engines, fuel) evenly across all cylinders while sealing vacuum, coolant, and oil passages that run through or alongside it. But in most cases, simply replacing the manifold gasket is all that’s required. Exceptions are when the manifold or plenum is damaged, such as the induction backfire damage shown in the photo below.
This means your order isn’t just about the manifold shell. It’s about everything that seals to it, bolts through it, plugs into it, and routes through it. A bare manifold without the right gaskets, hardware, and sensor provisions is a parts order that stalls on the bench.
Whether you’re buying a complete assembly with integrated sensors and a thermostat housing or a bare replacement casting, the scope of your order depends on what your specific manifold includes and what it doesn’t.
Choose Your Cart Size
1. Minimum viable repair
You’ve got a confirmed failure on the manifold itself: a crack, a warped flange, a broken runner flap actuator, or a failed integrated component. Everything around it is serviceable.
Choose it if:
- The failure is isolated to the manifold body or an integrated component
- Gaskets, seals, and hardware are in good shape and can be reused or sourced separately
- Your vehicle has low to moderate mileage and no history of cooling system or vacuum issues
Typical cart:
- Intake manifold (matched to engine and sensor configuration)
- Upper and/or lower intake manifold gaskets
- Throttle body gasket (if the surface is disturbed)
- Any bolts or studs that are stretch-to-yield or corroded
2. Smart same-access refresh
The manifold is coming off, and you want to handle every wear item you’d regret skipping once it’s back together.
Choose it if:
- The engine has 80,000 miles or more and the manifold is plastic.
- You’ve noticed minor coolant weeping, rough idle, or soft vacuum readings
- You want to avoid pulling the manifold again in 20,000 miles for a $4 gasket
Typical cart:
- Intake manifold
- Full gasket set (upper, lower, plenum, throttle body, EGR, valley pan if applicable)
- Thermostat and housing or crossover, if integrated or accessed through the manifold
- PCV valve and grommet
- Coolant temperature sensor or intake air temperature sensor, if the original is brittle or slow
- New coolant (enough for a full drain-and-fill)
- Fresh intake manifold bolts (especially if torque-to-yield)
3. High-mileage / do-it-once reset
The manifold is part of a broader top-end refresh on a truck, SUV, or daily driver with well over 100,000 miles. You’re making one trip into this area.
Choose it if:
- You’re already doing a valve cover gasket, spark plug, or coolant crossover job at the same time
- Your vehicle runs hard: towing, extreme heat, high-idle commercial use
- You want to button up every vacuum and coolant path under the manifold while it’s off
Typical cart:
- Everything in the same-access refresh, plus the following:
- Valve cover gaskets (if accessible once the manifold is removed)
- Spark plugs and coil boots (if the manifold covers the plug wells)
- Fuel injector O-rings or seals, for port-injection applications
- EGR valve and gasket, if integrated into the manifold or accessed through it
- Heater hose fittings, quick-connect retainers, or coolant crossover tubes
- All vacuum line tees, check valves, and PCV plumbing in the manifold area
What Is Commonly Ordered Together on This Job
Sealing Items
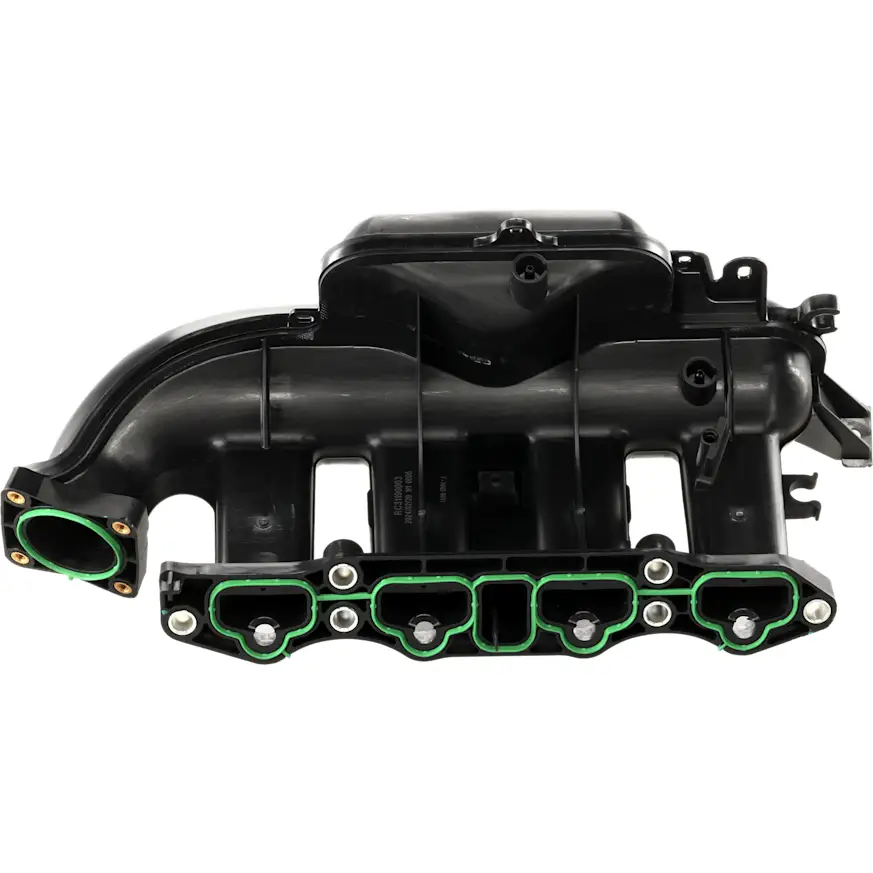
Intake manifold gaskets are the most commonly missed line item. On many V-configuration engines, there’s an upper gasket set, a lower gasket set, and sometimes a separate plenum or valley pan gasket. Don’t assume that your manifold ships with gaskets unless the listing explicitly says so. Throttle body gaskets, EGR passage gaskets, and any O-ring seals for coolant crossover tubes also belong here.
Hardware and Fasteners
Intake manifold bolts on many modern engines are torque-to-yield, meaning they’re one-time-use. If the factory service procedure calls for new bolts, order them. Stud kits, spacer washers, and heat shields may also apply depending on the engine.
Fluids and Consumables
You’ll lose coolant on most intake manifold jobs because coolant passages run through or under the manifold in many engines. Order enough coolant for a full drain-and-fill. RTV sealant (where specified by the OE procedure), thread sealant for coolant port fittings, and throttle body cleaner are commonly needed.
Sensors and Electrical Items
Many intake manifolds have provisions for a coolant temperature sensor, intake air temperature sensor, MAP sensor, or knock sensor, depending on the application. Confirm whether the manifold includes these or expects you to transfer them. Brittle plastic sensor connectors are a common casualty during removal. If the engine uses a manifold-mounted EVAP purge valve or EGR solenoid, check those too.
Thermostat and Coolant Crossover
On a significant number of V6 and V8 applications, the thermostat housing or coolant crossover is buried under or integrated into the intake manifold. If you’re pulling the manifold and the thermostat hasn’t been changed in 100,000 miles, this is the time to do it.
Full Assembly vs. Bare Manifold
Some listings include the throttle body, fuel rail, injectors, sensors, and all gaskets. Others ship a bare casting. The price gap between the two is usually significant, but so is the labor you’ll spend transferring parts. Know what you’re getting before you commit.

What People Forget Until the Vehicle Is Already Apart

Most intake manifold jobs stall not because the part is wrong, but because something adjacent wasn’t in the box. Before you start unbolting anything, check the following:
- Did you order the lower intake gaskets separately? Many manifold listings only include upper gaskets, or none at all.
- Does your vehicle’s engine use torque-to-yield intake bolts? If so, reusing them risks a leak.
- Is the thermostat buried under the manifold? If yes and you didn’t order one, you’ll be waiting.
- Are coolant crossover tubes or O-rings included? These are a common source of post-installation leaks.
- Do you need to transfer sensors? Check whether MAP, IAT, ECT, or knock sensors come pre-installed.
- Are fuel injector O-rings in the cart? On port-injection engines, the injectors seal to the manifold. Old O-rings can leak.
- Do you have enough coolant on hand? Most manifold jobs require a full cooling system refill.
- Is the PCV valve accessible only with the manifold off? If it’s original, replace it now.
- Did you check for runner flap actuator or IMRC compatibility? Not all manifolds include the runner control mechanism.
- Are vacuum hose tees and check valves accounted for? Brittle plastic fittings snap during removal and aren’t always available at a parts store on Sunday morning.
When Replacing Only the Intake Manifold Is False Economy
If your vehicle’s manifold cracked or a runner flap broke and the engine has under 60,000 miles, replacing just the manifold with fresh gaskets is perfectly rational. There’s no reason to turn a straightforward swap into a weekend-long top-end overhaul.
But here’s where it changes. On a higher-mileage V6 or V8, pulling the intake manifold exposes the entire valley: coolant crossovers, thermostat housing, valve cover sealing surfaces, spark plug wells, fuel injectors, and PCV plumbing. The labor to access all of that is already done. Putting the manifold back over a 130,000-mile thermostat or a weeping crossover O-ring means you’ll be pulling it again when that part fails, and paying the same labor twice.
The logic isn’t to buy everything. It’s to look at what’s exposed and ask whether any of it is due. A $9 thermostat, a $4 PCV valve, and a set of injector O-rings are trivial costs compared to the hours it takes to pull the manifold a second time.
The Fitment Splits That Break Intake Manifold Orders
Engine Family
This is the single most important variable. The same vehicle may have been offered with a four-cylinder, a V6, and a V8 across the same model years. Each engine uses a completely different manifold with different port counts, bolt patterns, and runner geometry. Confirm the engine, not just the vehicle.
Upper vs. Lower Manifold
Many V-configuration engines use a two-piece intake manifold: an upper plenum and a lower manifold that seats against the heads. These are separate part numbers. Ordering the wrong half is more common than you’d expect.
Runner Control Mechanism
Some manifolds include an intake manifold runner control (IMRC) actuator, variable-length runner flaps, or swirl valve assemblies. Others are sold without these, expecting you to transfer the mechanism from the old manifold. If the runner control failed and that’s why you’re replacing the manifold, make sure the new one includes it.
Sensor and Port Provisions
Manifolds for the same engine can differ in the number or placement of sensor bosses, vacuum ports, and coolant passages depending on trim level, emissions package, or production date. A manifold that’s physically close but missing a port or boss won’t work without modificati
Emissions Configuration
Federal and California (CARB) versions of the same engine sometimes use different EGR routing, different vacuum port configurations, or different sensor provisions on the manifold. This split is real and commonly overlooked.
Material Type
Composite (plastic/nylon) and aluminum manifolds are both common in the aftermarket. The replacement doesn’t always have to match the original material, but the gasket surfaces, bolt patterns, and port geometry must be identical. Some aftermarket aluminum manifolds are designed as upgrades, not drop-in replacements.
Production-Date or Midyear Change
Some engines had manifold revisions mid-model-year. A 2004 truck built in January may use a different manifold than one built in August. If your application spans a known revision, check the production date on the door jamb sticker or the VIN build data.
Delivery-Day Inspection Checklist
Before you commit to teardown, pull the new manifold out of the box and verify the following against your old part:
- Port count and spacing match the cylinder head layout
- Throttle body mounting flange bolt pattern and opening size are correct
- All sensor bosses are present and in the correct locations
- Coolant passage openings align in number, position, and diameter
- Vacuum port locations and sizes match
- Runner flap mechanism (if applicable) is included and functional
- EGR passage or port is present if your application requires it
- Bolt holes align with the block or head mounting points
- Gasket surfaces are flat and undamaged from shipping
- All included hardware, gaskets, and seals match the listing description
Your One-Job Order Sheet for an Intake Manifold
- Confirm the vehicle and engine. Year, make, model, engine displacement, and engine code. On trucks and SUVs, confirm the specific engine option, not just the displacement.
- Confirm upper vs. lower. If your engine uses a two-piece manifold, make sure you’re ordering the correct half, or both.
- Confirm what the listing includes. Gaskets? Sensors? Thermostat housing? Runner control? Throttle body? Read the full description, not just the title.
- Choose your repair scope. Decide whether you’re doing a minimum replacement, a same-access refresh, or a full high-mileage reset before you add to cart.
- Add the gaskets and seals. Upper, lower, plenum, throttle body, EGR, crossover O-rings. Don’t assume they’re in the box.
- Add the fluids and consumables. Coolant, RTV (if specified), thread sealant, throttle body cleaner.
- Add the smart adjacent items. Thermostat, PCV valve, injector O-rings, coolant temperature sensor, and any hardware that’s one-time-use.
The Smart Way to Shop Intake Manifolds
The fastest way to order the wrong intake manifold is to search by vehicle, sort by price, and click the first listing that looks like it fits. This approach skips every variable that actually matters: engine code, upper vs. lower, included components, sensor provisions, and emissions configuration.
The right approach is to start from the job. Decide the repair scope, confirm every fitment variable for your specific engine, and build the cart so it includes everything you’ll need the day you start wrenching. One complete, well-matched order always costs less than two rounds of shipping and a second afternoon under the hood.
Your intake manifold order should close the job, not just start it.
Keep Reading: Related Posts




Any information provided on this Website is for informational purposes only and is not intended to replace consultation with a professional mechanic. The accuracy and timeliness of the information may change from the time of publication.