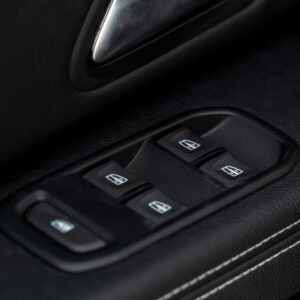
A wobbly window switch bezel does more than look bad. It leaves the switch wiring exposed to dust, moisture, and the occasional elbow bump. That usually gets worse the longer you leave it. Most drivers notice the problem the moment a bezel pops loose or a corner cracks near a mounting clip.
The good news is that swapping it out takes under an hour with basic hand tools. Just make sure the new bezel matches your door panel’s clip pattern first.
How Do You Install a Window Switch Bezel?
The job breaks down into five steps. Working through them in order keeps you from snapping clips or pinching wires along the way.
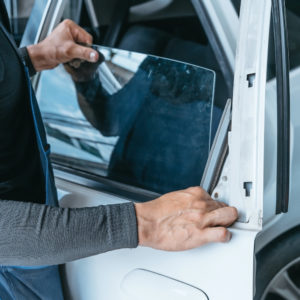
- Pry the old bezel free with a plastic trim tool, starting from one edge.
- Depress the locking tab on the switch connector and unplug it.
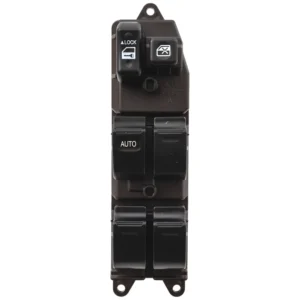
- Mount the switch assembly into the new bezel and seat it fully.
- Reconnect the wiring harness until the connector clicks into place.
- Snap the bezel back into the door panel opening.
Test every window and lock switch before you close the panel back up. It only takes a minute, and it beats pulling everything apart twice. If a window still won’t budge after the swap, a deeper window regulator problem could be to blame.
Why Do Window Switch Bezels Wear Out or Break?
Sun exposure dries out the plastic tabs that hold most bezels in place. Years of resting an elbow or a coffee cup on the armrest add stress those tabs were never built for. Once a tab snaps, the bezel starts to rattle and eventually lifts on one side. The switch itself can fail too, often showing switch failure symptoms first.
A bezel that already rocks in its opening will keep breaking clips, even with a fresh switch installed. If the switch itself feels worn too, a new power window switch solves both issues at once. Replacing the trim piece itself solves the problem for good. Patching around a crack only delays the inevitable.
What Tools Do You Need Before You Start?
Gather these items before you pull the door panel trim apart. None of them require a trip to a specialty store.
- Plastic trim removal tool or a flat blade screwdriver
- Small Phillips screwdriver
- Wire connector pick or a slim flathead for locking tabs
- New window switch bezel matched to your door panel color
- Electrical contact cleaner for the connector terminals
If you don’t own a trim tool, wrap the tip of a metal screwdriver in tape. Bare metal scratches door panel plastic fast, and that’s an easy mistake to avoid.
Removing the Old Window Switch Bezel
Work from the inboard edge first, since that side usually hides the main release clip. Once you find it, the rest of the panel comes free pretty easily.
- Insert the trim tool at the seam between the bezel and the door panel.
- Apply steady upward pressure until the first clip releases.
- Work around the edge until the bezel lifts free.
- Depress the wiring connector’s locking tab and unplug the switch.
- Set the old bezel aside if you plan to reuse the switch inside it.
Some door panels hide a screw or two under the armrest trim. It’s worth checking for hardware before you pry any harder than you need to.

Installing the New Window Switch Bezel
Confirm the new switch sits correctly in the bezel before either piece goes back into the door. A few seconds of checking now saves a frustrating redo later.
- Inspect the new bezel’s clips and tabs for shipping damage.
- Mount the switch assembly into the bezel opening and seat it fully.
- Reconnect the wiring harness until the locking tab clicks into place.
- Align the bezel with the door panel cutout and press evenly.
- Push each corner until every clip seats with an audible snap.
Never force a bezel that won’t seat flush. A misaligned clip almost always means a wire is pinched behind the panel, so it’s worth backing up and checking.
How Do You Choose the Right Window Switch Bezel for Your Vehicle?
Fitment drives every other decision on this part. Judge a power window switch trim option on three things: clip pattern, cutout count, and finish match. Brand quality varies across aftermarket switch brands, so compare before you buy.
- Confirm the OE part number against your actual door panel, not just the model year
- Count the switch cutouts and compare the button layout to your current bezel
- Match the texture and finish to the rest of the interior trim
- Check whether the new part ships with its own retaining clips
Buying a Window Switch Bezel Online for the Best Deal
Local parts counters rarely stock every trim variant for every model year. Window switch bezels vary more than most shoppers expect. Buying online opens up the full range of clip patterns and finishes without a trip across town.
Typical pricing for a window switch bezel replacement runs from about $10 up to $80 or more. OE branded parts sit at the top of that range. Those numbers shift with supply and vehicle platform, so treat them as a general guide rather than a fixed quote.
What Should You Skip When Buying or Installing a Bezel?
A few habits cause most of the repeat trips and cracked parts people run into. Steer clear of these, and the job goes a lot smoother.
Skip guessing a part number from the model year alone. Trim levels change clip patterns within the same production run. Skip forcing a still connected switch out of its bezel, since the connector tab usually snaps first.
Skip reusing a bezel with a cracked screw tower, since a small crack turns into a full rattle within weeks. Skip closing the door panel before testing every switch. Catching a loose connection now beats pulling the panel apart twice.
Get Your Window Switch Bezel Install Right the First Time
A correctly seated bezel feels snug immediately, with no rattle and no visible gap along the edge. Confirm fitment against your specific door panel before checkout. Trim levels shift the switch layout mid year on many trucks and SUVs.
CarParts.com stocks window switch bezels and switches for a wide range of makes and models. Every order comes with a price match guarantee, free shipping on eligible orders, and an extended return window. Most local counters simply can’t offer all three. That combination makes ordering online the safer bet over settling for whatever’s sitting on a nearby shelf.
Keep Reading: Related Posts




Any information provided on this Website is for informational purposes only and is not intended to replace consultation with a professional mechanic. The accuracy and timeliness of the information may change from the time of publication.