A crooked hood line or a headlight that sits low usually points to one bent panel behind the bumper. The fender support takes the hit in low-speed knocks. When it bends, it drags every panel bolted to it out of place. Reading the damage first tells you which fix actually fits.
How Do You Straighten a Bent Fender Support?
You straighten fender support metal by pushing it back the way it came. The trick is bracing the good metal so it stays put. Most home jobs sort into three levels, and the damage tells you which one you face.
Prop up the apron area with a floor jack or stands near the parts that should stay put. That backing absorbs your hammer blows, so the good metal doesn’t flex.
For a lip or flange that got tapped in, back it with a dolly and tap it flat. For a deeper U-channel bend, clamp locking pliers or a big wrench and push it back.
Thick apron steel won’t budge with light taps, so plan on real force. If a spot is bent and creased at once, that crease fights you. Creased metal usually comes out cleaner when you cut and replace it. Work in small steps and check your fit often, since overpulling also hurts.
When Should You Use Heat?
Heat drops the force you need to move heavy-gauge metal, which helps on thick supports. Bring the metal into the low reddish zone with a torch, then bend it while hot. That beats hammering forever on a cold bend and hoping it gives.
Heat isn’t your first move, though. Reach for it once mechanical straightening stalls out on you. Heat only the section you’re working, because spread-out heat warps nearby metal. Keep the torch away from wiring, brake lines, and fuel lines, or shield them first.
Here’s the quick read on it. If you can get real heat into a straight bend, you can probably fix it. If you’re staring at a hard crease or a tear near a weld, heat won’t save it.

Pulling a Support Back to Length
A support that got shoved back isn’t just bent, it’s shorter than it started. Hammer the visible bend without restoring length and your panels still won’t line up. That’s the mistake that trips up most driveway repairs.
A come-along or hand puller anchored to something solid pulls that length back. Mechanics jokingly call a chain tied to a tree a backwoods frame machine. It leans on the same idea as the pros’ rigs, just cheaper.
Tie the car down first so it can’t roll toward your anchor, then strip the bumper cover. Hook the puller to the bent section and crank in tension. Rap the metal with a big hammer under load, and it walks back toward length. Pull sideways as well as front to back until the nose sits square.
One safety note that matters. Hand pullers throw several tons of force and can hurt you if the cable slips. Anchor to something that won’t move, stay clear of the cable, and check your tie-on point.
Straighten, Repair, or Replace?
Not every support is worth saving, and knowing that upfront saves you hours. Shallow dings often pull out with practice, but structural hits are another story. Match the plan to how the metal actually deformed before you grab a tool.
- Straighten it: shallow dents, tapped-in flanges, and clean single-direction bends respond well to hammer, dolly, and clamp work.
- Pull then dress it: metal that’s pushed out but not torn comes back with a puller and filler.
- Replace it: creased, torn, or multi-plane damage calls for a fresh body panel welded in.
The fender support ties into the fenders, strut brackets, and frame rails. Fixing one spot can reveal the next, and a hard enough hit can even lead to car frame damage. Factor that in before you commit to straightening over a fresh part.
Fitment and Buying Checks
When straightening isn’t worth the effort, a direct-fit aftermarket part brings back factory dimensions. It skips the guesswork too. Nail down a few details before you order so the piece drops right in.
- Confirm your year, make, model, and sub model, since one body style can need a different support.
- Note driver or passenger side for one-piece aprons and liners.
- Check whether the listing is a single piece, a pair, or a full assembly.
- Look for CAPA-certified options validated against factory tolerances.
- Confirm it has provisions for factory accessories so brackets and mounts line up.
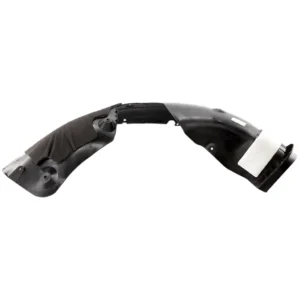
If the impact caught the skin, a galvanized replacement fender bolts on ready for paint. Damage behind the wheel usually means a new fender liner or the engine splash shield that guards it.
Installation Notes That Prevent Repeat Damage
Getting the part on is easy. Getting the panels to line up afterward is where jobs go sideways, so a little care here pays off.
Set Your Panel Gaps First
Mock up the new part and check your panel gaps before you fully tighten it. The support sets the reference for the fender and hood. Reuse your old clips or grab the right hardware, since body panels ship without it.
Protect the Bare Metal
Sand, degrease, and prime a bare-steel fender before paint so the finish sticks. While you’re in there, check nearby factory pinch welds for spots that popped loose. A dab of rust primer on raw metal buys time before paint.
Buying Online for the Best Deal
Ordering the support or fender online skips the counter markup and the wait on local stock. Aftermarket collision parts routinely come in well under original-equipment pricing while holding up great. The vehicle selector filters the catalog to your exact setup, so you land on the right side.
CarParts.com is a solid place to wrap up this repair, whether you need a full kit or just a bracket. The price-match guarantee keeps structural parts affordable, and guaranteed fitment removes the compatibility gamble. Fast shipping from regional warehouses gets the part to you in days, not weeks.
Keep Reading: Related Posts



Any information provided on this Website is for informational purposes only and is not intended to replace consultation with a professional mechanic. The accuracy and timeliness of the information may change from the time of publication.