
Testing spark plug wires means confirming whether each wire can deliver ignition energy without excess resistance, voltage leakage, or physical damage. A failing wire tends to show up as a rough idle, hesitation under acceleration, or a persistent engine misfire. These symptoms overlap with plenty of other ignition system and fuel issues, so a logical order of checks saves you time and money.
What You Need Before You Start
You don’t need a large tool kit to test spark plug wires accurately. If you don’t have a scope, and most DIYers don’t, a digital multimeter, an inline spark tester, a low-impedance test light, insulated gloves, a spray bottle with clean water, and some dielectric grease for reassembly will cover nearly every practical test you can do at home.
Pro Tips are nuggets of information direct from ASE-certified automobile technicians working with CarParts.com, which may include unique, personal insights based on their years of experience working in the automotive industry. These can help you make more informed decisions about your car.
Pro Tip: To reduce the risk of electric shock, wear insulated gloves, keep your hands away from high-voltage ignition components and moving parts, and avoid grounding yourself while the engine is running.
Start with the cheapest checks and only move to tool-based testing when you need more evidence.
Here’s a sensible order to follow:
- Inspect the wires with the engine off and cool.
- Check the boots, terminals, and wire routing.
- Measure resistance one wire at a time with a multimeter.
- Use an inline spark tester if resistance looks normal but the misfire continues.
- Replace the full set if age, heat damage, or multiple weak readings point to general deterioration.
Use a Test Light as a Poor Man’s Scope
On older ignition systems with an accessible negative primary terminal, a low-impedance test light, not an LED test light, can sometimes work as a “poor man’s scope.” Connect the test light to the negative primary terminal and watch the pattern. A good circuit should show a nice, even flicker. If there’s an open spark plug wire, the light can pulse sharply, similar to what you would see if the plug wire were disconnected. This check is not a substitute for a scope, and it may not apply to modern coil-on-plug systems where the coil primary circuit is not safely or easily accessible.
Start With a Visual Inspection
A visual check costs nothing and often gives you the answer in a few minutes. Look for cracked or brittle insulation, hardened or swollen boots, white tracking marks, burn spots, and oil contamination from a valve cover leak. Also, check whether any wire touches the exhaust manifold, rests against sharp metal, or sits too close to another wire.
When pulling a wire off for inspection, always grip the boot rather than the cable. If you have a set of spark plug cable pliers, use them because they’re designed to grip the boot with more force than you can muster with your fingers without yanking on the wire. Yanking on the wire can separate the conductor from the terminal and create a new fault on a wire that was previously fine.

How to Test Spark Plug Wires With a Multimeter
Resistance testing is one of the most practical ways to evaluate a spark plug wire, and a standard digital multimeter is all you need. Remove and test one wire at a time so you don’t disturb the firing order. Set the meter to ohms, place one probe on each metal terminal, and record the reading.
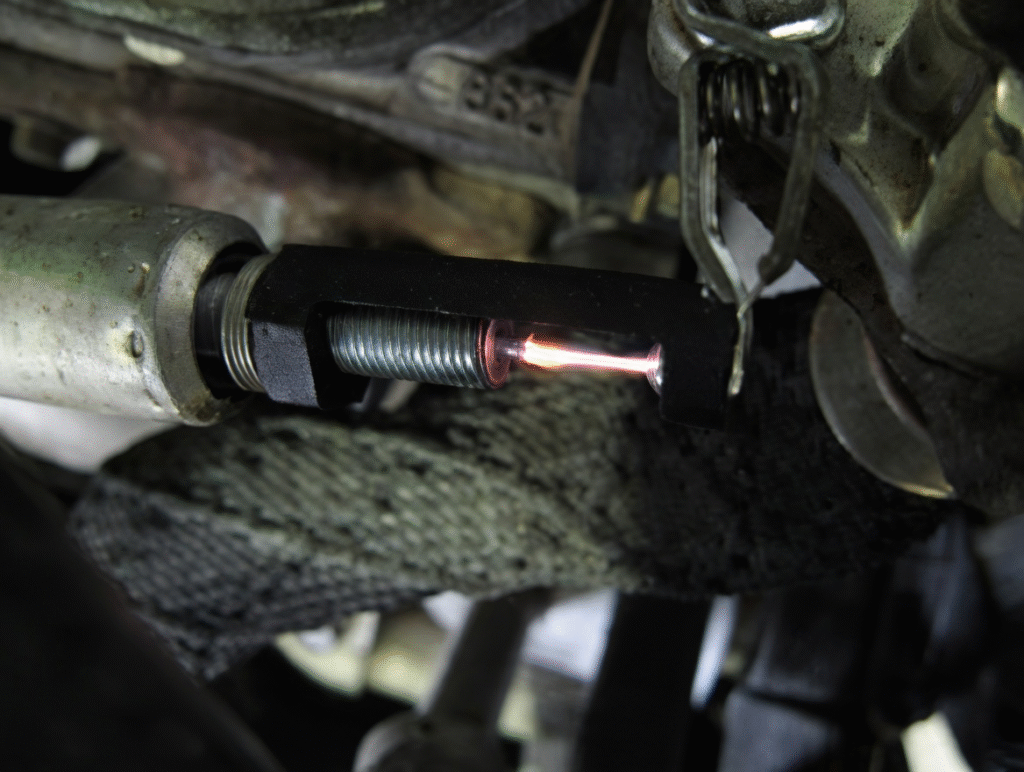
Before measuring resistance, inspect the interior of the boot on both ends. If it looks dusty, rusty, or sooty inside, discard the wire because that can be a sign of spark leakage inside the boot creating ozone. Notice how one side of this ignition coil is rusty because ozone from spark leakage inside the boot corroded the terminal.

Why Dielectric Grease Matters
Dielectric grease is applied to spark wires for two reasons. One is to prevent the plug wire boot from vulcanizing to the plug and sticking so hard you have to destroy it to remove it.
The other is to help prevent spark leakage where the terminal snaps onto the coil tower or the spark plug head. Spark leakage can cause radio frequency interference, or RFI, and ozone when the spark meets air. Dielectric grease is an insulating compound that helps force the spark energy to travel only where the metal terminal is touching the spark plug.
When it comes to measuring the resistance of the wires, most OEM-style carbon conductor wires fall in the range of 5,000 to 15,000 ohms per foot, though performance wires with spiral-wound or copper-core construction read much lower. Make sure you’re touching the metal terminal with your multimeter probe or you won’t get a good reading.
Always compare against your manufacturer’s specification when available. Longer wires will naturally read somewhat higher than shorter wires of the same type, so compare wires of similar length when evaluating the set.
A stable, in-range reading is what you want. A reading that’s dramatically higher than the others, a value that jumps around, or an open circuit usually means the wire is bad.
Pro Tips are nuggets of information direct from ASE-certified automobile technicians working with CarParts.com, which may include unique, personal insights based on their years of experience working in the automotive industry. These can help you make more informed decisions about your car.
Pro Tip: Rust or soot in the boot can also mean the conductor has burned loose from its metal terminal at the end of the wire. The conductor should be folded under so that it is crimped between the plug wire terminal and the insulating sheath. If it’s not, the wire will likely measure very high resistance and needs to be replaced.
What the Readings Actually Mean
An infinite resistance reading means the conductor is open and the wire needs to be replaced. A reading that’s much higher than the others often points to a deteriorating conductor. A normal reading paired with visible burn marks or tracking lines on the insulation usually means voltage is leaking through the jacket, which a multimeter alone won’t catch.
Use a Spark Tester When Resistance Looks Normal
If the resistance readings check out but the engine is still misfiring, an inline spark tester is your next move. Install the tester between the spark plug and the wire, start the engine, and watch the tester window. A steady flash means the cylinder is getting spark consistently, while a weak or intermittent flash points to a failing wire, a poor terminal connection, or another ignition fault upstream.
If you’re using an adjustable spark tester and the spark isn’t blue, hot, and able to jump about an inch, meaning it’s yellow and won’t jump more than about 1/2 to 3/4 inch, the coil is usually the problem. Another possibility is that the plug wire is leaking spark somewhere else, so only part of the energy is making it to the plug.
This test is also safer than pulling a wire loose and watching for an arc by hand. If your setup allows it, compare the suspect cylinder to a known-good one so the difference is obvious.
Check for Insulation Leaks With a Water Test
Some spark plug wires break down only under higher electrical demand. That’s why a vehicle can run fine on a dry day and stumble badly after a rainstorm or a car wash. A simple mist test can expose insulation leakage that a multimeter misses entirely.
Some technicians use slightly soapy or very mildly salted water for this because it can make leakage easier to see, but use the lightest mist possible and avoid soaking connectors. Spray the wires with the engine running and see whether the engine begins to misfire or visible spark appears. If the engine doesn’t misfire when you spray the plug wires, move on. Typically, a breached plug wire that leaks spark under load will show up as a misfire “bite” in high gear at about 45 mph.
With the engine idling in a dim area, lightly mist the wires with clean water and watch closely. Don’t soak anything or spray directly into connectors. Blue arcing, a snapping sound, or an immediate drop in idle quality all indicate that the insulation is leaking.
When the Wire Isn’t the Problem
Spark plug wires are only one piece of the ignition system. Fouled spark plugs, corroded coil towers, incorrect plug gap, vacuum leaks, and compression issues can all produce nearly identical symptoms. If a misfire follows a specific cylinder even after you swap wires, the wire probably isn’t the root cause.
Vehicles with coil-on-plug ignition don’t use conventional plug wires at all. In that case, focus on the boots and individual ignition coils instead.
Route the New Wires Correctly to Prevent Crossfire
Know the firing order, which way the distributor spins if equipped, and where the number one wire was originally connected. Also know how the cylinders are numbered.
On V8s, don’t run two wires parallel to each other if they’re next to each other in the firing order and also next to each other on the engine. That can cause induction crossfire. The plug wire that fires first can create spark in the wire that fires right after it and cause the plug in that cylinder to fire early, which can make that cylinder ping.
Chevy and Ford V8s with distributors are common examples. On Chevy V8s with a 1-8-4-3-6-5-7-2 firing order, cylinders 5 and 7 are adjacent on the cap and on the engine. On Ford V8s with a 1-5-4-2-6-3-7-8 firing order, cylinders 7 and 8 are adjacent in the firing order and on the engine.
When routing these wires, make sure there are two other wires in the loom separating the wires that run from adjacent cap posts to adjacent cylinders.
On distributor-equipped vehicles, a worn distributor cap or distributor rotor can also contribute to weak spark or misfire symptoms, so inspect those parts while you’re working through the ignition path.
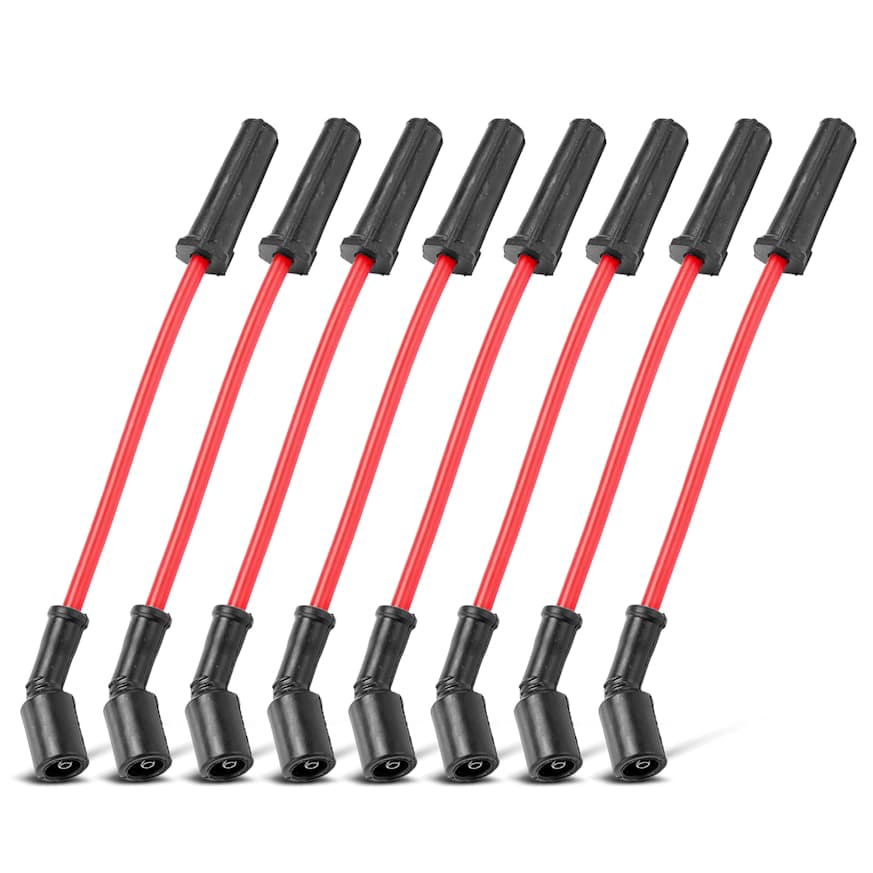
Buying the Right Replacement Set
Once testing confirms the wires are the problem, fitment matters more than brand reputation. A direct-fit replacement is almost always the better value for a daily driver because it removes the guesswork from boot selection and terminal matching.
CarParts.com makes it easy to find the right set without second-guessing compatibility. Their built-in vehicle selector lets you search by year, make, model, and VIN, and applicable parts are backed by a fitment guarantee. They carry over one million parts across a wide range of brands, so you can compare OE-style and aftermarket options side by side before committing.
For most common applications, a solid OE-style replacement set lands somewhere between the high teens and around $50. Performance-oriented options typically cost more. Universal sets are best reserved for custom builds or modified engines where standard lengths don’t work.
When you install the new wires, replace one at a time to preserve the firing order. Route each wire away from heat sources and sharp edges, and push every boot firmly onto its terminal until it seats. Apply dielectric grease sparingly inside the boot if needed, since a poorly routed or incompletely seated wire can bring back the same misfire you just fixed.
Keep Reading: Related Posts


Any information provided on this Website is for informational purposes only and is not intended to replace consultation with a professional mechanic. The accuracy and timeliness of the information may change from the time of publication.


