A locking hub isn’t the kind of part you can match by eyeballing a thumbnail and hoping for the best. Spline counts, engagement types, vacuum provisions, and seal configurations all vary by vehicle, and “looks close enough” is a fast way to end up with a hub that won’t lock, won’t release, or won’t even bolt on.
Before you click “add to cart,” step back and think about the actual job. What exactly needs to go in the cart for this repair? Are you replacing a single failed manual hub, swapping both sides to restore reliable 4WD engagement, or upgrading from automatic to manual hubs? The answer changes everything about your order.
Locking hub orders go sideways more often than most people expect. Spline count mismatches are common. Seal kits get overlooked. Buyers replace one side and discover the other is just as worn. Vacuum-actuated systems get treated like simple mechanical hubs, and the real failure point gets skipped entirely. This article will help you build a complete, correct order on the first try.
The Job in One Sentence
You’re restoring the front axle’s ability to reliably engage and disengage from the drivetrain for four-wheel drive operation.
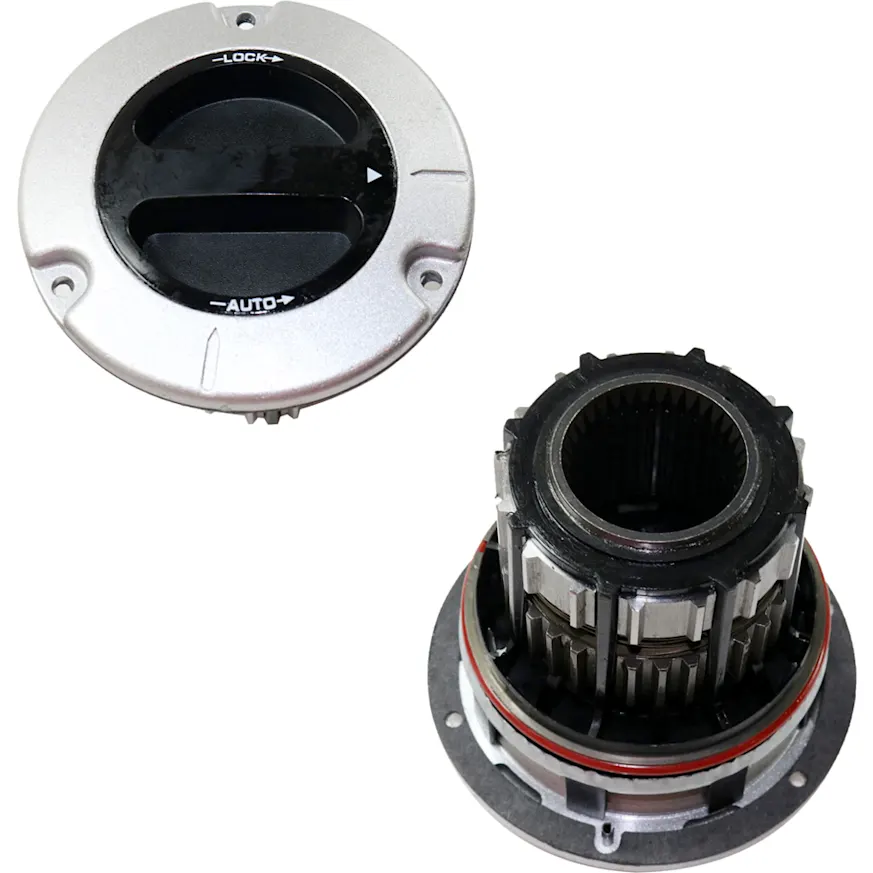
The locking hub is the mechanical link between the front wheel and the front axle shaft. When it’s locked, the wheel drives and is driven by the axle. When it’s unlocked, the wheel spins freely, reducing wear, noise, and fuel consumption. A failed locking hub means your four-wheel drive system either won’t engage when you need it or won’t disengage when you don’t.
Pro Tips are nuggets of information direct from ASE-certified automobile technicians working with CarParts.com, which may include unique, personal insights based on their years of experience working in the automotive industry. These can help you make more informed decisions about your car.
Pro Tip: Not all four-wheel-drive vehicles use locking hubs right there at the wheel. Some use sliding collars and a motor to lock the axle shaft to the drive axle between the front final drive and the wheel. This article doesn't apply to those.
This means your order isn’t just about a hub body. It’s about everything that lets that hub lock, seal, and hold under load: the internal mechanism, the seals that keep grease in and water out, the snap rings or retaining hardware that hold it all together, and sometimes the actuator or vacuum components that command engagement in automatic systems.
Choose Your Cart Size
1. Minimum Viable Repair
Replace only the failed locking hub on the side that’s causing the problem.
Choose it if:
- Only one hub is visibly broken, seized, or stripped
- The opposite side was recently replaced or inspected
- You’re addressing a single known failure in a low-mileage vehicle
- Budget is firm and the other hub is confirmed functional
- Only one hub is visibly broken, seized, or stripped
- The opposite side was recently replaced or inspected
- You’re addressing a single known failure in a low-mileage vehicle
- Budget is firm and the other hub is confirmed functional
Typical cart:
- One locking hub (or locking hub assembly)
- Axle shaft snap ring, if not included
- Hub seal/gasket, if not included
- Axle shaft grease or wheel bearing grease
2. Smart Same-Access Refresh
Replace both hubs and refresh the seals while the spindle area is accessible.
Choose it if:
- One hub failed and the other has similar age and mileage
- You’ve noticed intermittent 4WD engagement issues on both sides
- You’re already pulling the wheel, rotor, and caliper to access the hub
- You want predictable engagement on both front wheels going into winter or off-road season
Typical cart:
- Two locking hubs (left and right, or a pair/kit)
- Hub seal kit or individual gaskets for both sides
- Snap rings if not included
- Axle needle bearings, if inspection shows wear
- Spindle grease and/or wheel bearing grease
3. High-Mileage / Do-It-Once Reset
Replace both hubs, refresh the full seal and bearing stack in the spindle area, and address any vacuum or actuator components if the system is automatic.
Choose it if:
- • Your truck has 120,000+ miles with significant off-road, towing, or plow use
- You’re converting from automatic to manual hubs
- Vacuum-actuated engagement has been unreliable
- You want to reset this entire zone and not revisit it for years
Typical cart:
- Two locking hubs (or a manual conversion kit)
- Hub seal kit for both sides
- Spindle needle bearings
- Snap rings and retaining hardware
- Axle shaft seals
- Vacuum actuator and/or IWE solenoid, if applicable
- Vacuum lines and check valve, if applicable
- Wheel bearing grease and axle lubricant
What Is Commonly Ordered Together on This Job
Seals and Gaskets
The hub-to-spindle seal is the most commonly missed item. If it isn’t included with the hub, order it separately. A torn or flattened seal lets water into the spindle cavity and destroys bearings and splines. On many applications, there’s also an inner axle seal that should be inspected any time the hub is off.
Snap Rings and Retaining Hardware
Locking hubs are typically retained by snap rings on the axle shaft. These are often reusable, but corroded or deformed snap rings can pop out under load. If you’re working on a truck that’s seen salt, mud, or years of neglect, a fresh snap ring is cheap insurance. Some kits include them, but many don’t.
Grease and Lubricants
The spindle cavity and hub internals need fresh grease on reassembly. Don’t assume there’s enough old grease left to do the job. Use the type specified for your vehicle’s axle and spindle bearings. Some hubs also require a light film of grease on the hub body O-ring to seat properly.
Spindle Bearings
While the hub is off, the spindle needle bearings are exposed and easy to inspect. If they’re pitted, dry, or rough, now is the time. Replacing them later means pulling everything apart again.
Vacuum and Actuator Components (Automatic Systems)
For trucks with automatic locking hubs (common in Ford Super Duty, Ranger, and F-150 with IWE systems), the hub itself may not be the root failure. Vacuum leaks, failed solenoids, cracked check valves, and deteriorated vacuum lines are frequent culprits. If you’re replacing an automatic hub or converting to manual, inspect the entire vacuum circuit and order any components that are cracked, soft, or suspect.
Paired Hub Replacement
Locking hubs wear as a set. If one side is stripped, sticking, or corroded, the other usually isn’t far behind. Replacing both ensures even engagement and avoids a second teardown six months later.
What People Forget Until the Vehicle Is Already Apart
Most locking hub jobs stall not because the part is complicated, but because something small was left off the order.
- Spline count: Did you confirm whether your axle shaft has 27 or 30 splines? This is the single most common mismatch.
- Manual vs. automatic: Are you matching the existing system, or deliberately converting? The hub type, mounting, and sometimes the spindle hardware differ.
- Hub seal: Is it included with the hub or sold separately? Check before you assume.
- Snap ring: Is the old one reusable, or is it corroded and bent? It’s good to have a replacement on hand.
- Vacuum lines and check valve: In automatic systems, these are often brittle by the time the hub fails. You can’t test them easily once the wheel is back on.
- Axle shaft condition: A hub won’t engage properly on stripped or twisted splines. Inspect the shaft while it’s exposed.
- Spindle nut and washer: Some applications require a new spindle nut or thrust washer on reassembly. Confirm whether yours is reusable.
- Dust cap or hub cap: If the outer cap is dented, corroded, or missing its seal, it should go in the cart now.
- Grease: Don’t plan to use what’s in there. Fresh grease costs a few dollars. A dry spindle costs a bearing set.
When Replacing Only the Locking Hub Is False Economy
If one hub failed because of a mechanical defect, a crash, or a single unusual event, replacing just that hub makes perfect sense. There’s no reason to tear into the opposite side if it’s engaging cleanly and the seals are dry.
But if the failure is wear-related, corrosion-related, or connected to age and mileage, replacing only one side is a gamble. The other hub has the same hours, the same exposure, and the same wear pattern. It’s not unusual for a truck to come back in three to six months with the other hub doing the exact same thing.
The stronger case for a broader order is on automatic systems. If the hub failed because of a vacuum leak, a stuck solenoid, or a collapsed check valve, replacing just the hub treats the symptom and ignores the cause. The new hub will fail the same way if the vacuum circuit isn’t addressed. For IWE-equipped trucks in particular, a full vacuum system inspection and refresh at hub replacement time can prevent repeated engagement failures.
The minimalist order is fine when the failure is isolated and mechanical. It’s false economy when the failure is systemic, environmental, or age-driven.
The Fitment Splits That Break Locking Hub Orders
Spline Count
This is the number-one fitment trap. Front axle shafts on otherwise identical trucks can have different spline counts depending on production date, axle model, or factory option. A 27-spline hub won’t engage a 30-spline shaft, and they can look nearly identical on screen. Always confirm the spline count before ordering.
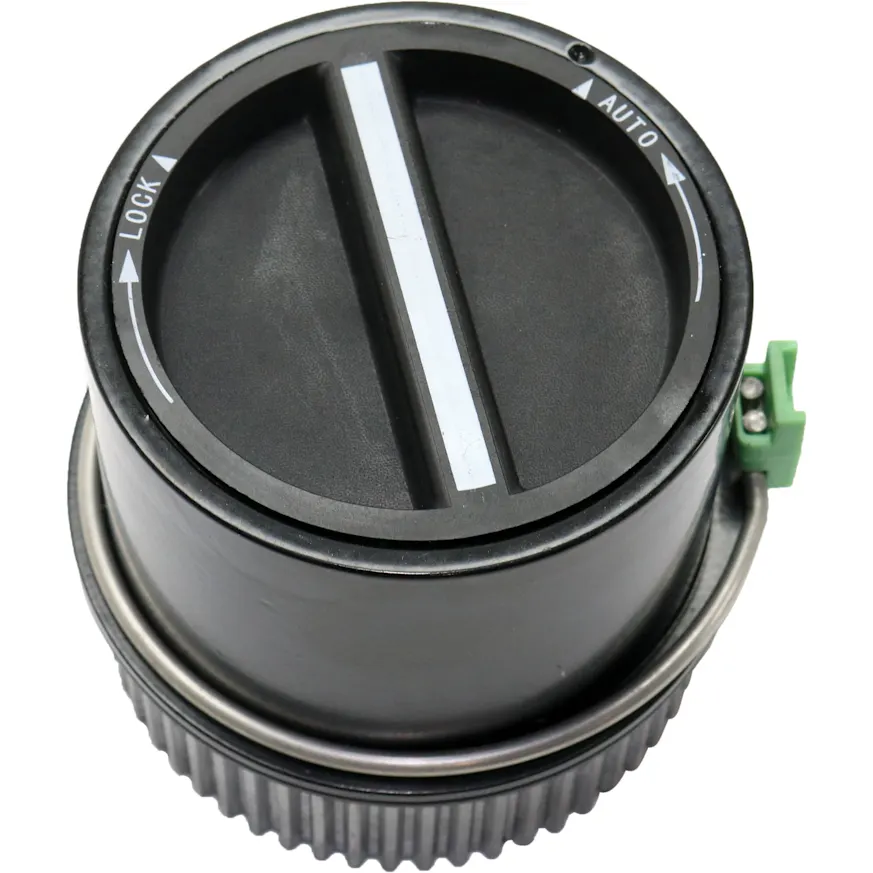
Manual vs. Automatic Engagement Type
Manual locking hubs and automatic locking hubs aren’t interchangeable without deliberate conversion. If you’re converting from auto to manual, make sure the kit is designed for your specific axle and spindle. If you’re replacing in-kind, confirm whether your vehicle uses a cable-actuated, vacuum-actuated, or pulse-vacuum system.
Axle Model
Many trucks share the same body but can be equipped with different front axle assemblies, especially across different production years or drivetrain options. The axle model (Dana 44, Dana 50, Dana 60, or a manufacturer-specific unit) determines which hub fits.
Production Date or VIN Split
Some applications have a midyear production change that alters the hub, spindle, or seal configuration. This is particularly common for Ford trucks in the late 1990s and early 2000s. If your vehicle straddles a model-year transition, check the production date on the door sticker or the VIN breakpoint listed in the fitment notes.
4WD System Type
Part-time 4WD, full-time 4WD, and automatic 4WD systems may use different hub and engagement hardware even on the same model truck. Confirm your system type before ordering.
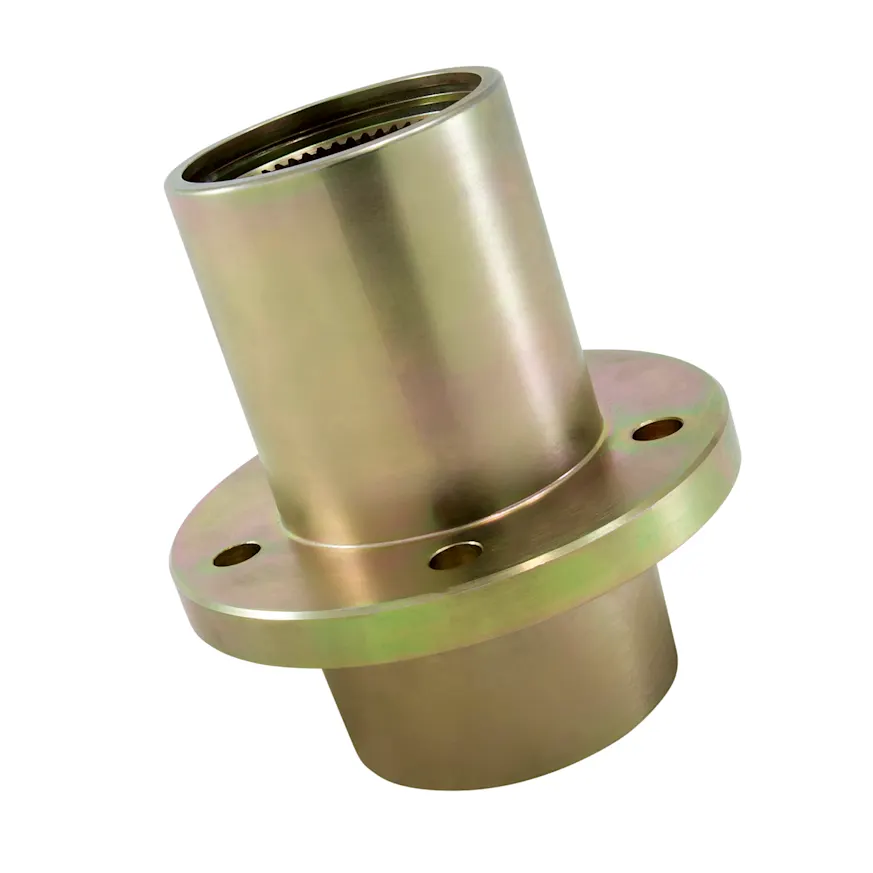
Wheel Bearing Configuration
In some applications, the locking hub assembly interacts with the wheel bearing preload or spindle nut torque. Hub assemblies designed for different bearing configurations, tapered roller vs. unit bearing for example, may not be compatible even if the bolt pattern matches.
Delivery-Day Inspection Checklist
Before you pull the wheel and start disassembly, inspect the new locking hub at the bench.
- Confirm that the spline count matches your vehicle’s axle shaft (count them if you have to)
- Verify the bolt pattern and mounting diameter against the old hub or spindle
- Check that any included seals or gaskets are present and undamaged
- Confirm that the engagement mechanism matches your system (manual dial, automatic internals, or actuator provisions)
- Inspect for vacuum port or actuator mounting provisions if your truck uses an automatic system
- Compare the overall depth and profile of the new hub to the old one
- Check that snap rings, retaining clips, or lock rings are included if the listing says they are
- Look for shipping damage, especially on the spline bore and sealing surfaces
- If a dust cap or outer cover is included, verify it matches the hub and sits flush
Your One-Job Order Sheet for a Locking Hub
- Confirm the vehicle. Year, make, model, engine, drivetrain, and 4WD system type. If your truck has a production-date split, check the door sticker or VIN.
- Confirm the spline count. Count the splines on the axle shaft, or cross-reference the axle model. Don’t guess.
- Decide on the repair scope. One hub for an isolated failure, both hubs for a matched refresh, or a full spindle-area reset for high-mileage trucks or system conversions.
- Check what the listing includes. Seals, snap rings, gaskets, and hardware may or may not be in the box. If they’re not listed, order them separately.
- Add consumables. Wheel bearing grease, spindle grease, and any threadlocker or sealant specified for your application.
- Address the system, not just the hub. For automatic systems, inspect and order vacuum lines, check valves, and solenoids if they’re suspect. For manual systems, confirm that the engagement dial or cap is included and functional.
- Bench-check before teardown. Compare the new hub to the old one before you pull the spindle apart. A five-minute comparison saves a multi-day parts delay.
The Smart Way To Shop Locking Hubs
The cheapest locking hub in the search results isn’t a deal if it has the wrong spline count, missing seals, or no snap ring in the box. The right order starts with knowing your vehicle’s axle, your engagement type, and your repair scope, then building a cart that covers the whole job.
Locking hubs don’t fail in isolation. The seals, bearings, hardware, and vacuum components around them are all part of the same system and the same labor window. A complete, well-matched order means your truck goes back together once, engages cleanly, and stays reliable.
Shop by the job, not by the part thumbnail. Confirm the fitment details that actually matter, check what’s included, and don’t skip the small stuff that holds it all together.
Keep Reading: Related Posts


Any information provided on this Website is for informational purposes only and is not intended to replace consultation with a professional mechanic. The accuracy and timeliness of the information may change from the time of publication.