
Most headlight switch orders go wrong before the old one is even removed. Someone sees a knob that looks right, adds it to the cart, and discovers at install that the connector has the wrong pin count, the dimmer function is missing, or the fog light circuit on the new switch does not exist on the vehicle. A headlight switch looks like a simple part, but it sits at the intersection of lighting, dash illumination, wiring, and in many vehicles, fog lamps and daytime running lights.
The smart approach starts with one question: what exactly needs to go in the cart for this job to finish in a single sitting? This article reframes the purchase around repair scope so the order arrives complete, fits the first time, and restores every function the old switch controlled.
The Job in One Sentence
The job is to restore full driver control of the vehicle’s exterior and interior lighting circuits through a switch that matches the car’s original electrical and physical layout.
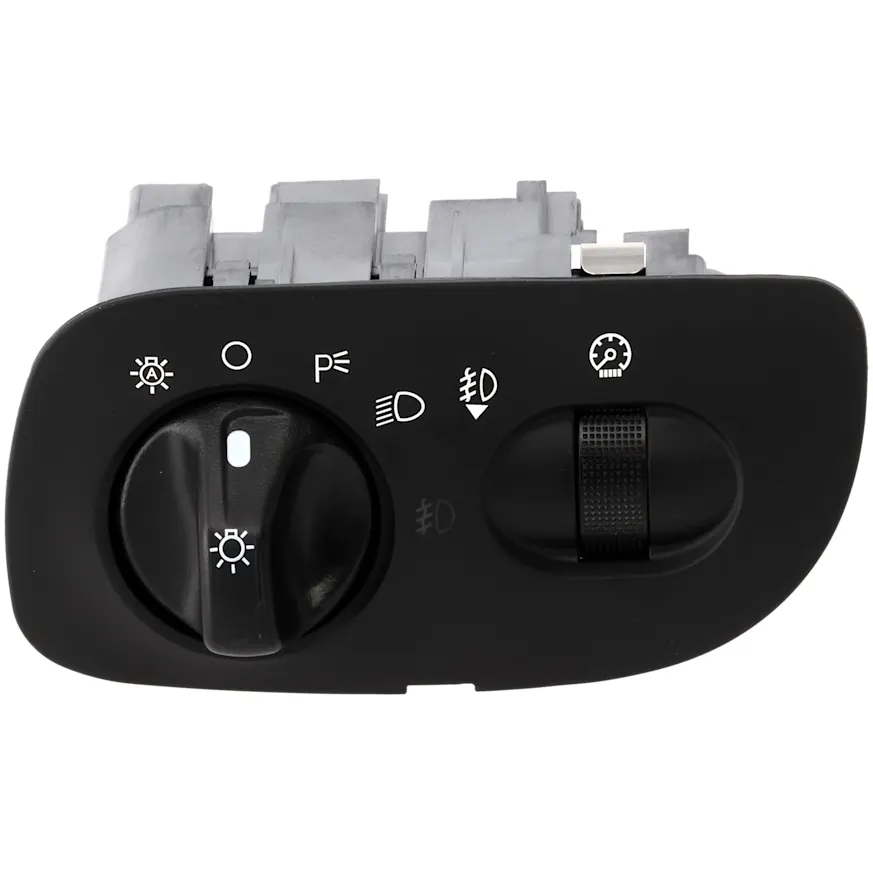
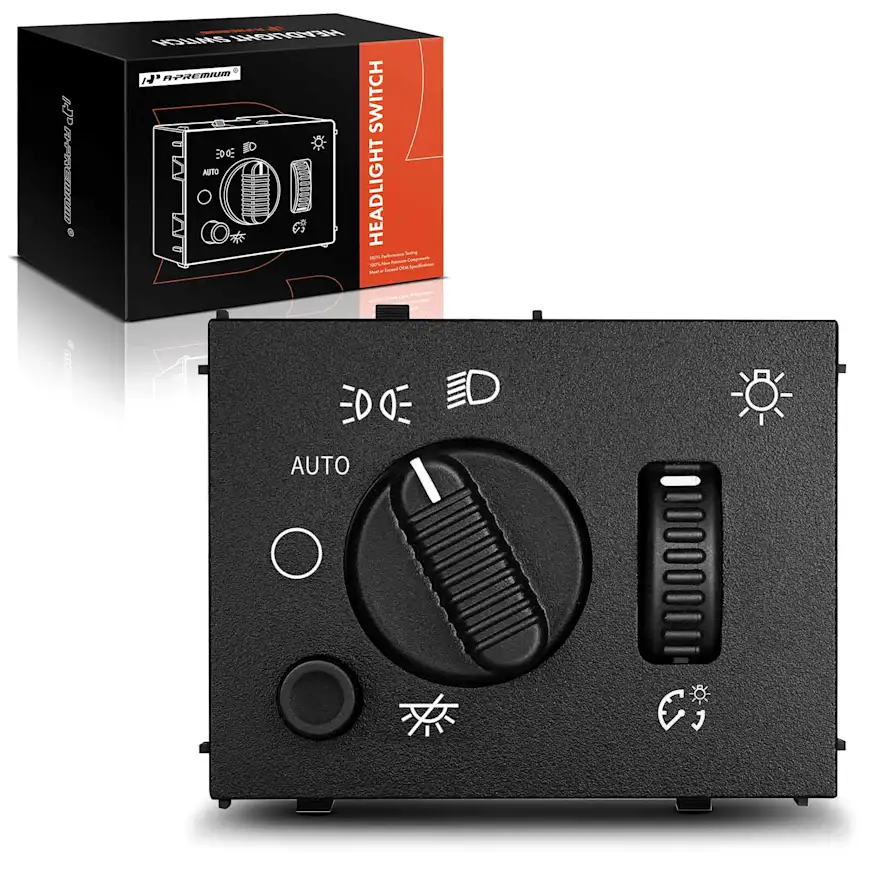
A headlight switch is not only a headlamp on/off control. It typically routes power to parking lamps, tail lamps, side markers, dash backlighting, and on many vehicles, fog lamps and the dimmer rheostat for instrument cluster brightness. Some switches are bare electrical units. Others are full dash-mounted assemblies with a bezel, knob, and integrated fog light button. The order has to match the exact variant, not just the general category.
How Modern Headlight Switch Circuits Work
The caveat is that most modern vehicles use a switch that does not carry the lamp current. Instead, the switch tells the body control module (BCM) to turn on the headlamps through relays or other control modules.
For many vehicles produced in the last 15 to 20 years, a straight-wired headlight circuit, where the full current of the bulbs flows directly through the dashboard switch, is uncommon. The industry has moved largely to logic-side switching rather than load-side switching. For that reason, headlight switches on many vehicles built since about 2010 are less likely to fail from heat and current load than older designs.
Choose Your Cart Size
1. Minimum Viable Repair
The switch failed, the wiring and connector test fine, and the goal is to restore function with the smallest correct order.
Choose it if:
- The vehicle is a daily driver with no other lighting complaints
- The connector and pigtail are in good shape
- The dash bezel and knob are intact and reusable
Typical cart:
- The exact-fit headlight switch (bare unit or assembly, matched to application)
- Contact cleaner for the connector
2. Smart Same-Access Refresh
The dash is already coming apart, so anything living in the same access zone gets attention now.
Choose it if:
- The knob or bezel is cracked, faded, or sticky
- The connector shows heat discoloration or melted pins
- The dimmer rheostat feels gritty or cuts out
Typical cart:
- Full headlight switch assembly with bezel and knob
- Replacement pigtail or connector repair kit
- Dimmer knob or rheostat, depending on application
- Dash bulb set if the cluster illumination is dim
3. High-Mileage / Do-It-Once Reset
Older trucks, classic vehicles, and high-mileage sedans often have multiple tired switches and brittle wiring in the same area.
Choose it if:
- The vehicle is 15+ years old
- Other dash switches feel worn
- The lighting circuit has a history of intermittent faults
- On older pull-type switches, headlights that flash off and on randomly on high beam can point to the internal switch circuit breaker.
- You’ve added extra lights to the park light circuit and burned out the switch. You’ll need to rewire the external lights through a relay if this has happened.
Pro Tips are nuggets of information direct from ASE-certified automobile technicians working with CarParts.com, which may include unique, personal insights based on their years of experience working in the automotive industry. These can help you make more informed decisions about your car.
Pro Tip: Do not choose this option if the headlights aren’t giving any trouble and the switch and contacts aren’t melted.
Typical cart:
- Complete switch assembly, OE-grade
- New pigtail and terminals
- Dimmer switch or dash light rheostat
- Replacement knobs and bezels
- Dielectric grease and contact cleaner
What Is Commonly Ordered Together on This Job
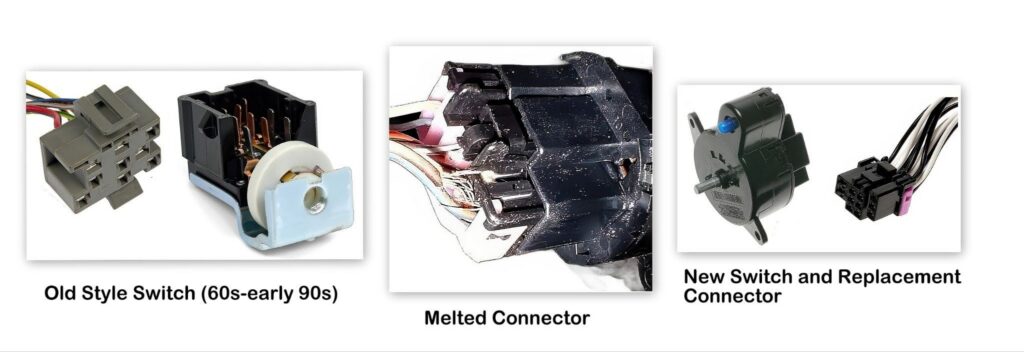
Connectors and pigtails. Headlight switches pull steady current, and burned or melted terminals are common. If the connector shell shows any browning, order a pigtail kit and splice it in while the dash is open.
Dimmer knob or rheostat. On many vehicles the dash brightness rheostat is part of the headlight switch assembly. On others it is a separate piece that shares the same housing. A car dimmer switch can also control interior cluster brightness independently, so confirm which layout the vehicle uses before ordering.
Dash bezel and knob. Older GM trucks, Ford pickups, and many classic applications sell the bezel and knob separately. Skip this detail and the new switch installs with a cracked trim ring still on the dash.
Bulbs and consumables. If the cluster lighting is dim, dash bulbs often belong in the same order. Dielectric grease on the connector extends switch life noticeably.
Full assembly versus bare component. Some listings include the knob, bezel, and wiring harness. Others are the switch body alone. Read the listing carefully because this is the single most common source of incomplete orders in this category.
What People Forget Until the Vehicle Is Already Apart
A quick checklist that saves return trips:
- Does the new switch have the same number of connector pins?
- Does it include the fog light function, or omit it?
- Is the dimmer rheostat built in, or separate?
- Does the listing include the knob and bezel, or just the switch body?
- Is the shaft length correct for a pull-type switch?
- Does the mounting style match the dash cutout?
- Are there any daytime running light circuits the new switch has to support?
- Is there a separate auto headlight or twilight sensor circuit on the old plug?
When Replacing Only the Headlight Switch Is False Economy
Swapping only the switch makes sense when the rest of the circuit is healthy. Good connector, clean terminals, working dimmer, intact bezel. In that case the minimalist order is the right order.
The small cart becomes the expensive cart when the failure is actually heat damage at the connector. Headlight switches carry real amperage, and a corroded or melted terminal cooks the new switch within weeks. If the old connector shows brown plastic, green corrosion, or pins that wiggle, the pigtail belongs in the same order.
The other trap is selling short on worn assemblies. A cracked bezel or a dimmer that no longer clicks through its detents becomes obvious the moment the new switch goes in. Going back into the dash a second time costs more labor than adding a bezel to the first order.
The Fitment Splits That Break Headlight Switch Orders
With or Without Fog Lights
Two otherwise-identical trims often split on this single feature. A switch built for a fog-equipped vehicle has an extra circuit the base model does not use, and the base switch will not trigger the fog lamps on a loaded trim.
Connector Pin Count
Pin count changes by model year, submodel, and options package. A six-pin plug does not mate with an eight-pin switch, regardless of how similar the knobs look.
Rotary Versus Pull Type
Domestic trucks and older sedans often use a pull-type shaft switch. Later vehicles moved to rotary dash-mounted units. These are not interchangeable even on the same nameplate across generations.
Integrated Dimmer Rheostat
Some switches include the cluster dimmer. Others split it into a separate piece. Mixing the two layouts leaves the dash brightness control either missing or doubled up.
Daytime Running Light Provision
Vehicles sold in markets with mandatory DRL often have a switch variant that other markets do not. Depending on application, this can change pin count and internal circuitry.
Assembly Versus Bare Switch
A bare replacement headlight switch costs less but does not include the knob, bezel, or harness. Check what the listing actually ships.
Delivery-Day Inspection Checklist
Before teardown, put the new switch next to the old one and confirm:
- Same connector shape and pin count
- Same mounting tabs or bracket pattern
- Same shaft length and knob style on pull-type units
- Fog light button present or absent to match the vehicle
- Dimmer rheostat integrated or separate, matching the old layout
- Bezel dimensions match the dash cutout
- No shipping damage to the housing or terminals
- All included hardware present if the listing advertises an assembly
Your One-Job Order Sheet for a Headlight Switch
- Confirm the vehicle. Year, make, model, trim, and whether it has factory fog lights.
- Confirm the repair scope. Switch only, or switch plus connector and bezel.
- Confirm what the listing includes. Bare switch, full assembly, or kit with knob and bezel.
- Add the consumables. Dielectric grease, contact cleaner, and a pigtail if the old connector shows heat damage.
- Bench-check the old part logic. Count the pins, note the knob style, and photograph the connector before ordering.
- Choose the right ownership logic. Daily driver with a clean circuit takes the minimum cart. An older truck with a tired dash takes the full refresh.
The Smart Way to Shop Headlight Switches
The cheapest-looking order is rarely the correct order. A replacement switch that matches the knob in the thumbnail but misses the fog light circuit or the correct pin count turns a thirty-minute job into a return, a reorder, and a second teardown. A wrong pin count can also leave the headlights flickering once the new switch is in.
The correct order is the one that closes the repair in a single sitting. That means matching the exact electrical layout, including the right accessories in the cart, and verifying the parts against the old unit before anything gets unbolted.
Shop by repair scope, not by resemblance. The best order is the one that restores every lighting function the headlamps and dash actually need, and does not need to be revisited.
Keep Reading: Related Posts


Any information provided on this Website is for informational purposes only and is not intended to replace consultation with a professional mechanic. The accuracy and timeliness of the information may change from the time of publication.


