
An EGR valve replacement is rarely anyone’s first choice; it usually comes up after weeks of rough running, a persistent check engine light, or a failed emissions test. By the time you are considering it, you’re weighing drivability, long-term engine health, and whether cleaning or repair is still worth your time. Understanding what the valve actually does and how failures show up in real engines helps you avoid throwing parts at the problem.
The EGR (exhaust gas recirculation) valve’s only job is to meter a controlled amount of exhaust back into the intake under specific load conditions to reduce combustion temperature and NOx emissions. When the valve sticks, clogs, or loses electrical control, the engine management system can no longer keep combustion under control, and you’ll see symptoms like knock, poor response, elevated emissions, and sometimes long-term damage if the issue is ignored.
When EGR Valve Replacement Is the Right Fix
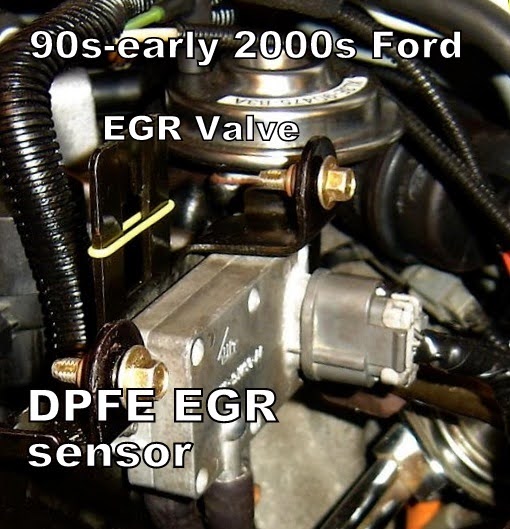
Before committing to an EGR valve replacement, it’s smart to verify that the valve is genuinely the root cause. Typical symptoms of a failing EGR system include a check engine light with EGR-related codes (often P0401 “insufficient flow” or similar), rough idle, hesitation on tip-in, surging at cruise, increased fuel consumption, and in some cases spark knock or diesel detonation under load.
If the valve sticks fully open, the engine can idle rough even stall at idle; if it sticks closed, NOx emissions spike and combustion temperatures climb. In some cases, you may get spark knock or detonation, but usually you won’t notice anything at all.
Pro Tips are nuggets of information direct from ASE-certified automobile technicians working with CarParts.com, which may include unique, personal insights based on their years of experience working in the automotive industry. These can help you make more informed decisions about your car.
Pro Tip: If you start the engine and it’s idling rough and the manifold gets really hot really fast, you’ve likely got an EGR stuck or fouled open by carbon.
A basic diagnostic workflow should include:
- Scanning for fault codes and looking at freeze-frame data (load, RPM, coolant temp at the time the code set).
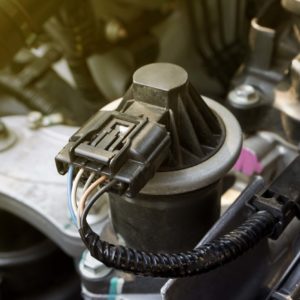
- Visual inspection of the EGR valve, passages, and harness for carbon buildup, coolant contamination, broken connectors, or obvious vacuum leaks.
- Commanding the valve on and off with a scan tool (if electronic) or applying vacuum to a diaphragm-type valve to see whether the engine’s idle quality changes. In other words, If you have a two-way scan tool (higher-end tool) you can command the EGR open to see if the engine idles rough. If not, the passages may be clogged. The feedback sensor (different for different platforms) may be an issue.
- Checking related components such as EGR solenoids, differential pressure sensors, and EGR coolers on diesel applications.
Cleaning is a valid EGR valve repair strategy when the valve still moves freely and the electrical part tests good. On many gasoline engines, you can remove the valve, soak only the gas-side portion with intake or throttle-body cleaner, and scrape the ports in the intake manifold, then reinstall with a fresh gasket. If the pintle is seized, the position sensor is out of range, the electronics have failed, or the valve has obvious mechanical damage or coolant contamination, replacement is the only reliable choice.
Pro Tips are nuggets of information direct from ASE-certified automobile technicians working with CarParts.com, which may include unique, personal insights based on their years of experience working in the automotive industry. These can help you make more informed decisions about your car.
Pro Tip: If you have a P0401 code, you may have clogged EGR passages, which is a common issue that replacing the EGR valve won’t fix. This issue won’t usually cause anything except check engine light (MIL) and increased NOx emissions.
Cost is heavily platform-dependent. On common passenger vehicles, the valve itself often falls in the roughly $60–$500 range, with total professional replacement cost commonly landing in the low- to mid-hundreds of dollars depending on access. A typical half-ton pickup example: for many Ford F-150 configurations, average replacement cost is estimated between about $276 and $350. Hybrids and late-model diesels with integrated coolers or complex plumbing can sit higher.
Tools and Parts Needed Before You Start Changing an EGR Valve
Preparation is what separates a straightforward EGR valve change from an all-day project. For most modern cars and light-duty trucks, you’ll want:
- Basic hand tools: 1/4- and 3/8-inch drive ratchets, metric and/or SAE sockets, including deep sockets, box wrenches for tight spaces
- Torque wrench capable of low to mid range (around 10–40 ft-lb is typical)
- New EGR valve matched to your exact engine and emissions calibration
- New EGR gasket(s) or O-rings, and new mounting bolts if the originals are heavily corroded
- Carburetor, throttle-body, or intake cleaner for carbon removal
- Nylon or brass brush and a plastic or composite gasket scraper
- Shop towels and a small vacuum or compressed air for cleaning debris away from ports
- Safety glasses and gloves
- OBD-II scan tool capable of clearing codes and, ideally, commanding the EGR valve for testing
On many late diesels, plan for extra items: new coolant (if the EGR cooler must be disconnected), fresh hose clamps, and possibly replacement coolant hoses that become brittle with age.
How to Replace an EGR Valve Step by Step
The exact procedure varies by platform, but the overall “how to replace an EGR valve” process is similar across most engines. Always work on a cold engine to reduce burn risk.
1. Verify the failure first
- Read and record all engine codes.
- Confirm there are no obvious vacuum leaks, broken connectors, or wiring issues that could mimic an EGR fault.
2. Disconnect the battery
- Remove the negative terminal to avoid short circuits while you remove the valve and to protect sensitive electronics.
3. Locate the valve and gain access
- Consult a service manual or reliable repair database for your engine’s location; many valves sit near the intake manifold or at the front or side of the cylinder head.
- Remove any intake ducting, engine covers, or brackets that block access.
4. Disconnect electrical and vacuum connections
- Unplug electrical connectors by releasing their locks instead of pulling on wires.
- For older designs, carefully remove any vacuum hoses and mark them so they go back in the correct locations.
5. Unbolt and remove the EGR valve
- Spray penetrating oil on heavily corroded fasteners and allow it to soak.
- Remove mounting bolts evenly to avoid stressing the housing.
- Lift the valve off the sealing surface; note any coolant lines on integrated-cooler designs and be prepared to capture coolant.
6. Clean the mating surfaces and passages
- Remove all remnants of the old gasket with a plastic scraper to avoid gouging the aluminum.
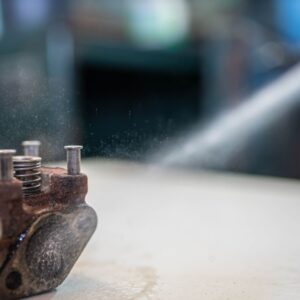
- Use intake cleaner and a nylon brush to dissolve carbon in the passages leading into the manifold. Keep debris out of open ports by stuffing them with a clean rag, then vacuuming before removing the rag.
7. Install the new valve and gasket
- Position the new gasket, then place the new valve on the manifold or adapter.
- Hand-start all bolts before tightening to avoid cross-threading.
- Tighten bolts evenly in a criss-cross pattern to the specified torque using a torque wrench.
8. Reconnect lines, hoses, and electrical connectors
- Reinstall all vacuum lines or coolant hoses and secure with clamps.
- Reconnect electrical connectors until they click into place.
- Refit any brackets, engine covers, and intake plumbing removed earlier.
9. Reconnect the battery, clear codes, and confirm operation
- Reattach the negative battery cable.
- Clear codes with a scan tool.
- Start the engine and watch live data for EGR command and feedback where supported, then road-test under light-to-moderate load to confirm no new codes or drivability issues arise.
If you’re unsure how to remove the EGR valve on your specific engine—particularly where access is tight—looking up an engine-specific service procedure or walk-through video for your exact year, make, and engine code is worth the time.
Engine-Specific EGR Insights: Trucks, Crossovers, and Hybrids
Different platforms put very different stress on EGR components. A few examples help shape realistic expectations:
6.7-liter Cummins light-duty diesels
These engines move a lot of soot through their EGR systems, especially when driven gently or idled for long periods, so valve and cooler clogging is common. The EGR valve is typically mounted near the intake elbow, often under charge-air plumbing, so give yourself extra time to remove intake tubes and heat shields. Deleting EGR and DPF components may be popular online, but it is illegal for on-road use in most jurisdictions and can create inspection problems later.
Cummins ISX heavy-duty applications
On highway tractors, the EGR valve is physically large and often buried under intake and crossover components; 2–3 hours of labor is common just to reach, remove, and replace it. Pairing EGR valve replacement with EGR cooler inspection or replacement is smart, as cooler failures and plugged passages are frequent and parts plus labor can approach several thousand dollars.
Duramax diesel pickups
Duramax EGR valves are generally accessible but live in a high-heat environment. Heat cycling and soot both contribute to sticking valves, so close attention to cooling system health and regular fuel filter changes pays off. When the upper intake is off for other work (like injector or glow-plug service), that’s an ideal time to inspect and clean EGR passages.
Ford F-150 configurations with EGR
Some F-150 engines, especially diesel and certain earlier gas V8s, are prone to EGR flow codes when carbon builds up in the passages. Owners often first notice reduced power, increased fuel consumption, and a persistent EGR-related check engine light. Because parts and labor are moderate compared with heavy-duty diesels, professional replacement is a reasonable option if you’re not comfortable with DIY work.
Toyota Prius hybrids
On many second- and third-generation Prius models, EGR and EGR cooler clogging has been linked to elevated combustion temperatures and a higher risk of head gasket failure at higher mileages. When replacing or cleaning the EGR valve, it’s wise to clean the cooler and intake manifold runners at the same time, and to address any chronic oil consumption, because oil vapor greatly accelerates carbon buildup.
Chevy Equinox crossovers
Certain Equinox engines use a conventional EGR valve that can trigger P0401 “insufficient flow” as the passages clog. Access can vary widely between the 3.4-liter earlier engines and later Ecotec variants; some models require intake removal or careful maneuvering around the rear bank. Following a model-specific removal procedure or video guide can save a lot of frustration.
Chevy Volt range-extender hybrids
The Volt’s compact engine bay means the EGR valve is packaged tightly, but it can still be removed with basic tools and an extension if you know the exact path in. Some owners have reported EGR-related shorts that blow fuses and disable the engine; in those cases, thorough wiring inspection and proper valve replacement is critical, and roadside “bypass” tricks should be treated as temporary at best. Professional replacement costs for the Volt typically sit in the mid-hundreds of dollars.
Preventive EGR Care After Replacement
Once a fresh valve is in place, protecting your investment comes down to keeping soot and oil out of the system and avoiding extreme operating conditions that accelerate carbon buildup. Good basic maintenance—timely oil changes with the correct spec, high-quality fuel, and properly functioning PCV and crankcase ventilation—reduces the amount of oily vapor and particulates entering the intake, which in turn slows EGR passage clogging.
On engines known for EGR and intake deposits, integrating periodic EGR and intake cleaning into your maintenance schedule is smart. That can mean pulling the valve and cooler for a thorough cleaning every 60,000–100,000 miles on soot-heavy diesels, or using intake and upper-cylinder cleaners at sensible intervals on gasoline engines, always following the manufacturer’s guidelines. Some platforms with chronic buildup issues benefit from additional measures such as catch cans or revised PCV routing, provided they do not interfere with emissions certification.
Finally, be cautious about “fixes” that disable or delete the EGR system. While they may temporarily reduce soot in the intake, they raise NOx emissions dramatically, can cause the engine to fail inspections, and may lead the control module to run overly aggressive timing or boost strategies that were never validated without cooled EGR in place. A correctly functioning EGR system, paired with sensible driving and maintenance habits, is a better long-term solution for both engine life and compliance.
Keep Reading: Related Posts


Any information provided on this Website is for informational purposes only and is not intended to replace consultation with a professional mechanic. The accuracy and timeliness of the information may change from the time of publication.


