Refrigerant doesn’t just vanish. If your car’s AC is blowing warm air after a long winter or a season sitting idle, a low charge is one of the first things to rule out. If the compressor won’t run, diagnose the problem before adding refrigerant. If all the refrigerant has leaked out or the system has been opened to the atmosphere, it needs leak repair and evacuation before recharging.
If the system is confirmed to be low on refrigerant, getting refrigerant back into the system starts with connecting the charging hose correctly. Get that wrong, and nothing else you do will matter. A short-cycling compressor can indicate a low charge, but it isn’t proof by itself. For the running-system charging method described here, the compressor must be operating properly.
This guide covers connecting a temporary charging hose to a service port. That tool is different from the vehicle’s permanently installed refrigerant lines, which are discussed in the replacement-parts section below.
Warning: Never work with refrigerant unless you’re wearing eye protection.
How to Connect a Refrigerant Hose to a Car AC System
The connection point is the low-pressure service port, also called the low-side port. It is generally on the larger-diameter AC line between the evaporator and the compressor, or on the accumulator in systems that use one. The cap may be marked with an “L,” but cap colors vary. Confirm the port location using vehicle-specific service information rather than color alone.
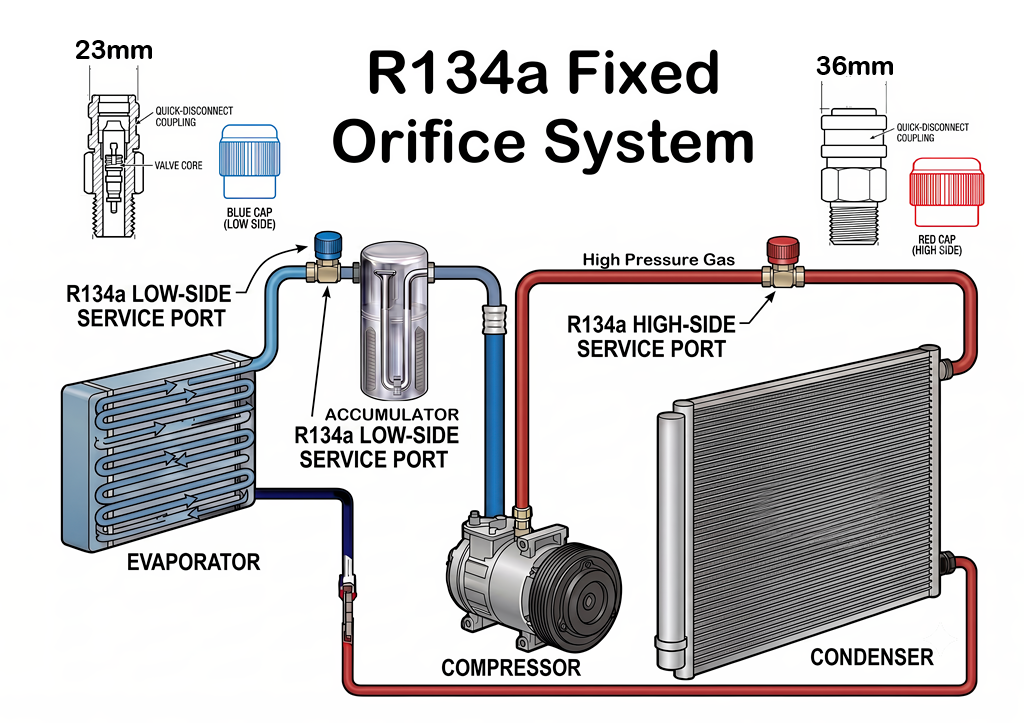
Here’s the full process if you’re using a short low-side charging hose:
- Park outdoors on a level surface, apply the parking brake, turn off the engine, and let hot components cool before reaching into the engine bay.
- Put on safety goggles and gloves suitable for handling refrigerant.
- Locate the low-pressure service port and wipe the area clean with a lint-free rag.
- Unscrew the port cap counterclockwise and put it somewhere you won’t lose it.
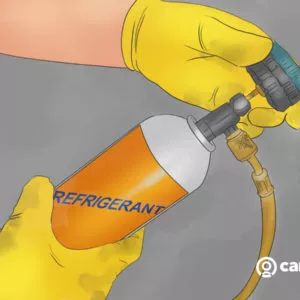
- Attach the correct refrigerant can to the charging assembly according to the tool’s instructions, with refrigerant flow shut off. Can taps differ, so follow the specified valve position and connection procedure for your particular can and tool.
- Pull back the collar on the quick-connect fitting at the end of your charging hose.
- Push the fitting firmly over the port until it clicks into place.
- Tug lightly on the hose to confirm it’s seated. If it pulls free easily, it hasn’t latched.
- With the hose routed clear of belts, fans, and hot components, start the engine and set the AC to maximum cooling with the fan on high. Confirm that the compressor is operating and check the pressure according to the kit’s instructions before dispensing refrigerant. If the reading or compressor operation is abnormal, stop and diagnose the system.
- Keep the vehicle parked with the hood open while charging. Hold the can in the position specified by the kit manufacturer, generally upright for vapor charging. Keep the can and hose away from hot or moving parts. Never drive with the charging hose or refrigerant can attached.
- If charging is appropriate, dispense refrigerant in the intervals specified by the kit manufacturer. Stop the flow before checking the gauge and allow the reading to stabilize. Do not assume the system needs an entire can, and do not use an ungauged hose to estimate the charge.
- Cooler air at the vents and a cold suction line can help assess performance, but neither confirms the correct refrigerant quantity. The most reliable way to establish the correct charge is to recover the remaining refrigerant, repair any leaks, evacuate the system, and recharge it by the manufacturer’s specified weight.
- Shut off refrigerant flow, disconnect the charging hose according to the tool’s instructions, and put the cap back on the low-side port. See the disconnection section below.

Warning: Never connect to the high-pressure side using a consumer recharge kit. The high-side service port is on the high-pressure portion of the system, which includes the discharge line from the AC compressor and the liquid line downstream of the condenser. Its exact location varies by vehicle. Connecting a small charging can to the high side can expose it to dangerous pressure. The high-side fitting is a different size, so the correct low-side charging coupler should not fit it. Never force a connection or use an adapter to bypass that protection.
What Refrigerant Type Does Your Car Use?
Many newer vehicles use R1234yf, while many older vehicles use R134a. Existing R134a systems can still be serviced with R134a. Make sure you know what’s in yours, because R1234yf uses different service fittings.
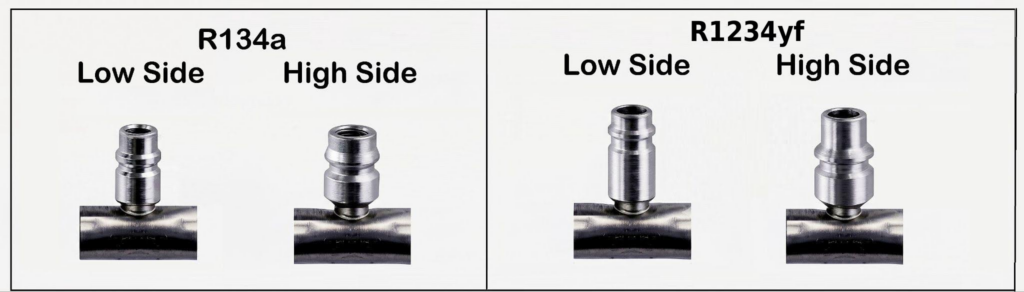
R134a vs. R1234yf
R134a became common in the 1990s, and automakers began introducing R1234yf during the 2010s. There is no universal 2015 model-year cutoff that identifies the refrigerant in every vehicle.
R134a and R1234yf use different service-port fittings and require compatible couplers and charging equipment. Can connections also vary with refrigerant and container design, including self-sealing and piercing-style cans. Match the hose and can tap to the exact refrigerant and container instead of assuming that thread size or coupler appearance establishes compatibility. Never mix refrigerants or force mismatched fittings.
Check your owner’s manual or the underhood sticker near the AC components before buying anything. Skipping that step is how a simple AC recharge turns into a shop visit.
What to Look for When Buying an AC Charging Hose
Not every hose on the market is built to the same standard. These are the specs worth checking:
- Hose length: Choose a hose long enough to reach the service port without stretching or routing it against hot components, belts, or fans. The required length depends on your engine bay and service-port location.
- Gauge quality: Look for a clearly marked gauge suitable for the refrigerant and the tool’s intended pressure range. A gauge with a higher maximum pressure does not automatically provide better resolution. Accuracy, dial size, and graduation spacing matter, and color-coded zones do not replace vehicle-specific diagnostic information.
- Coupler construction: Metal couplers hold up better than all-plastic versions over time. Make sure the collar slides smoothly before committing.
- Pressure rating: Choose a charging assembly with a manufacturer-specified working-pressure rating appropriate for the refrigerant and service application. Working pressure and burst pressure are different ratings. The hose, coupler, gauge, and valves must all be suitable for the job.
Trigger Kits vs. Manifold Gauge Sets
Consumer recharge hoses with trigger dispensers are built for a quick top-off using a single can. However, a single low-side gauge cannot establish how much refrigerant remains in the system or diagnose every cause of poor cooling. But if you’re diagnosing AC performance or adding refrigerant more than once, a manifold gauge set with separate blue and red hoses gives you pressure readings from both sides of the system. Those readings still require vehicle-specific interpretation, and a manifold set does not replace recovery equipment or charging by weight.
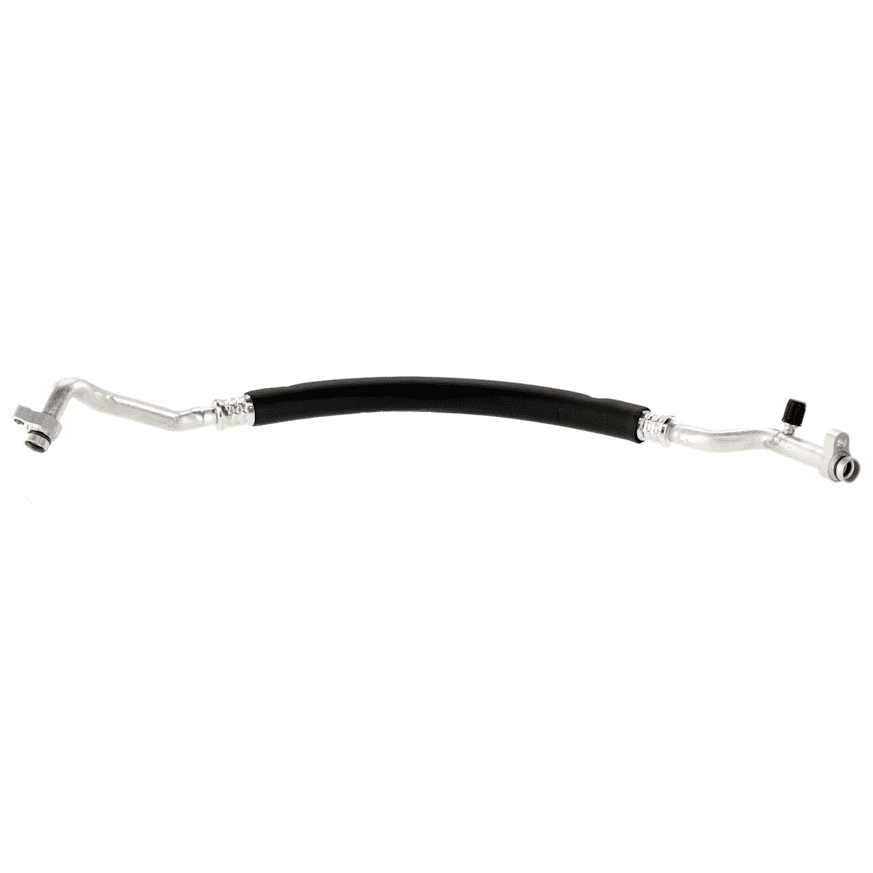
When choosing aftermarket charging hoses and gauge sets, compare their refrigerant compatibility, working-pressure ratings, and operating instructions. Vehicle-specific replacement refrigerant hoses are different products and should not be confused with these service tools.
How Do You Know the Connection Is Working?
Once the engine is running and the AC is on full blast, watch the gauge on your charging hose. For an operating-pressure check, the compressor must be pumping, and refrigerant flow from the can should be stopped before you read the gauge. On a conventional clutch-equipped compressor, the center of the pulley rotates when the clutch engages. Clutchless and electric compressors require different checks.
Some R134a systems operate around 25 to 45 PSI on the low side under certain conditions, but that is not a universal healthy range or charging target. Ambient temperature, airflow, compressor design, engine speed, and system load affect pressure. For either R134a or R1234yf, use the vehicle manufacturer’s specifications and the charging equipment’s instructions. It also helps to understand how AC systems work before diagnosing any pressure readings.
Tip: On a cycling-clutch system, low-side pressure generally rises when the compressor stops and falls when it engages. Read the gauge under the operating conditions specified by the manufacturer, with refrigerant flow paused and the reading stabilized. Do not add refrigerant simply to force the gauge into a generic target range.
How to Disconnect a Refrigerant Hose Safely
First, stop dispensing refrigerant and close the charging valve as directed by the tool manufacturer. Follow the kit’s instructions on whether the engine and AC should remain running during disconnection. Keep clear of belts, fans, and hot surfaces.
Pull back the collar on the quick-connect fitting and pull the hose straight off the port. Don’t twist it. If the coupler has a separate control knob, close it as instructed before releasing the fitting. The service-port valve should close when the coupler is removed. A brief hiss can occur as trapped refrigerant escapes, but continued hissing or spraying indicates a leak that needs attention. Never deliberately vent refrigerant to reduce an overcharge.
Replace the port cap immediately after pulling the hose off. The cap and its seal help prevent refrigerant leakage and keep dirt and water away from the service valve. A missing cap does not automatically mean moisture has entered the refrigerant circuit, but it should be replaced promptly.
If air and moisture enter an opened or leaking system, they can cause corrosion and other problems. On systems equipped with an AC accumulator, its desiccant absorbs moisture but has a limited capacity. Follow the vehicle manufacturer’s replacement requirements after contamination or exposure to the atmosphere. If you want to know more about how it works, read about the signs of a bad accumulator.
Does It Make Sense to Buy a Replacement AC Refrigerant Hose Online?
Absolutely. Aftermarket AC refrigerant hoses are engineered to match OEM pressure ratings, diameter specs, and routing geometry, often at a fraction of dealership prices. The key is confirming fitment before ordering. AC hoses have pre-formed bends designed to match a specific engine bay layout. A hose that’s the right diameter but the wrong length or angle won’t seat cleanly at the fittings, and that creates leak points.
Make sure the listing specifies whether the hose is for the suction side or discharge side. They’re not interchangeable. The discharge hose runs significantly hotter and carries higher pressure, so it’s built with thicker walls. If warm air is a recurring issue even after a recharge, it may be worth checking whether a bad AC compressor is the real culprit before adding more refrigerant.
CarParts.com carries vehicle-specific AC refrigerant hoses from trusted aftermarket brands, with fitment filters that narrow results to your exact year, make, model, and engine.
Keep Reading: Related Posts




Any information provided on this Website is for informational purposes only and is not intended to replace consultation with a professional mechanic. The accuracy and timeliness of the information may change from the time of publication.