To swap control arm bushings, you remove the control arm from the vehicle, press the old bushings out of the arm, press new ones in, then reinstall everything and book an alignment. Most DIYers can finish a side in a long afternoon with a bushing press kit, basic hand tools, and a jack with stands. Whether it’s worth doing yourself depends on your vehicle, the rust situation, and how much your time is worth.
Key Takeaways
- Many shops, including professional repair facilities, replace the entire control arm because doing so is usually faster and may be more economical.
- The job centers on pressing rubber or polyurethane bushings out of the control arm and pressing new ones in.
- Expect roughly $200 to $600 in parts and $300 to $700 in shop labor per side, depending on your vehicle.
- Sometimes a complete control arm assembly costs less than separate bushings plus labor.
- Plan on an alignment afterward, since suspension geometry shifts when the arm comes off.
- Lubricating the press threads and chilling new bushings makes installation noticeably easier.
What Control Arm Bushings Do
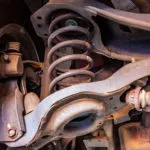
Control arm bushings are rubber or polyurethane components installed between a control arm and the vehicle’s frame or subframe. They cushion the connection, allow controlled suspension movement, absorb vibration, and help maintain wheel position and alignment.
They may begin to squeak before they become loose enough to cause other symptoms, especially when the rubber loses its bond with the outer shell.
When the bushings tear, dry-rot, separate, or split, you might hear a clunk over bumps, notice uneven tire wear, or feel the steering wander. These are also among the common control arm symptoms. A visual inspection may reveal cracked rubber, excessive movement, or fluid leaking from a hydraulic bushing.
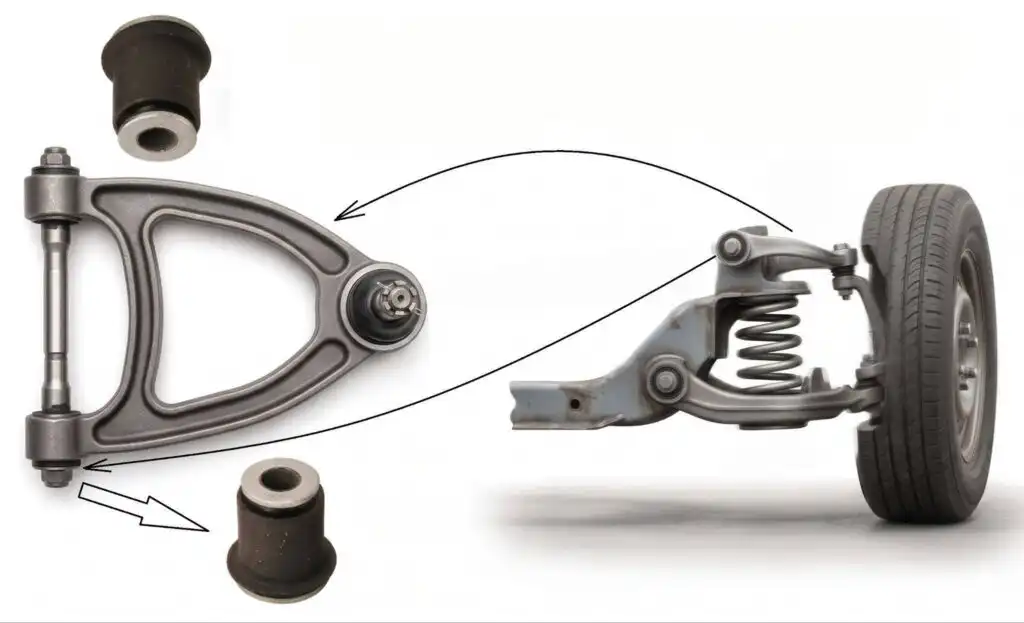
What You’ll Need
A bushing press kit handles the toughest part of the job, since these sleeves sit in tight steel housings and won’t come out with a hammer alone. Plan to gather a bushing press or large C-clamp with the right cups and adapters, a floor jack and pair of jack stands, a metric or SAE socket set, a breaker bar, a torque wrench, penetrating oil, anti-seize, and grease. You’ll also want the new bushings, plus any one-time-use bolts that the service manual specifies.
A bench vise helps when the arm is small enough to clamp. For pressed-in ball joints that share the arm, a separate ball joint adapter or a hammer for staked joints may also come into play.

Pro Tips are nuggets of information direct from ASE-certified automobile technicians working with CarParts.com, which may include unique, personal insights based on their years of experience working in the automotive industry. These can help you make more informed decisions about your car.
Pro Tip: This is an advanced DIY job. If you are not comfortable working around suspension components, loaded springs, and high-torque fasteners, leave the repair to a professional.
How the Job Goes, Step by Step
Lift the Vehicle and Free the Arm
Park the vehicle on a firm, level surface. Loosen the lug nuts, raise the vehicle at the specified lifting points, and support it securely with jack stands. Never work beneath a vehicle supported only by a floor jack.
Remove the wheel and apply penetrating oil to the control arm bolts, pinch fasteners, and other hardware that must come apart. Allow the oil time to penetrate.
Depending on the suspension design, disconnect the sway bar end link, separate the ball joint, and remove the through-bolts securing the arm to the frame or subframe.
Support the lower control arm before removing hardware if the coil spring seats on or loads the arm. Never remove a control arm that supports a loaded spring without following the vehicle manufacturer’s service procedure. Some suspension designs require a spring compressor or other specialized equipment.
Inspect Before You Commit
With the arm removed, inspect the bushing housings and the rest of the assembly. Heavy rust pitting, distorted mounting points, cracked metal, or signs of a bad ball joint can change the repair plan.
At this point, a complete control arm assembly with new bushings and, when applicable, a new ball joint may be the more practical purchase. Replacing the assembly avoids press work and renews several wear components at once.
Press Out the Old Bushings
Set the arm in the press with the right size cup behind the bushing and a driver in front. Lubricate the press threads, then steadily turn the screw until the bushing pops free. If it refuses to move, careful heat from a torch can break the rubber-to-metal bond, but go easy near aluminum arms to avoid weakening them.
Press In the New Bushings
Chill new rubber bushings in the freezer for an hour first. They’ll shrink slightly and slide in with less resistance. Line the bushing up square with the housing, set the press, and drive it in until it bottoms out. Don’t force it crooked, because a misaligned bushing will fail early.
Reinstall and Torque
Bolt the arm back on, but leave the through-bolts loose until the suspension sits at ride height. Torquing rubber bushings while the wheel is hanging twists them and shortens their life. Lower your vehicle onto its wheels, then bring everything to spec with a torque wrench.

What It Costs
Cost varies a lot, so don’t anchor on a single number. When asking how much should it cost to replace control arm bushings, the honest answer falls in a wide range. A pair of OEM-quality bushings runs roughly $30 to $150, while polyurethane sets land between $80 and $250. Independent shops typically charge two to four hours of labor per side because of the press work, plus the cost of an alignment. This puts the all-in shop price between $400 and $900 per side for common cars, and higher for trucks or vehicles with seized hardware.
When the arm itself is rust-free, the math sometimes leans toward swapping the whole assembly. This route resets the wear clock on every joint and skips the press work entirely.
Difficulty Level
The vehicle matters more than the basic technique. Asking how hard is it to replace control arm bushings is reasonable because the answer changes with suspension geometry, access, corrosion, and tool availability.
For most DIYers, it is a difficult job.
On a clean vehicle with accessible hardware, an experienced DIYer with the correct press equipment may complete one side in several hours. Seized bolts, corroded sleeves, limited working space, or incorrectly sized press adapters can extend the same repair into a full weekend.
Vehicles such as the Toyota Tacoma and Toyota FJ Cruiser can present additional challenges when bolts seize inside the bushing sleeves. In some cases, the bolts must be cut out, and replacement hardware may be required.
You should be comfortable with suspension safety, lifting procedures, press operation, and torque specifications before attempting the repair. If the ball joint is staked, riveted, or pressed into the arm, follow the appropriate service procedure rather than assuming it can be removed with a hammer and punch. When in doubt, have the suspension inspected by a professional to determine whether the bushings alone are worn or whether the complete control arm should be replaced.
Safety and Alignment Notes
Loaded coil springs, wheel-control geometry, braking forces, and steering input can all pass through the control arm. Incorrectly installed parts or improperly tightened fasteners can cause serious handling problems.
Use the torque specifications and tightening sequence for the exact year, make, model, and suspension configuration. Do not rely on a generic torque figure.
Because many suspension parts affect alignment, schedule an alignment inspection after reinstalling the arm. A complete alignment is especially important when the vehicle uses eccentric control arm bolts, adjustable mounting points, or replacement parts with slightly different dimensions.
If the vehicle pulls, clunks, changes direction during braking, or feels vague after the repair, stop driving and have the suspension inspected.
FAQ
Can you drive with bad control arm bushings?
For short distances and low speeds, yes, but worn bushings let the wheel shift under braking and cornering. Tire wear accelerates and steering response gets sloppy. Plan a fix sooner rather than later.
How long do new control arm bushings last?
Quality rubber bushings often last 80,000 to 100,000 miles. Polyurethane can outlive the vehicle but transmits more road noise. Climate, road salt, and driving style all affect lifespan.
Do you need an alignment afterward?
Yes. Removing the control arm shifts camber and caster slightly, and an alignment protects your new tires from premature wear.
Is it cheaper to replace the whole control arm?
Sometimes. If a complete arm with bushings and ball joint costs close to the bushings plus labor, the whole arm is usually the smarter buy and saves you the press work.
Sometimes. If a complete arm with bushings and ball joint costs close to the bushings plus labor, the whole arm is usually the smarter buy and saves you the press work.
Find the Parts You Need
A control arm bushing job is manageable when the hardware is in good condition, the correct tools are available, and the replacement parts arrive before the vehicle is taken apart.
CarParts.com carries replacement control arm bushings, complete control arms, control arm kits, ball joints, sway bar links, and other suspension components. Enter your vehicle’s year, make, model, and engine information to find compatible parts before starting the repair.
Keep Reading: Related Posts



Any information provided on this Website is for informational purposes only and is not intended to replace consultation with a professional mechanic. The accuracy and timeliness of the information may change from the time of publication.