Your new crossmember arrives, the car’s already up on stands, and the mounting holes don’t line up. It’s a frustrating spot to be in, and it usually starts with a search for the right parts.
The trouble is that crossmember means different things on different vehicles. It could be a front subframe, a rear cross brace, a transmission support, or a radiator support. Each one holds up different parts and fits in its own way.
That’s why it helps to start with a simpler question. What does this job need in the cart to get finished? Answer that first, and you’re much more likely to finish the repair in one weekend instead of two.
The Job in One Sentence
The job is to restore a solid mounting point, so every attached part sits where it belongs.
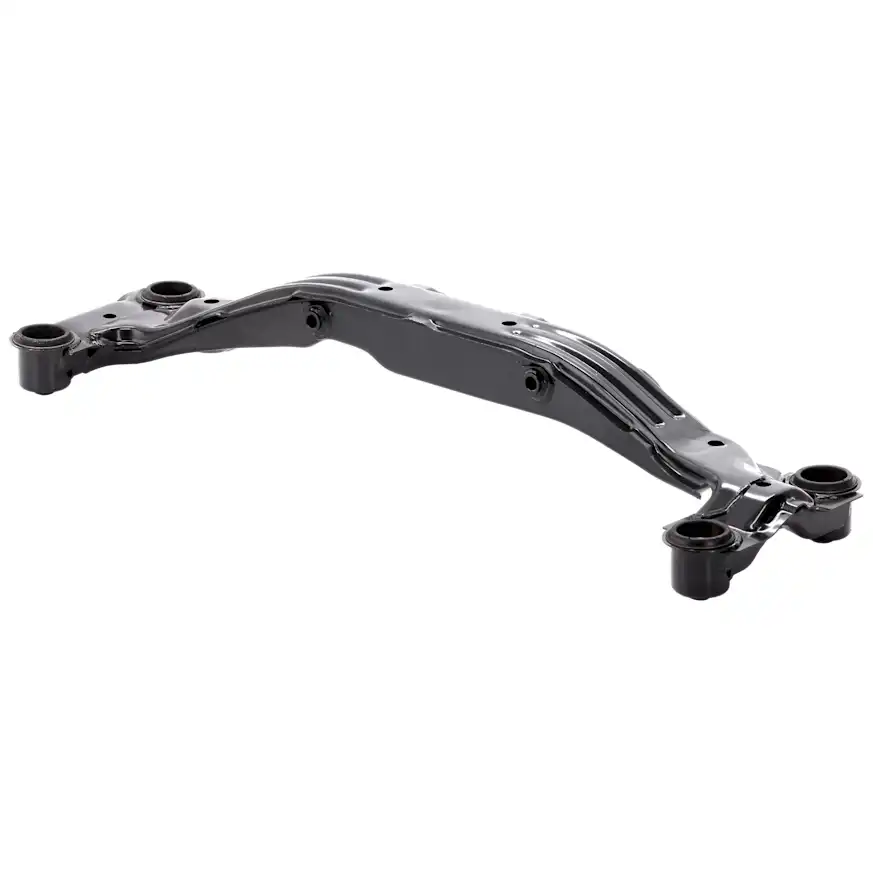
A crossmember ties the frame rails or body structure together. Depending on the vehicle, it carries the transmission, engine, steering rack, or rear suspension arms. Because it supports key components, you shouldn’t ignore issues caused by rust or impact damage.
This is why it’s important to order the right parts for the job. Some crossmembers ship bare, and some come as a set of two. Bushings, mounts, and hardware often ship separately, so check what the listing includes. A quality aftermarket crossmember restores factory mounting points at a friendly price, which leaves room in the budget for those extras.
Choose Your Cart Size
Three carts cover most crossmember jobs. Pick the one that matches your vehicle’s condition and how long you plan to keep it.
Minimum Viable Repair
This lane fits one damaged piece with sound parts around it.
Choose it if:
- The damage is isolated, such as a bend from an impact.
- Nearby mounts and bushings look healthy.
- The rest of the vehicle is in good shape.
Typical cart:
- The crossmember matched to your position and drivetrain
- Fresh fasteners where the originals are stretched or corroded
- Touch-up coating if the new piece ships bare
Smart Same Access Refresh
With the crossmember out, the neighboring parts sit within easy reach for very little extra labor.
Choose it if:
- Mounts or bushings that touch the crossmember look cracked or soft.
- You’re already disconnecting suspension or steering links.
- You’d rather pay for one alignment than two.
Typical cart:
- The crossmember
- Matching transmission mounts or engine mounts
- Subframe or control arm bushings
- Sway bar bushings and sway bar links
- New hardware for every joint you disturb
High Mileage Do It Once Reset
This lane suits an older vehicle, a salt exposure history, or a long ownership plan.
Choose it if:
- You plan to keep the vehicle for years.
- Rust on neighboring parts suggests more failures are coming.
- The vehicle tows, hauls, or sees rough roads.
Typical cart:
- Everything from the refresh lane
- Control arms, ball joints, or tie rod ends in the same zone
- Exhaust hangers if the exhaust crosses the work area
- Rust protection for the new piece and its mounting points
The first lane is still a legitimate order. The other two only make sense when the vehicle justifies them.

What’s Commonly Ordered Together on This Job
Here are other components that you may need to add to your cart to ensure that everything goes smoothly on the day of the install.
Mounts and Bushings
Mounts and bushings connect the crossmember to the drivetrain or suspension. You might be tempted to reuse the old ones to save a few bucks. But that only works if they aren’t worn and match the replacement part you’re installing. As a preventative measure, it’s a good idea to replace the worn mounts and bushings as part of the job. Some crossmembers arrive with bushings pressed in, and others arrive bare.
Hardware and Fasteners
Original bolts have lived through years of heat, road salt, and torque cycles. Some applications call for single-use bolts, so check the factory spec before you reuse anything on a structural part.
Wear Items in the Same Access Zone
Control arms, sway bar end links, tie rod ends, and steering rack mounts often sit right beside the crossmember. They cost little to replace now. They cost a lot of labor to reach again later.
Paired Pieces, Exhaust Items, and Alignment
Some applications use separate left and right pieces, so one side won’t finish the job. Exhaust hangers and gaskets can need replacing when the system passes through the work area. A front or rear crossmember job also calls for an alignment. Newer vehicles may need driver assistance calibration afterward, depending on application.
What People Forget Until the Vehicle Is Already Apart
Most surprises show up once the old part hits the floor. A few quick checks before you order can head them off.
Confirm whether the bushings and brackets transfer from the old piece or come with the new one. Check that the listing includes hardware, and that it covers one side or a full set. Make sure the tabs for brake lines, fuel lines, and sensors sit in the same spots as the original. Finally, find out whether the crossmember ships coated or needs paint before it goes in.
When Replacing Only the Crossmember Is False Economy
Replacing only the crossmember is totally reasonable in the right case. A vehicle with one impact bend and healthy mounts doesn’t need extra parts. Adding them just inflates the bill.
The math changes because a crossmember sits in a spot that’s hard to reach. Replacing it requires technical expertise and often requires supporting the engine or transmission and disconnecting suspension and steering parts. If a worn bushing fails six months later, you’ll be paying for that teardown twice.
Corrosion is another thing you should be mindful of. Nearby fasteners and brackets may take some damage from road salt and moisture. Before finalizing your purchase, check which parts are worn, and skip what you can’t justify.
The Fitment Splits That Break Crossmember Orders
A crossmember locates heavy parts precisely, so small differences matter. These splits cause the most wrong orders.
Position and Name
Front, rear, center, and transmission crossmembers are different parts, even on one vehicle. Some makers call the front structure an engine cradle or subframe. Confirm which piece you’re replacing before you search.
Drivetrain
Front-wheel-drive and all-wheel-drive versions of the same model often differ. A rear crossmember may carry a differential mount or use different suspension geometry. Year, make, and model alone won’t catch that.
Transmission Type
A transmission crossmember depends on the transmission. Automatic and manual versions can change mount location and length. Some suppliers group transmissions into families, so match yours to the right group.
Trim, Body Style, and Mounting Method
Trim level, wheelbase, and body style can change mounting points. Some crossmembers bolt to the frame, while others weld across the rails. The mounting method changes the labor and the tools you’ll need.
Brackets and Production Date
Tabs for lines, sensors, and exhaust hangers must match the original component. Mid-year changes also happen, depending on application. If your build date falls near a cutoff, verify against your VIN.
Delivery-Day Inspection Checklist
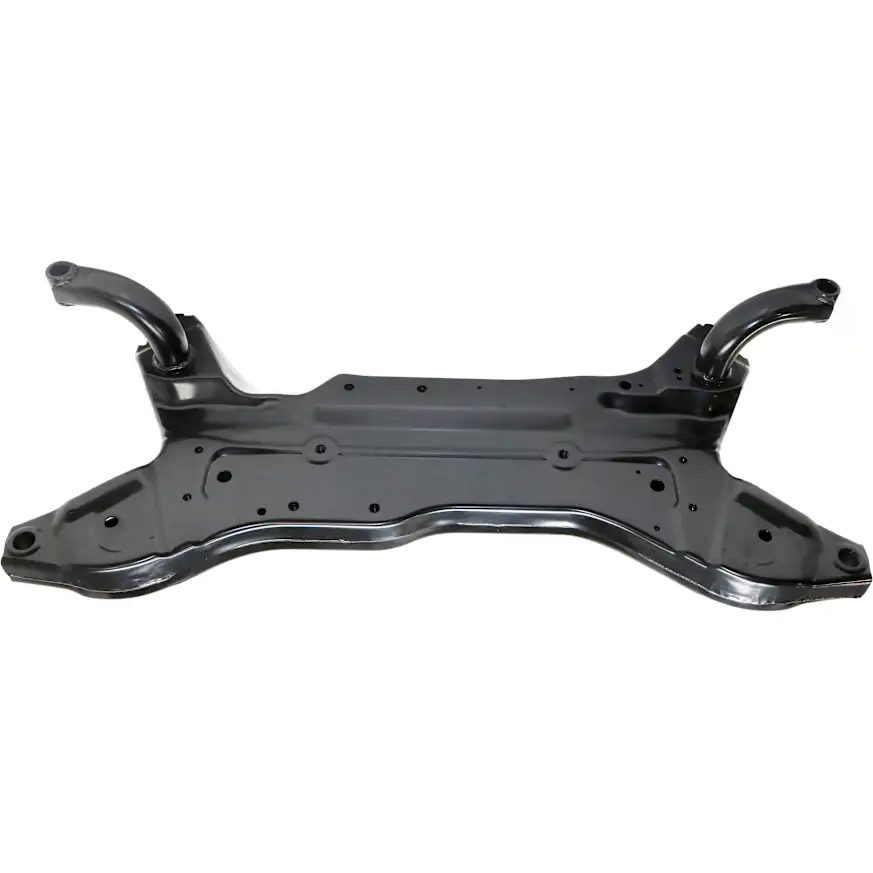
Compare the new piece to the old one before the vehicle goes any further. A short check on the floor can save a return trip.
- Match mounting hole positions and count against the old piece.
- Compare overall length and shape side by side.
- Check the orientation of mount tabs and offsets.
- Confirm the included bushings, mounts, and hardware against the listing.
- Look over weld seams and coating for gaps, cracks, or scrapes.
- Verify the position marking and part number against your order.
- Note any packaging damage before the carrier leaves.
Your One-Job Order Sheet for a Crossmember
Work through these steps in order. If you skim only one section, make it this one.
1. Confirm the Vehicle
Write down year, make, model, trim, engine, drivetrain, and transmission. Check your VIN if your build date sits near a change.
2. Confirm the Position and Repair Scope
Decide whether you need a front, rear, center, or transmission crossmember. Then decide whether this is an isolated fix or part of a larger refresh.
3. Confirm What the Listing Includes
Check for bushings, mounts, hardware, and whether it’s one piece or a set. Anything missing goes on your list.
4. Secure the Hardware and Adjacent Parts
Add fasteners, mounts, and bushings that touch the crossmember. Include any wear items from the same zone that need to be replaced.
5. Bench Check the Old Piece
Photograph the old crossmember and measure its key dimensions. You’ll compare those numbers against the new one on delivery day.
6. Choose the Right Ownership Logic
Pick the cart lane that fits how long you’ll keep the vehicle. A short-term fix and a long-term reset are both valid.
The Smart Way to Shop Crossmembers
Shop by repair scope, not by thumbnail. A crossmember that looks right in a photo can still miss on drivetrain, position, or mounting method. Trying to cut costs and ending up with the wrong order often costs more time and money. Always confirm your vehicle details, build the sheet, and order the right crossmember with the whole job in mind.
Keep Reading: Related Posts



Any information provided on this Website is for informational purposes only and is not intended to replace consultation with a professional mechanic. The accuracy and timeliness of the information may change from the time of publication.