A steering linkage assembly looks like the easiest order for a truck’s front end. One box shows up with the drag link, tie rod, ends, and adjusting sleeves already threaded together, so it feels like there’s nothing left to figure out. That’s exactly why shoppers get burned.
The listing that looks right in a thumbnail can match the wrong linkage style for the knuckles, leave out the pitman arm a conversion kit depends on, or ship without the bracket the steering stabilizer used to clamp onto. But you only find out with the old linkage already on the floor.
So don’t start with “Which one is cheapest?” or “Which one looks close enough?” Start with “What exactly needs to go in the cart for this job?” FOr most solid front axle trucks, Jeeps, and sport utility vehicles (SUVs), the honest answer depends on how much of the steering train is worn, which linkage design your vehicle runs, and whether the assembly you’re eyeing is a single rod, a set of two, or a complete kit.
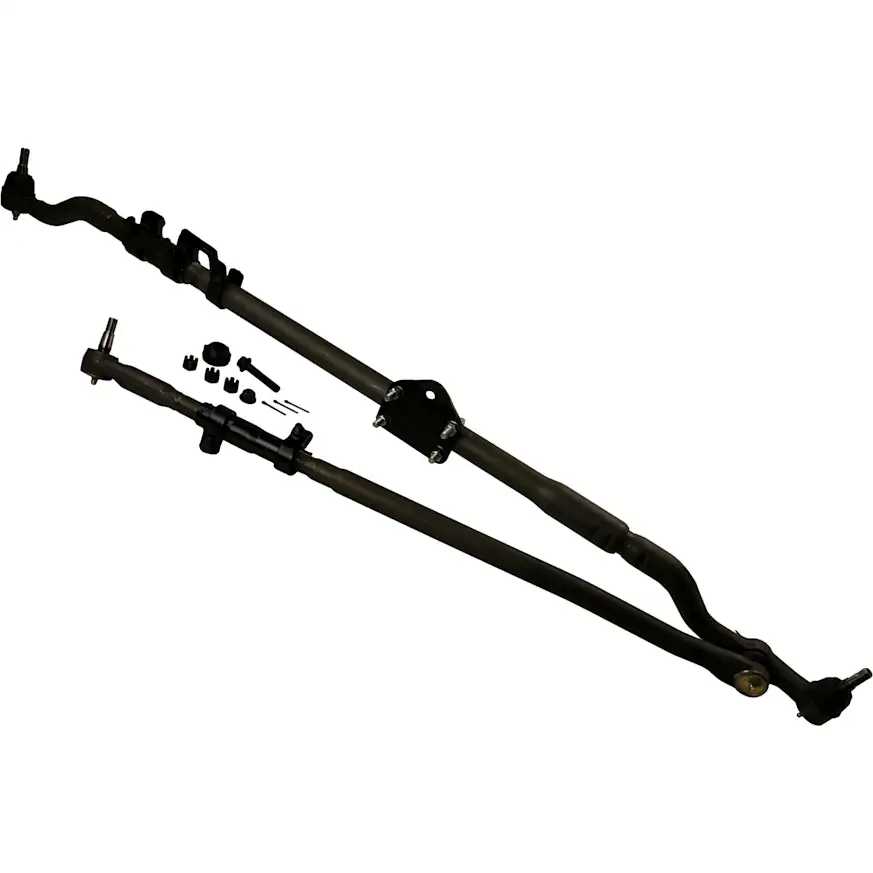
The Job in One Sentence
The job is to restore a tight, correctly sized connection from the steering gear to both front knuckles so the wheels steer together and hold toe.
On a solid front axle, the steering linkage assembly usually means the tie rod that ties both knuckles together and the drag link that carries input from the pitman arm. Every joint in this chain adds play, so a worn end on one rod shows up as wander, a crooked wheel, or uneven tire wear across the whole front end. That’s why the order is about the whole steering train, not just the rod that looks worst.
This category is sold in several ways. You’ll see a single rod sold individually, a drag link and tie rod sold as a set of two, and complete kits that add the pitman arm, steering stabilizer, or stabilizer bracket, depending on application. Two listings with the same name can carry very different contents, so the box you pick sets the size of your repair.
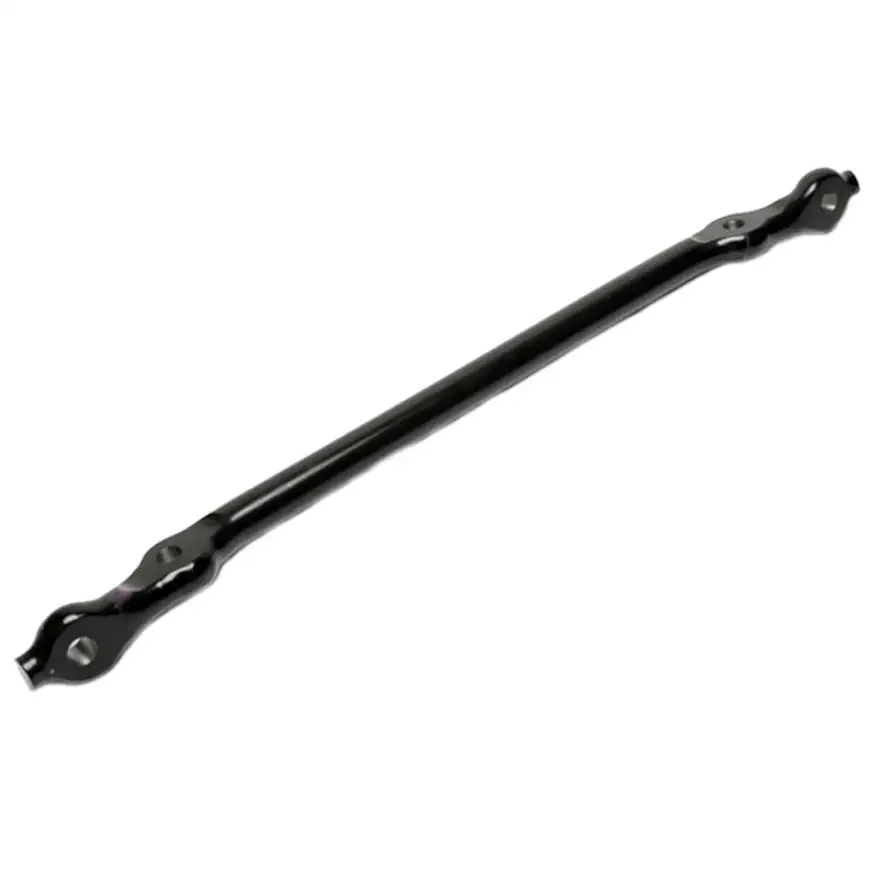
Choose Your Cart Size
Your cart size should match how much of the steering train is actually worn and how long you plan to keep your vehicle.
1. Minimum Viable Repair
This lane replaces the one rod that failed and leaves healthy parts alone.
Choose it if:
- Only the tie rod or only the drag link shows play or a torn boot
- The pitman arm and track bar are still tight, and the stabilizer isn’t leaking
- The truck runs stock height and stock tire size
Typical cart:
- One rod assembly sold individually
- New castle nuts and cotter pins if the listing doesn’t include them
- A front-end alignment
2. Smart Same-Access Refresh
This lane replaces both rods together because they share the same joints, wear miles, and alignment.
Choose it if:
- Ends on both rods show wear, even if one is worse
- You’d rather pay for one alignment than two
- The steering stabilizer is leaking or mounts to the rod you’re replacing
Typical cart:
- Drag link and tie rod as a set of two, or a complete kit
- Steering stabilizer and mounting bracket or clamp
- Hardware and an alignment
3. High-Mileage / Do-It-Once Reset
This lane rebuilds the full front steering train in a high-mileage, lifted, or hardworking truck.
Choose it if:
- The vehicle has high mileage on original steering parts
- It tows, plows, or runs larger tires
- You plan to keep it long term and want one front-end job, not three
Typical cart:
- Complete linkage kit, including the pitman arm where the application calls for it
- Steering stabilizer, track bar or track bar bushings, andball joints if they show play
- Alignment after everything goes in
What Is Commonly Ordered Together on This Job
A complete steering linkage order usually adds hardware, a stabilizer, and whichever neighboring joints share the same wear.
Hardware and Fasteners
Many assemblies ship with castle nuts and cotter pins, but not all of them do. You’ll regret old nuts on new tapers, so add a castle nut kit when the listing doesn’t list them.
Steering Stabilizer and Mounts
In most solid axle trucks, the steering stabilizer clamps to the tie rod or a bracket on it. Buyers often assume the new rod carries this bracket. Some kits include it, but others don’t, and a kit that includes the stabilizer might not match an aftermarket unit you already run.

Wear Items in the Same Access Zone
The pitman arm, track bar, and ball joints live in the same front-end zone and see the same loads. A new linkage on a sloppy track bar or a worn pitman arm end still steers loose, which is why shoppers often price these alongside the rods.
Full Assembly vs. Individual Components
You can also build the job from separate tie rod ends, adjusting sleeves, and bare tubes. This route saves money when only one end is worn. A preassembled linkage saves time and removes the risk of mixing ends with different tapers or thread directions.
Grease and Alignment
Greasable ends need chassis grease at installation and at every service interval. Plan for a front-end alignment too. It isn’t a part, but no linkage order is finished without it.
What People Forget Until the Vehicle Is Already Apart
Most stalled linkage jobs come down to one of these misses.
- Does the box hold one rod or two? “Sold individually” and “set of 2” sit side by side in this category.
- Does your vehicle run Y-style or T-style linkage? The two designs don’t swap without matching parts.
- Does the kit require a different pitman arm? Some conversion kits only work with the arm they include.
- Where does the steering stabilizer mount? If the clamp or bracket isn’t in the box, the stabilizer has nowhere to go.
- Will your current stabilizer fit the new tube diameter? Heavy-duty tubes can be thicker than stock.
- Is your truck lifted? Lift height changes drag link angle, and some kits need a drop pitman arm past a certain lift.
- Are new castle nuts and cotter pins included? Check before you pull the old ones.
- Who’s doing the alignment? Toe will be off after installation, so book the alignment before you start the job, not after
When Replacing Only the Steering Linkage Assembly Is False Economy
Replacing one rod is the right call when one rod is the only worn part. If a single tie rod end tore its boot and everything else is still tight, a single-rod order and an alignment will finish the job.
The small cart turns expensive when the rest of the steering train is just as worn. Both rods share the same miles, and every rod swap ends with an alignment. Replace the tie rod now and the drag link next season, and you’ll pay for two alignments and two rounds of seized-taper labor to get the same result one kit would have given you.
The same logic applies to the parts the linkage bolts to. A new linkage on a worn pitman arm end or a loose track bar will still wander. Check these joints before checkout. If they’re worn, add replacements to your cart while the front end is already apart.
None of this means that every truck needs the biggest kit. A stock-height daily driver with one bad end doesn’t need a stabilizer, track bar, and ball joints just because a kit bundles them.
The Fitment Splits That Break Steering Linkage Assembly Orders
These splits decide whether the linkage actually bolts up.
Linkage Design: Y-Style vs. T-Style
This is the big one for heavy-duty pickups. Y-style linkage runs the drag link from the pitman arm to the passenger knuckle, while T-style runs it to the tie rod. Some trucks changed designs mid-generation, and dealers updated some older trucks to the later style during repairs. Don’t trust the model year alone. Look at what’s actually under your truck.
Drivetrain and Axle
Two-wheel drive and four-wheel drive versions of the same truck can share a linkage or use completely different steering, depending on application. Confirm the drivetrain and front axle before you compare listings.
Pitman Arm Taper and Conversion Kits
Tie rod end tapers can change between model years, even when the rods look identical. Conversion kits often depend on a specific pitman arm, so a kit that’s correct for your truck can still fail if you keep the old arm.
Lift Height and Tire Size
Lifted trucks change drag link angle, which affects bump steer and clearance. Some kits note that past a certain lift height, you’ll need a drop pitman arm or a bump steer correction kit. Heavy-duty aftermarket linkage built for big tires can also use thicker tubes than stock.
Parallelogram Steering
In older rear-wheel drive cars and some trucks with independent front suspension, the steering linkage runs through a center link, idler arm, and inner and outer tie rods instead. Make sure the listing matches the system your vehicle actually uses.
Delivery-Day Inspection Checklist
Lay the new linkage next to the truck before you loosen a single nut, and check these points.
- Count the pieces against the listing: one rod, two rods, or a full kit with pitman arm and stabilizer.
- Match the layout to your truck. The drag link should connect where yours does, at the knuckle or at the tie rod.
- Compare overall length and bend shape with the old rods. Bent tubes clear axle and sway bar mounts for a reason.
- Check that every end has a castle nut, cotter pin, and grease fitting where the design calls for one.
- Confirm adjusting sleeves and clamps are present and threaded onto both ends.
- Look for a stabilizer clamp or bracket if your stabilizer mounts to the rod.
- Inspect boots for tears and studs for bent threads or damaged tapers.
- Check the box and tubes for shipping damage, since a bent tube won’t straighten in the driveway.
Your One-Job Order Sheet for a Steering Linkage Assembly
Run through these six steps before you check out so you have everything you need to finish the job the first time
1. Confirm the Vehicle
Enter the year, make, model, drivetrain, and cab or chassis rating. Keep the vehicle identification number (VIN) handy for production-date questions.
2. Confirm the Linkage Design
Crawl under the truck and identify Y-style, T-style, or parallelogram steering. Note any lift, aftermarket stabilizer, or past conversion.
3. Confirm the Repair Scope
Check every joint, from the pitman arm to both knuckles, plus the track bar. Decide whether you’re replacing one rod, both, or the whole train.
4. Confirm What the Listing Includes
Read quantity sold, included ends, sleeves, hardware, pitman arm, and stabilizer or bracket. Don’t assume the photo shows the full contents.
5. Add the Hardware and Adjacent Parts
Add castle nuts, cotter pins, a stabilizer, or worn neighboring joints only if the listing or your inspection says you need them. Then book a front-end alignment after you put the new linkage on.
6. Choose the Right Ownership Logic
Match the cart to the truck’s future. A short-term vehicle gets the minimum, while a tow rig or long-term keeper earns the full reset.
The Smart Way To Shop Steering Linkage Assemblies
Shop steering linkage assemblies by repair scope, not by thumbnail. Two rods in a product photo can look identical and still differ in linkage design, taper, tube size, and what comes in the box.
The cheap-looking order is one rod that matches the picture. The correct order matches your truck’s linkage style, includes the hardware and stabilizer mounting you need, and covers every worn joint you found before checkout. It’s the one that gets your truck aligned once and back on the road.
Your cart depends on your vehicle, application, and how long you plan to keep it. Start with your truck’s year, make, and model, read every listing’s contents, and build an order that lets you finish the job the first time.
Keep Reading: Related Posts


Any information provided on this Website is for informational purposes only and is not intended to replace consultation with a professional mechanic. The accuracy and timeliness of the information may change from the time of publication.